I haven’t used Go Veggie products in years, ever since I discovered that the Go Veggie products sold at the Kroger where I shop are not vegan.
So, I had no idea that the brand produces quite a selection of vegan products, including slices, shreds, and cream cheese in a variety of flavors plus parmesan style sprinkles until they contacted me and asked if I would like to sample some of them. Yes, please!
A big box arrived last week and today, a holiday in honor of MLK Day, I am home from school with a little extra time to experiment. So I did. A girl’s ‘gotta eat, right?
Having seen a couple of different preparations for Mac-n-Cheese on the Food Network this weekend–both made with a broth-based veloute style sauce and only a little dairy–I decided that I would use the Go Veggie Mexican Flavor and Mozzarella-style Shreds for my own rendition using veggie broth and soymilk. That left the Cheddar Flavor Vegan Rice Slices for the Smoky Cheddar Spread I had in mind. I could have used the shreds in my spread and the slices melted into my sauce this evening, but I wanted to see if the slices would shred since I really don’t make sandwiches or other recipes that call for slices of cheese. And they shred nicely…keep reading!
First, I broke off a strip of one of the slices to taste. The mild flavor was very pleasant and the texture quite nice. The slightly damp and slippery exterior was a tiny bit off-putting, but not a big drawback. With the rest of the strip, I performed a quick melt test, simply laying it on a plate and microwaving it. It was beautifully melted in less than 10 seconds. Brilliant!
Next, I fitted my food processor with the grater attachment, stacked the eight unwrapped slices together, folded them in half, fit them down into the feeder tube, flipped the switch, and pressed them down with the plunger. In seconds, I had lovely shreds. The cheese is quite soft, but it didn’t “mash” except at the very end as the last little bit went through the chute. No problem.
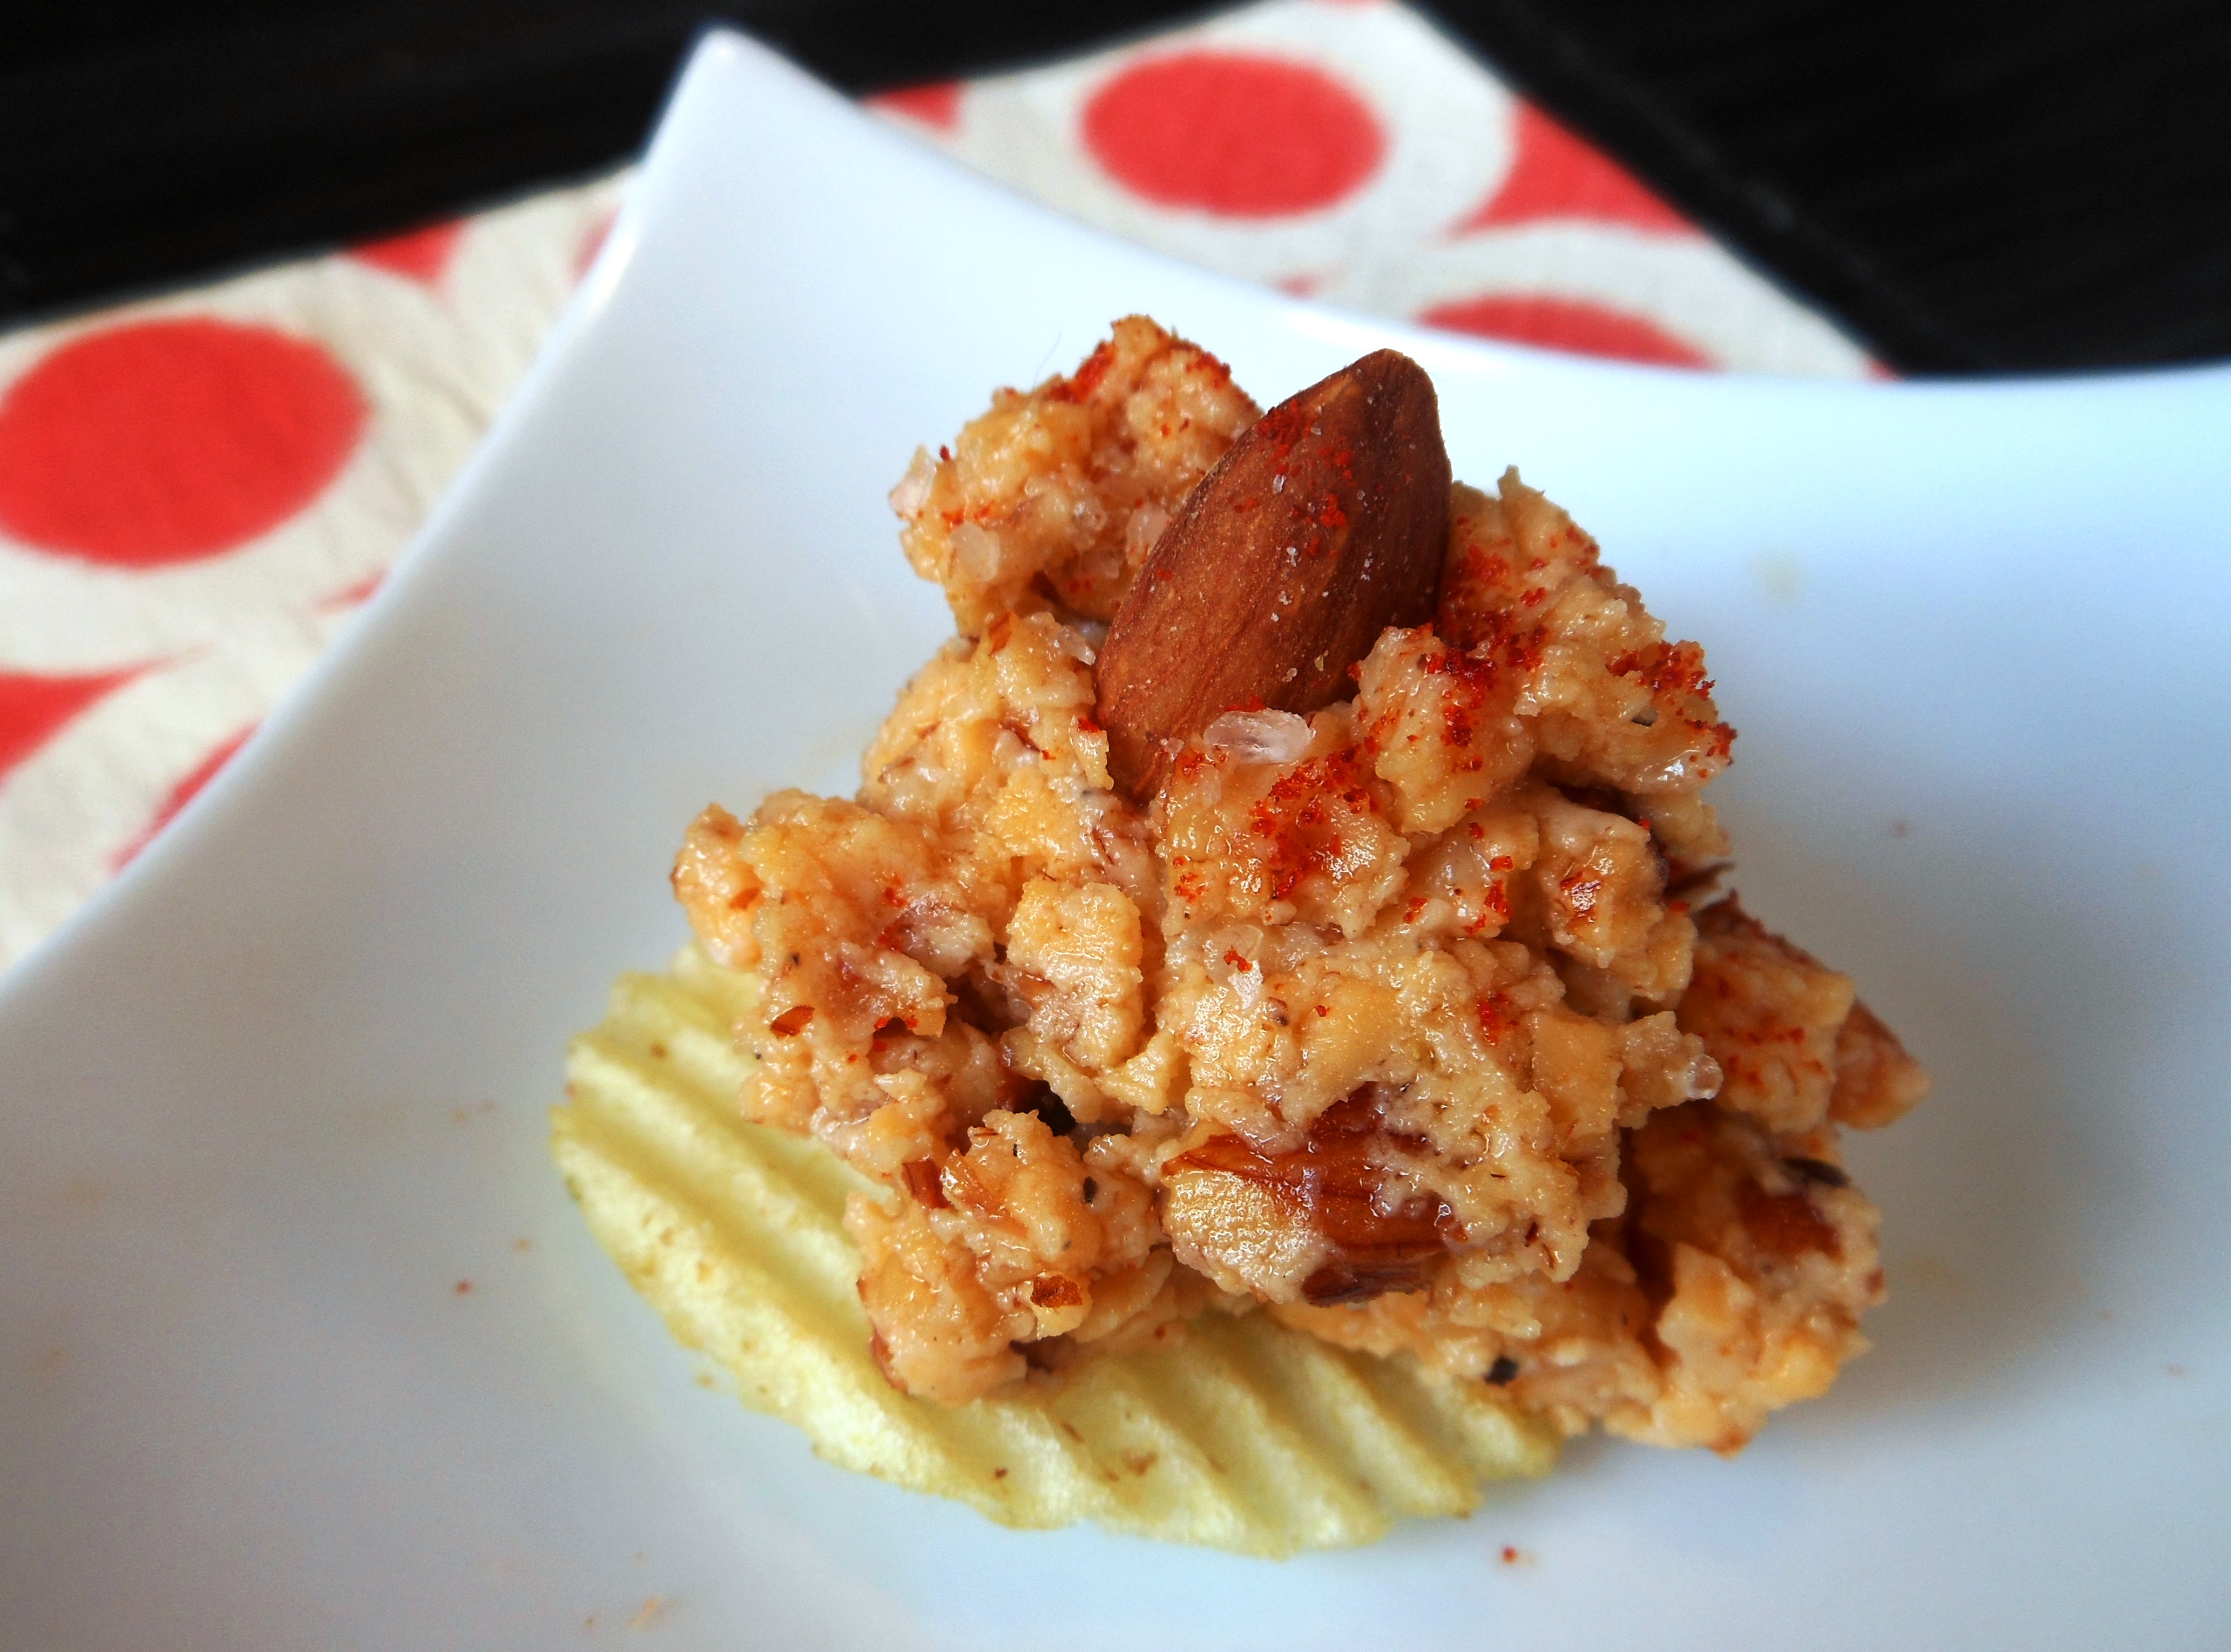
I made my Vegan Smoky Cheddar Spread by adding chopped smoked almonds, a little bit of vegan mayo, a pinch of garlic and onion powder, and a hint of smoked paprika. But the grated slices would make a beautiful pimento cheese spread as well.
Go Veggie is not paying me to endorse their products(!), but I would definitely purchase and use these Cheddar Flavor Vegan Rice Slices again. Very low in calories and fat, but high in calcium, they are a keeper.
For the vegan versions of Go Veggie products, look for the purple packaging. To find them at a store near you, click HERE.
Stay tuned for more Go Veggie taste tests and recipes. And thanks Go Veggie for enlightening me!
Vegan Smoky Cheddar Spread
Yield: 1 1/2 cups spread
8 ounces Go Veggie Cheddar Flavor Vegan Rice Slices, unwrapped, stacked, and grated (I used a food processor with grater attachment)
1/2 cup smoked almonds, finely chopped
Optional: 2 green onions, thinly sliced
1/4 cup vegan mayonnaise
1/8 teaspoon garlic powder
1/8 teaspoon onion powder
1/8 teaspoon smoked paprika
1/8 teaspoon sea salt or to taste
Optional Garnish: whole smoked almonds and a sprinkling of smoked paprika
Lightly combine all ingredients in a medium bowl until completely combined. Serve immediately with crackers or celery sticks or refrigerate in an airtight container until serving time. Garnish if desired with whole smoked almonds and a sprinkling of smoked paprika.
Visits to my family’s home in MS always involve food adventures. Last week, one of them came in the form of a mere description of a sandwich by my good friend since childhood, Margaret Deavours, who had heard about it on, of all places, NPR. This sandwich has become her go-to and I now see why!
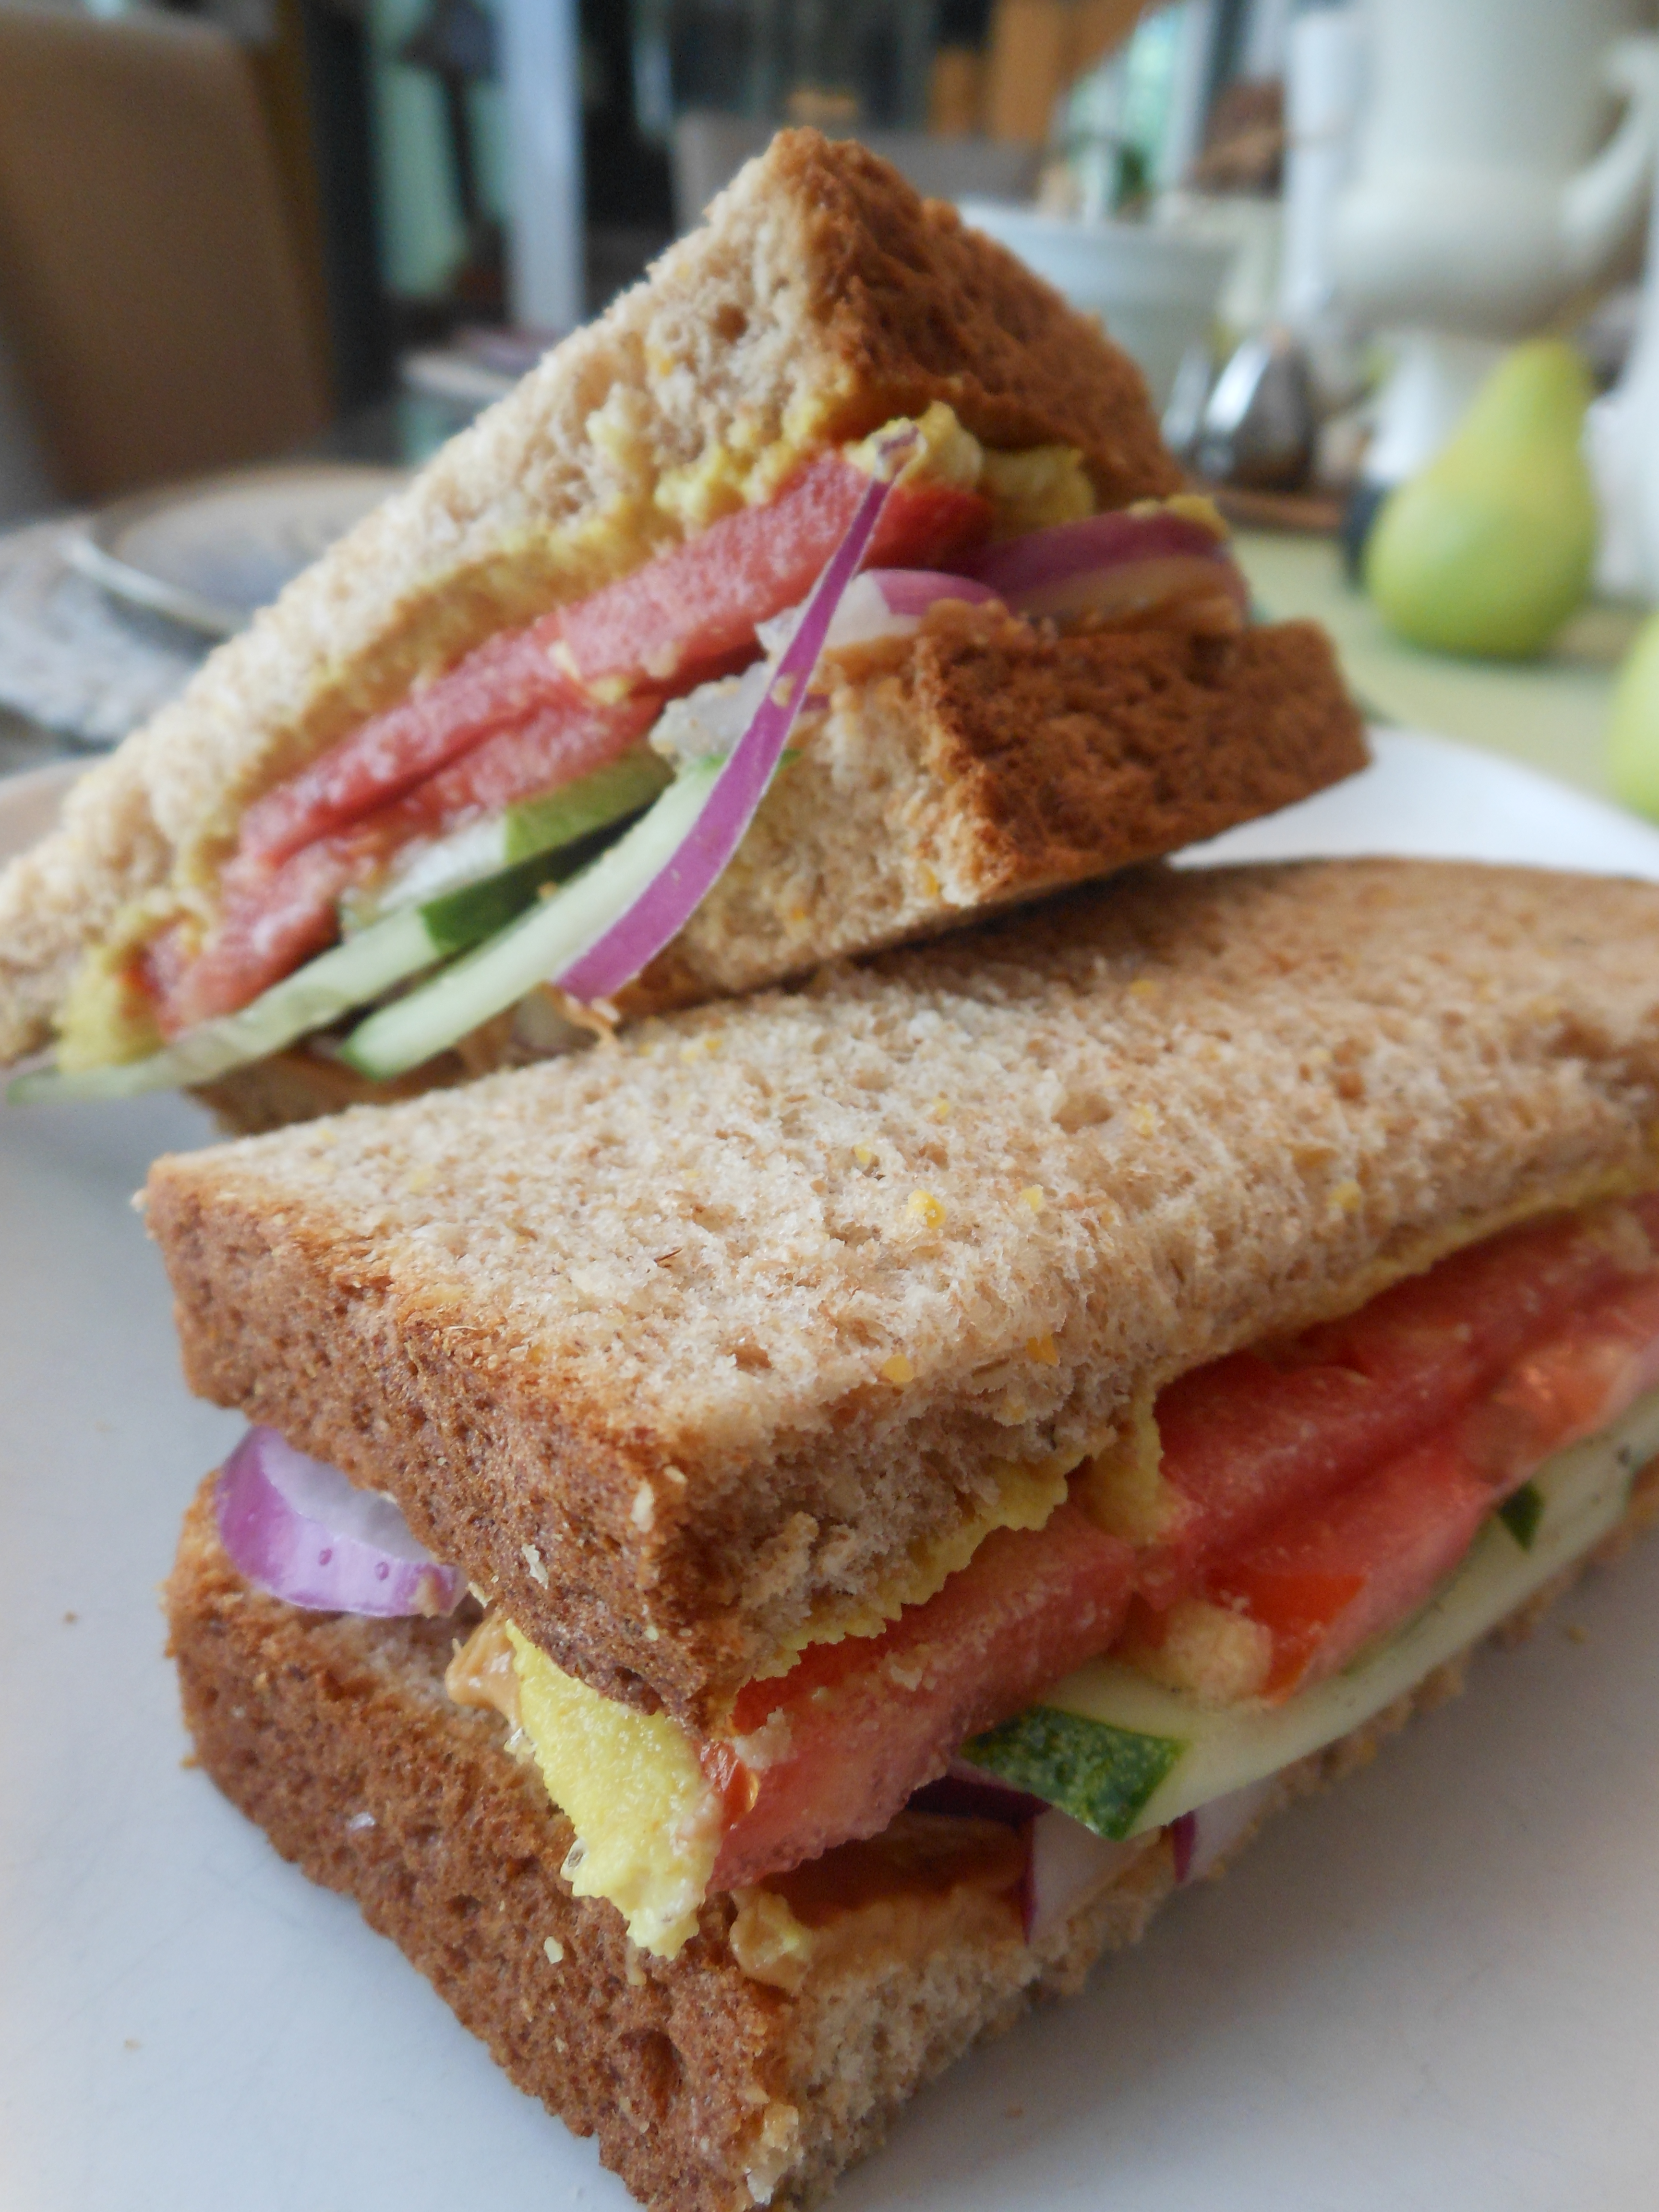
Called *Diane’s Dad’s Sandwich, it consists, in part, of summer garden favorites: thinly sliced vidalia or red onion, cucumbers, and tomatoes. These fresh ingredients are “sandwiched” between a top layer of (vegan) cheese ( white cheddar is used in the original recipe) and, believe it or not, a bottom layer of crunchy peanut butter. Stacked high between 2 slices of whole grain bread–untoasted for ease of eating–this sandwich is a winner in more ways than one!! *Be sure to read all about the sandwich by following the link. Recipes entered into the contest had to be accompanied by a story; it is NPR after all!
Margaret made the sandwich sound so intriguing that I created a special Vegan Sharp Cheddar Cheese just so I could partake because, apparently, the magic of this sandwich is attributed not only to it’s fresh and unusual combination of ingredients–unusual, at least, for a sandwich–but the precise order in which each and every one of them hits one’s palate. That being the case, be sure not to flip the sandwich as you lift it from plate to face!
Margaret’s only addition is, to me, essential because I tried it with and without: fresh basil or cilantro in keeping with the Thai flavor profile (not pictured below, as I added it later and LOVED it). To stay even more true to that profile, I chose Thai basil with it’s hint of anise, and will never make it any other way–wowza! Because fresh herbs are an add-on, I wasn’t sure where to place them in the all-important stacking order, but I chose the middle, between the cucumber and tomato. Other than swapping out the cheese for my delicious vegan version and adding a sprinkling of sea salt and freshly ground black pepper, the only other change I made to the directions was to soak the red onion in unsweetened soymilk for a few hours to temper some of that peppery bite and strong aroma.
Don’t be put off by the peanut butter! Besides the synergistic effect of all the ingredients, it is probably the peanut butter that makes this simple sandwich so extra-special!
2 slices whole grain bread, untoasted
1-2 tablespoons crunchy peanut butter
1 thin slice of vidalia or red onion (to rtemper strong flavor and aroma, soak in soymilk for a few hours, covered in refrigerator)
4 thin slices cucumber
Several fresh Thai basil leaves (you may substitute Italian basil or cilantro)
Spread 1 piece of bread with peanut butter and then layer on ingredients in the order given. A note to you sandwich flippers: be sure to eat the sandwich with the peanut butter on the bottom!
Vegan Sharp Cheddar Cheese Spread
2 cups raw cashews, covered in 2 cups water and soaked overnight
1/2 cup white miso (which is actually golden; this amount is needed for that “sharpness” unique to cheddar)
2 tablespoons nutritional yeast
1 teaspoon garlic powder
1 teaspoon onion powder
1 teaspoon turmeric (for color; I decided to go for a yellow cheddar for more color)
1/2 teaspoon mustard powder
1/4 teaspoon sea salt or to taste
1/3 cup dry champagne, prosecco, white wine or beer (a non-alcoholic wine or beer may be substituted)
Place all ingredients in bowl of food processor and process several minutes or until smooth, scraping down sides of bowl as necessary. Store leftovers covered in refrigerator.
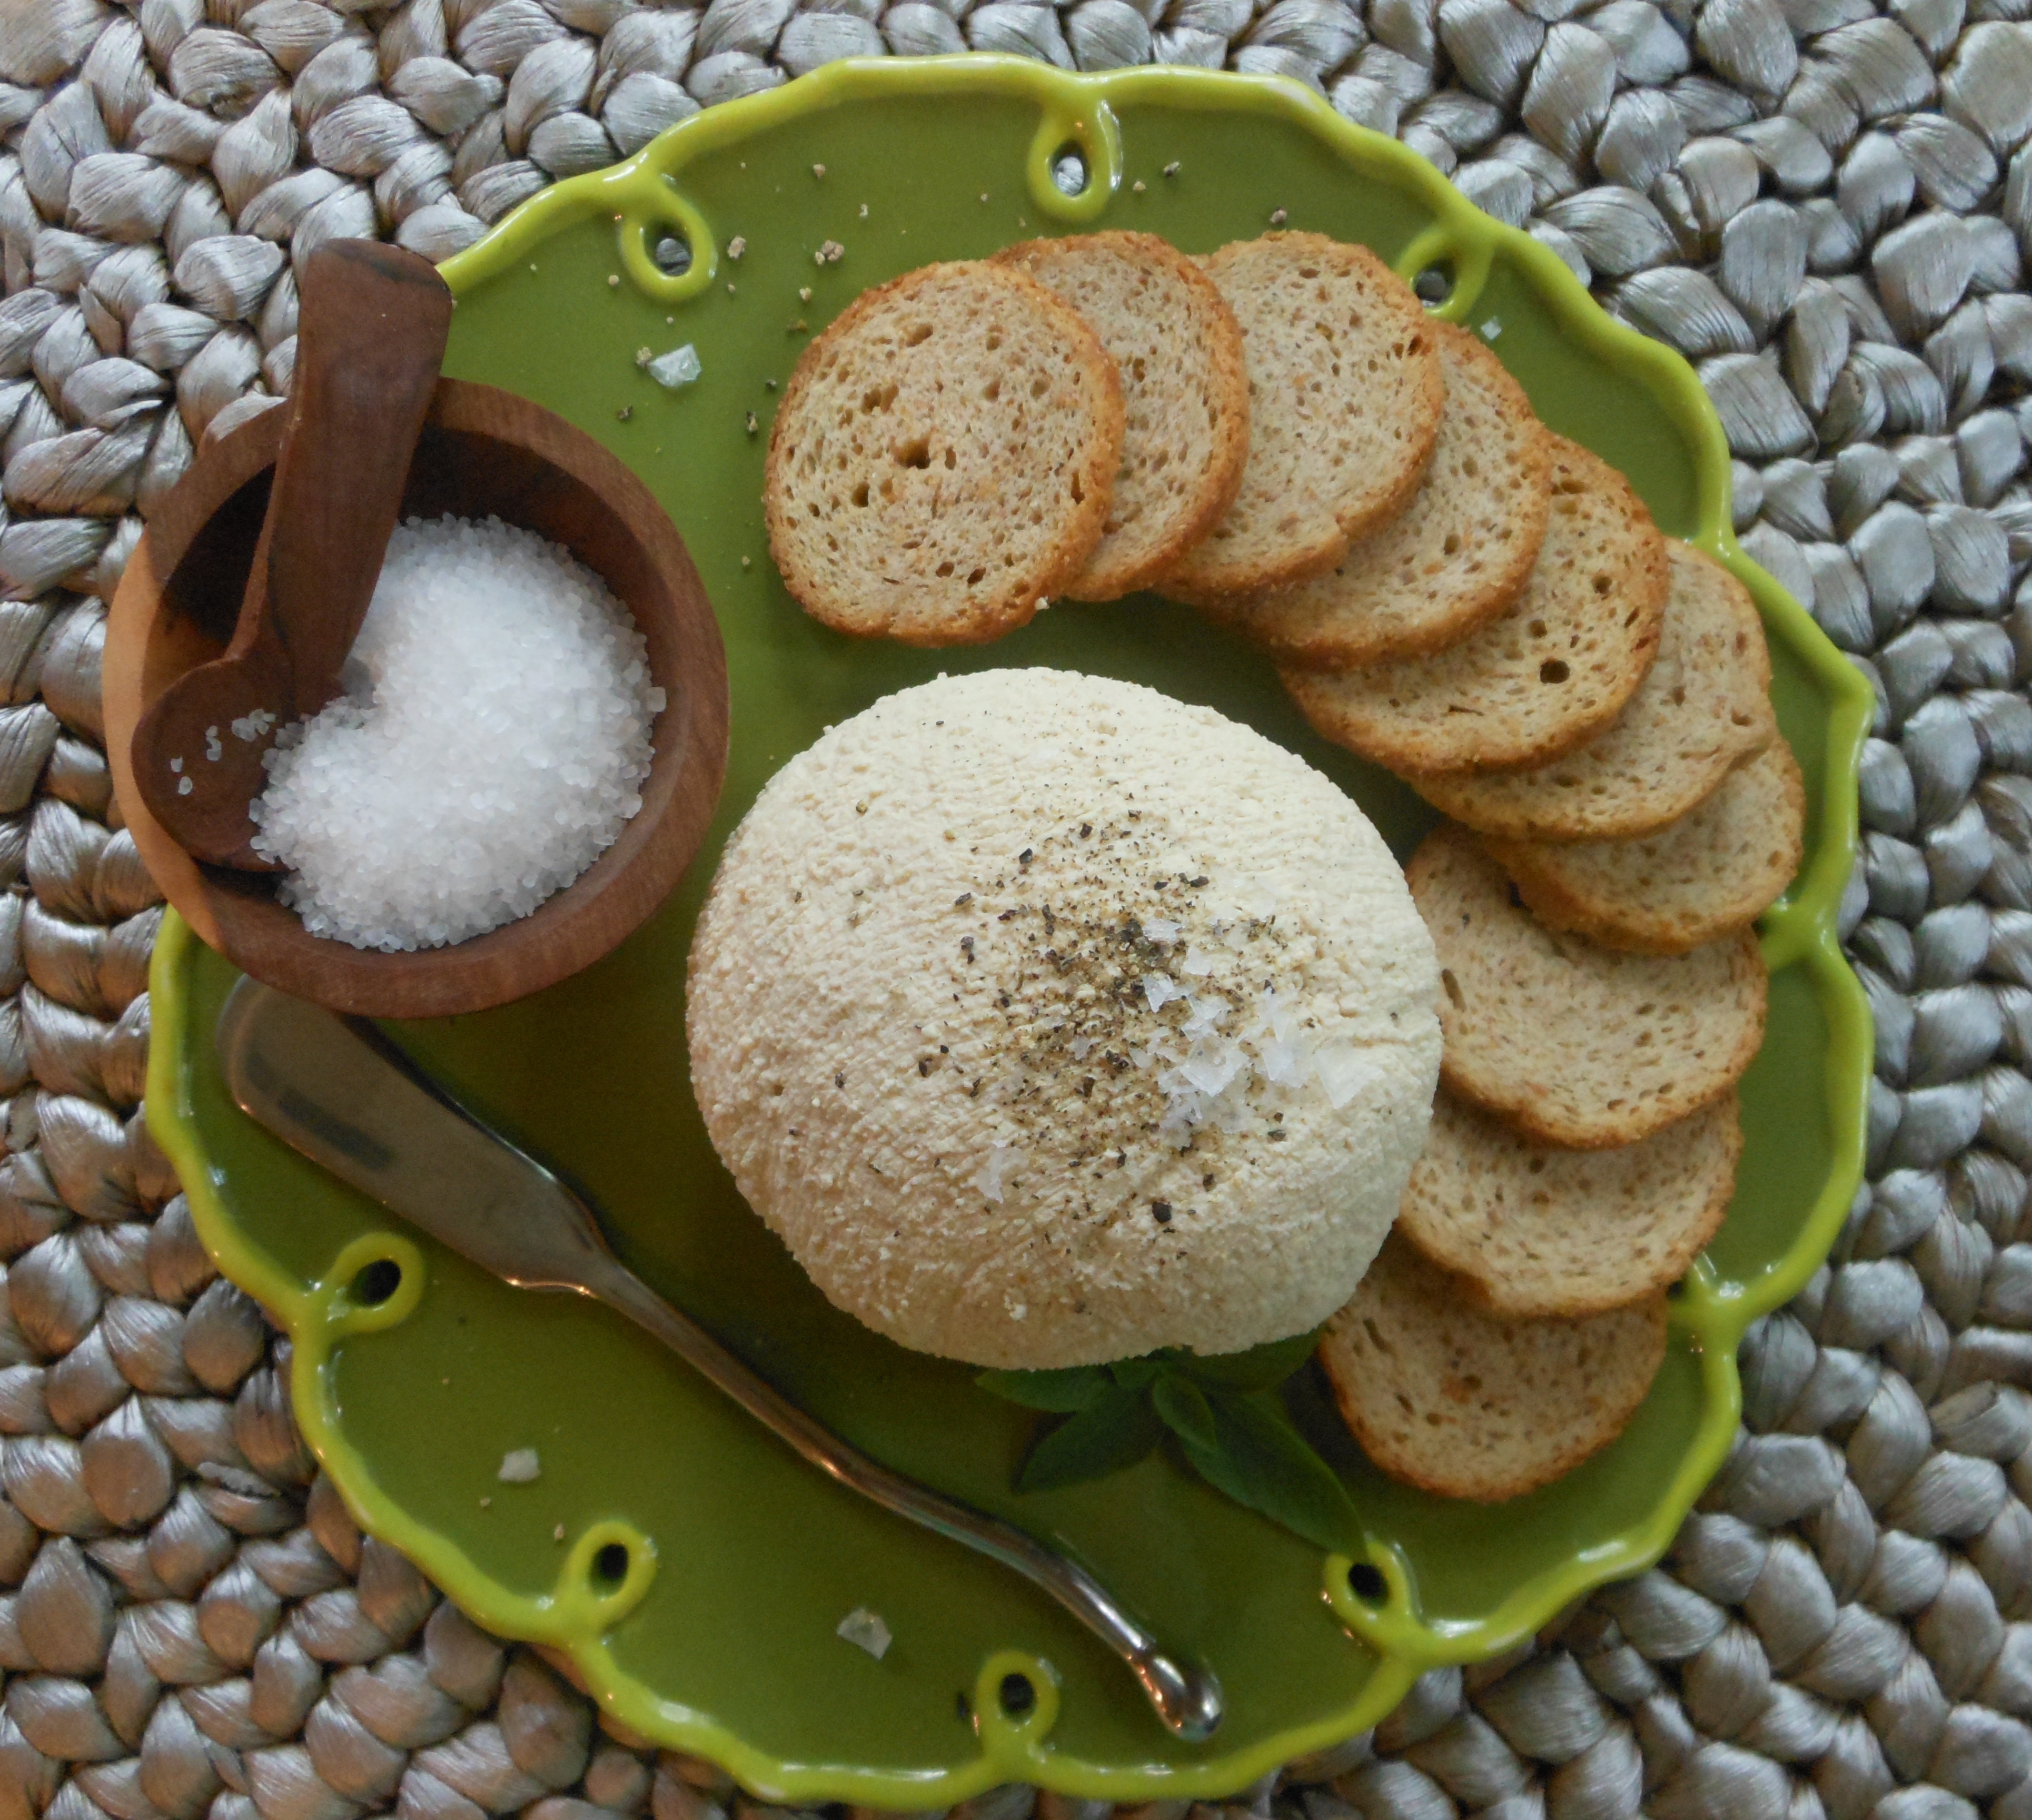
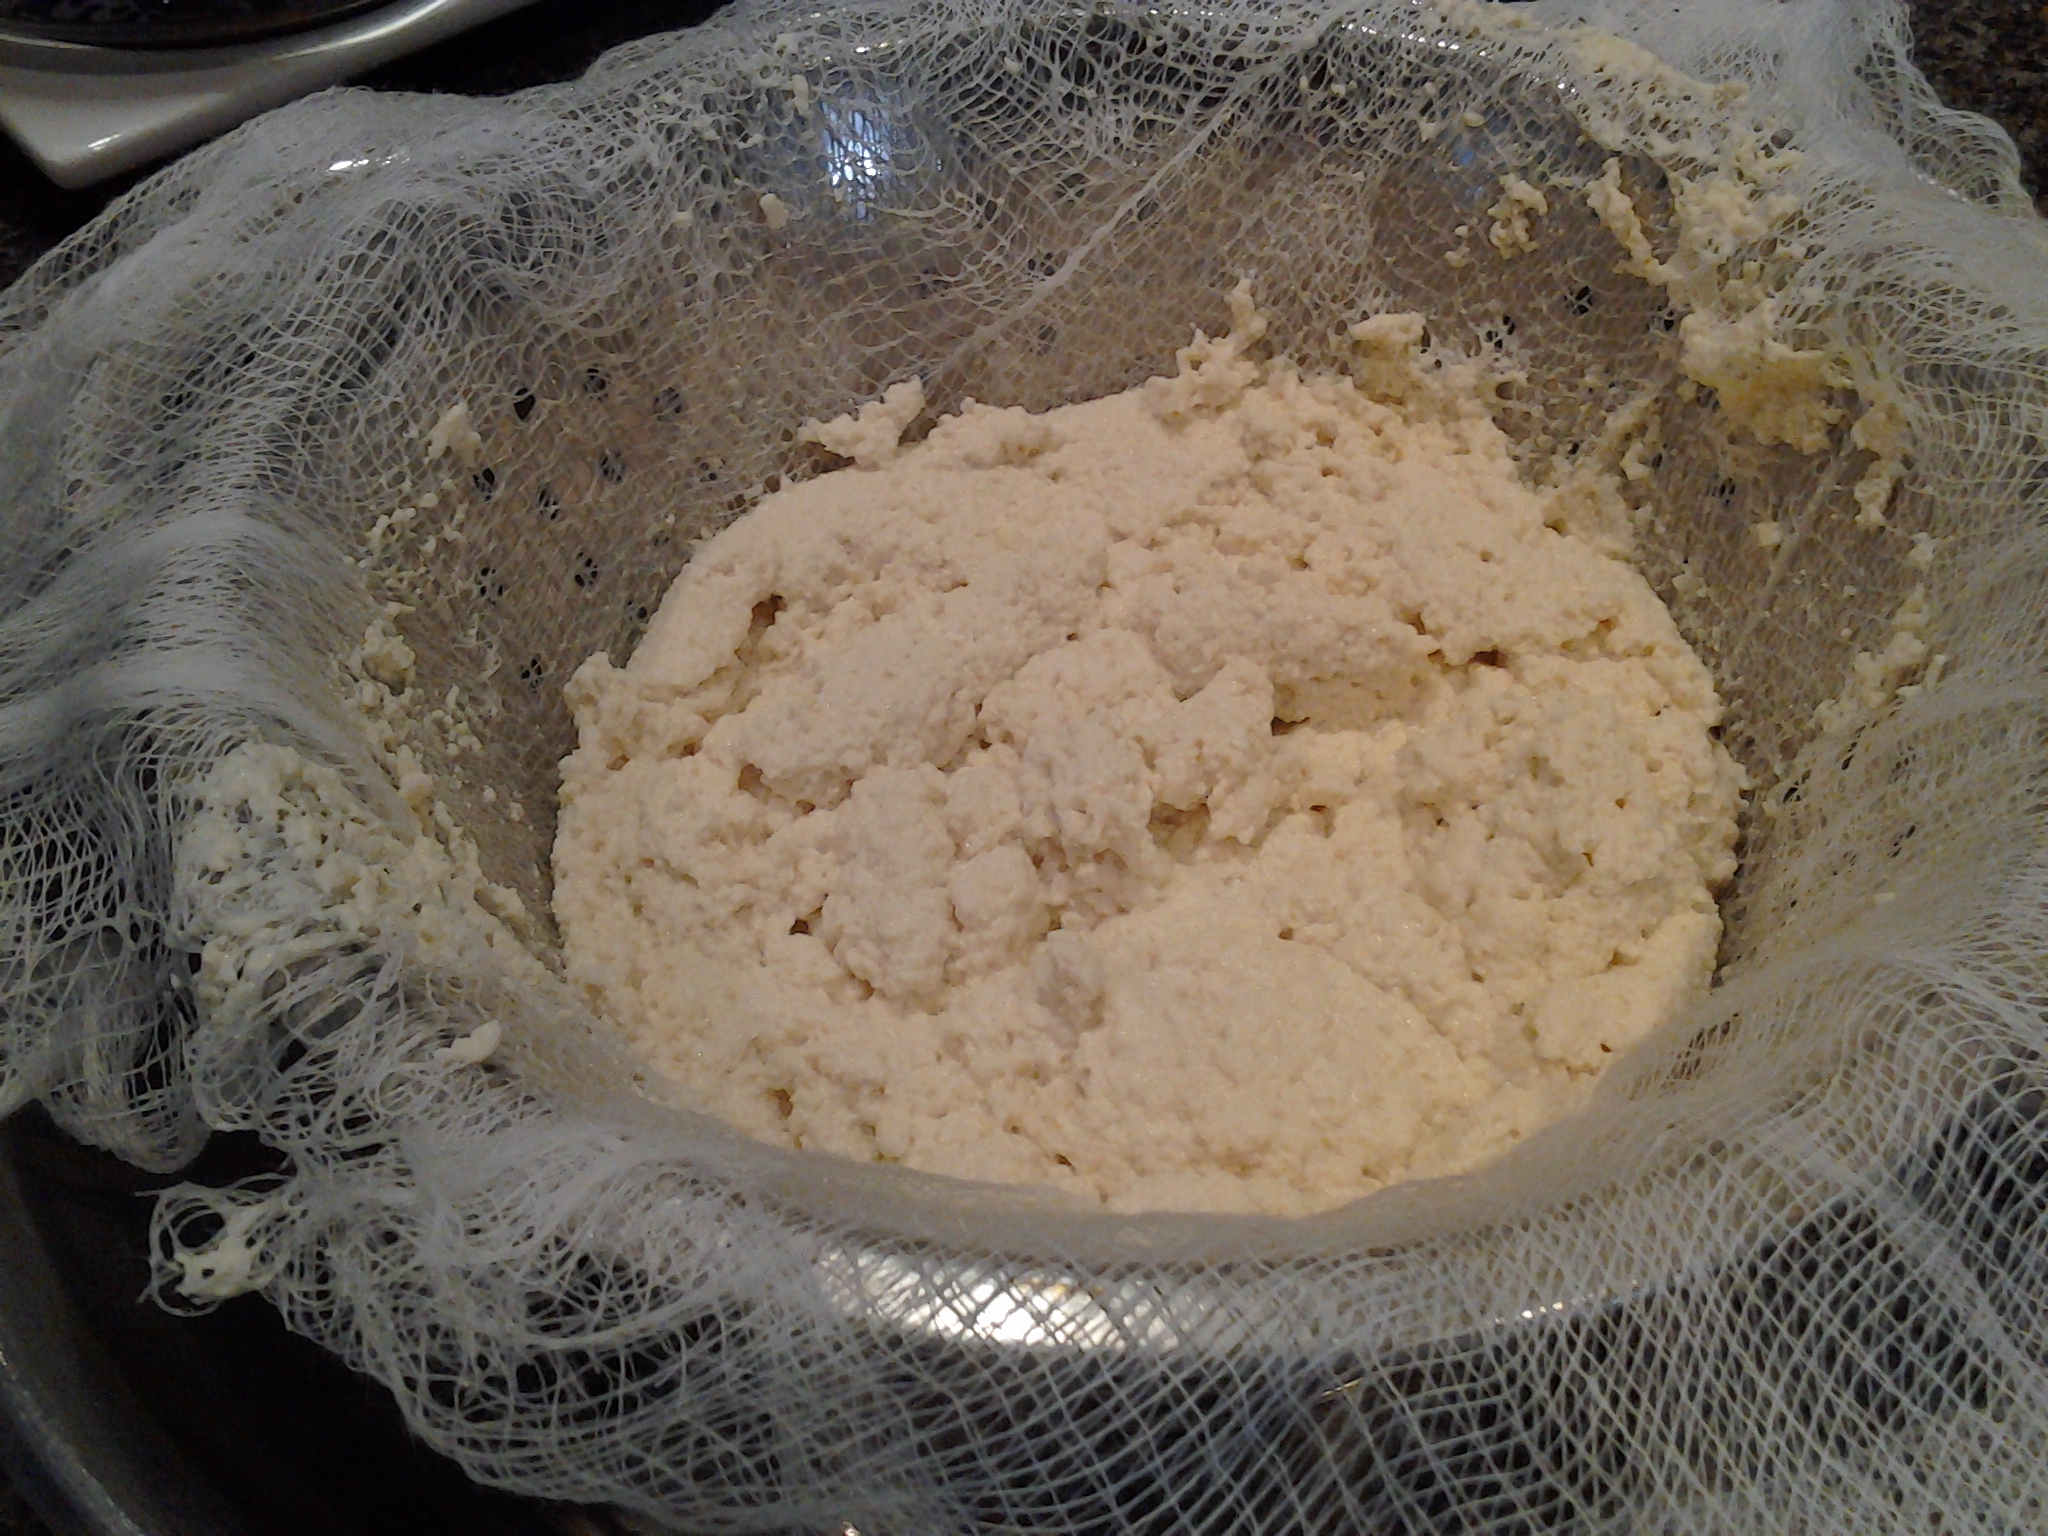
About a year ago, I purchased Artisan Vegan Cheese by Miyoko Schinner. Last week, I invited one of my vegetarian foodie friends, Trish Pfeifer, over to try out a couple of recipes…with disappointing results…except for our own Homemade Vegan Ricotta (pictured at right)!
I love the cheeses that I have created both for my blog (search “cheese”) and The Blooming Platter Cookbook, but I was intrigued by the promise of Schinner’s meltable and sliceable cheeses, as I am not a big fan of market varieities, even Daiya. Her photos make the cheese look like the real deal.
My Search for Rejuvelac
Many of the cheeses I was interested in called for “rejuvelac,” a liquid made from sprouted grains. I am busy, like everyone I know, so I knew that the number of times the grains must be rinsed, the water changed, etc., not to mention the days necessary for the grain to sprout, were deal-killers for me. So I thought I would purchase it but, alas, not so much. No one in our area carries it, but I found it online from Herbspro.com. It arrived sometime the week of July 7 while I was away–after ordering it on June 26–and it arrived wrapped in bubble wrap in a brown paper box though it was clearly marked “Perishable–Keep Refrigerated.” Oh, and the shipping for 2 bottles, which together cost $9 and change, was $20! I had decided to splurge for the sake of research.
I emailed the company to ask if the product only needed to be refrigerated after opening. They responded promptly that they “weren’t trained on the products” and provided the manufacturer’s contact information, also in CA. I called and was told that absolutely the product must be refrigerated every moment of its life and that I should throw it out and contact Herbspro for a refund. Easier said than done. I called and had to give my phone number to the person who answered who sent an email to shipping who would be in touch, though they weren’t there at that time (and it was mid-morning even in CA). I told him, after our brief conversation, that I had absolutely no confidence that anyone would call me back, though he assured me. And, guess what? No one did.
So I called back about 4 p.m. PST and got the same man to whom I explained why I was calling. He transferred me to “shipping,” where the phone rang interminably until I hung up. I called back for a third time and this time the phone was answered by a woman who knew exactly what was going on with the product–she knew it should have been shipped in a cold pack–and issued a refund. However, as I explained, they need to ship it with a signature required because I was out of town for a week and, even if it had been shipped cold, it wouldn’t have been when I returned home to open it.
Plan B
Without any Rejuvelac, I was forced to choose cheeses that didn’t call for it, which limited our options significantly. One also can’t purchase unsweetened plain vegan yogurt here and choosing recipes that didn’t call for it would have, again, limited our options down to almost nothing. The amounts of yogurt called for were small, though, so I bought some plain sweetened yogurt and hoped for the best with Schinner’s Cashew Cream Cheese. I also selected Farmer’s Cheese (really, a ricotta), which only called for soymilk, vinegar and salt. THe latter also involved actual dairy cheese-making methods, which I wanted to try.
Schinners Farmer’s Cheese/Ricotta–A Dud! (my SUCCESSFUL recipe follows at the bottom)
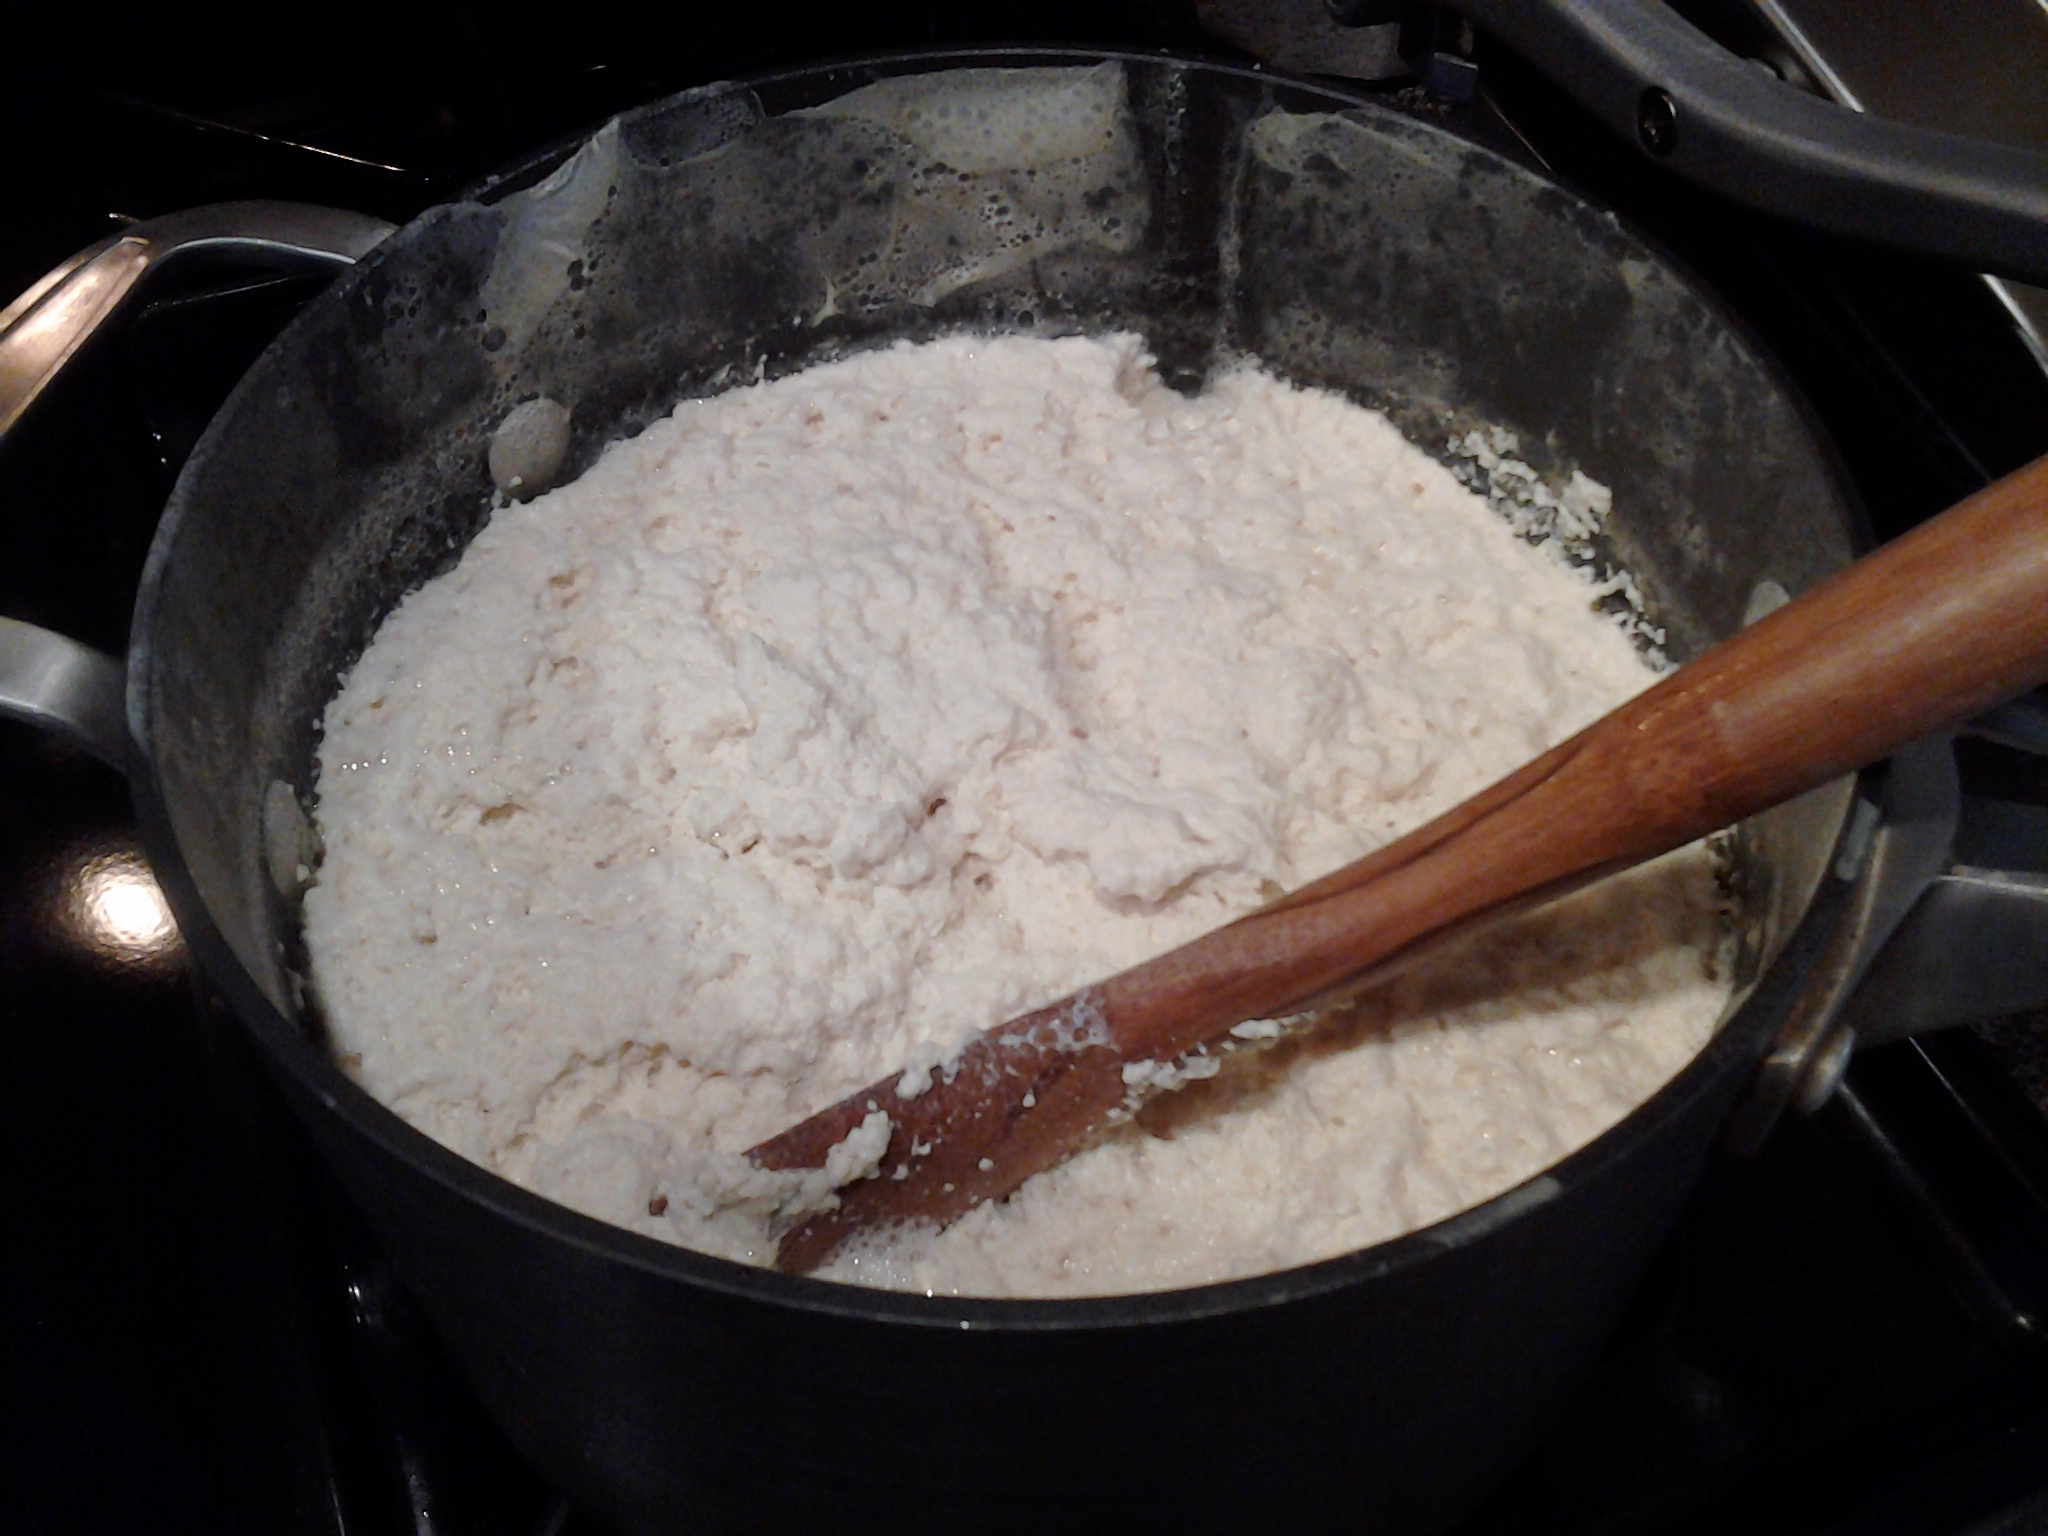
Our first attempt at Schinner’s”Farmer’s Cheese” was a complete flop. We added the vinegar to 200 degree soymilk exactly as instructed and watched as beautiful curds formed and then watched as they just as quickly melted, leaving us with nothing but a pot of warm milk. The problem with this recipe is incomplete instructions. She never says to remove the pot from the heat after the vinegar is added. She just says to add the vinegar and that curds will continue to form over the next 10 minutes. Ten minutes, we assumed, of cooking, since NOWHERE did she say to remove the pot from the burner, nor to turn it off.
I decided to look up homemade dairy ricotta recipes online and both that I consulted said to remove the pot from the heat as soon as the vinegar is added. That worked beautifull and we were thrilled with our results. But, Schinner’s yield says 2 cups and ours was 1. Because both online dairy recipes called for dairy milk and cream, we thought we should perhaps compensate for the lack of cream in some way. So the third time we made it, we reduced the milk by 25% to 6 cups, but kept the amount of vinegar the same at 1/4 cup. We saved milk and got the same beautiful results–a yield of 1 cup–with no vinegary taste. The only other change was not to let the curds form over the course of 10 minutes before pouring the mixture through a cheesecloth-lined strainer, but 1, as one of the online dairy recipes instructed.
Schinner’s Cashew Cream Cheese–A Disgusting Dud!
“What could go wrong?,” we thought. Afterall, I have made plenty of nut cheeses. But what I haven’t done is make them with live yogurt cultures AND leave them to cure, ripen, or whatever at room temperature as instructed in the book. The cheese was tasty–albeit not very similar to cream cheese–as soon as we took it out of the food processor. But as it sat for the recommended amout of time, it started becoming a bit foamy–not the consistency of cream cheese at all–and tasting spoiled. Schinner notes that the longer the cheese is left out, the “tangier” or “sharper” it becomes. It was not tangy or even sharp to our palate–as a vegetarian, I loved stinky cheese and Trish still does–rather it began to taste fishy and spoiled.
Because we wanted a firmer product, we weighted ours in a cheesecloth-lined colander and, as instructed, left them out for even more hours, at our respective homes. The results were completely inedible, as in gag-reflex inedible. I even tried salvaging mine with sea salt, pepper and olive oil. But, no good. Plus, I’m not sure if they would have made us sick if we had been able to choke them down. Honestly, they were disgusting and we both, independently, threw them out in our outdoor waste bins.
My Recommendation
It appears that we are not the only ones who met with some disappointing results when usuing this book. Though the 4- and 5-star reviews far outweigh the 1-stars, I read some of the latter who share my concerns. My advice would be to 1) make MY version of Vegan Ricotta, and 2) if you are still tempted to purchase the book, read a few reviews, and then do so fully informed. *Evidently, a lot of people are achieving fine results with the recipes in the book. However, this ain’t my first culinary rodeo, I can follow a recipe with the best of ’em, and still didn’t achieve edible cheese. I gave the book to Trish to give to her niece who lives near DC, can hopefully obtain rejuvelac there and, perhaps, have better luck with the rejuvelac-based recipes. I am left believing that there must be something about working with live cultures and probiotics that is far more variable than the level for which this book takes into account.
*Another vegan cookbook author friend reports that the Meltable Mozza from the book is nice. One of the reviews on Amazon, however, reports that it didn’t work. Buyer beware.
The Blooming Platter’s Homemade Vegan Ricotta Cheese
6 cups unsweetened soymilk
1 teaspoon sea salt
1/4 cup apple cider vinegar
Line a strainer or sieve with 2 thicknesses of culinary cheesecloth (not the hardware store variety), available at some grocery stores, at kitchen shops, and online. Place strainer over a deep bowl (I used my Kitchenaide mixing bowl) so that the bottom of the strainer won’t be suspended in the milk as it drains, or you can just pour off the liquid as it collects. In a large (4-quart) saucepan, heat milk and salt over medium-high heat to 200 degrees, stirring occasionally. Stir in vinegar, remove from heat, and very gently stir as big fluffy curds form and separate from the liquid (which would be whey in dairy cheesemaking). After about 1 minute, pour mixture into prepared strainer and allow to drain for one hour. It will be soft at this stage and can be refrigerated and then enjoyed like this. Or you can create a firmer cheese, as we did, by gathering up sides of the cloth, twisting, tying with cord, and hanging from your kitchen faucet or from a wooden spoon set across the top of your deep bowl as I like to do (to keep the dogs out of it!). Let draindrain for about 8 to 12 hours, unrefrigerated. Carefully remove cheese from the cheesecloth, cover, and refrigerate. Note: use the drained off liquid to water your plants!
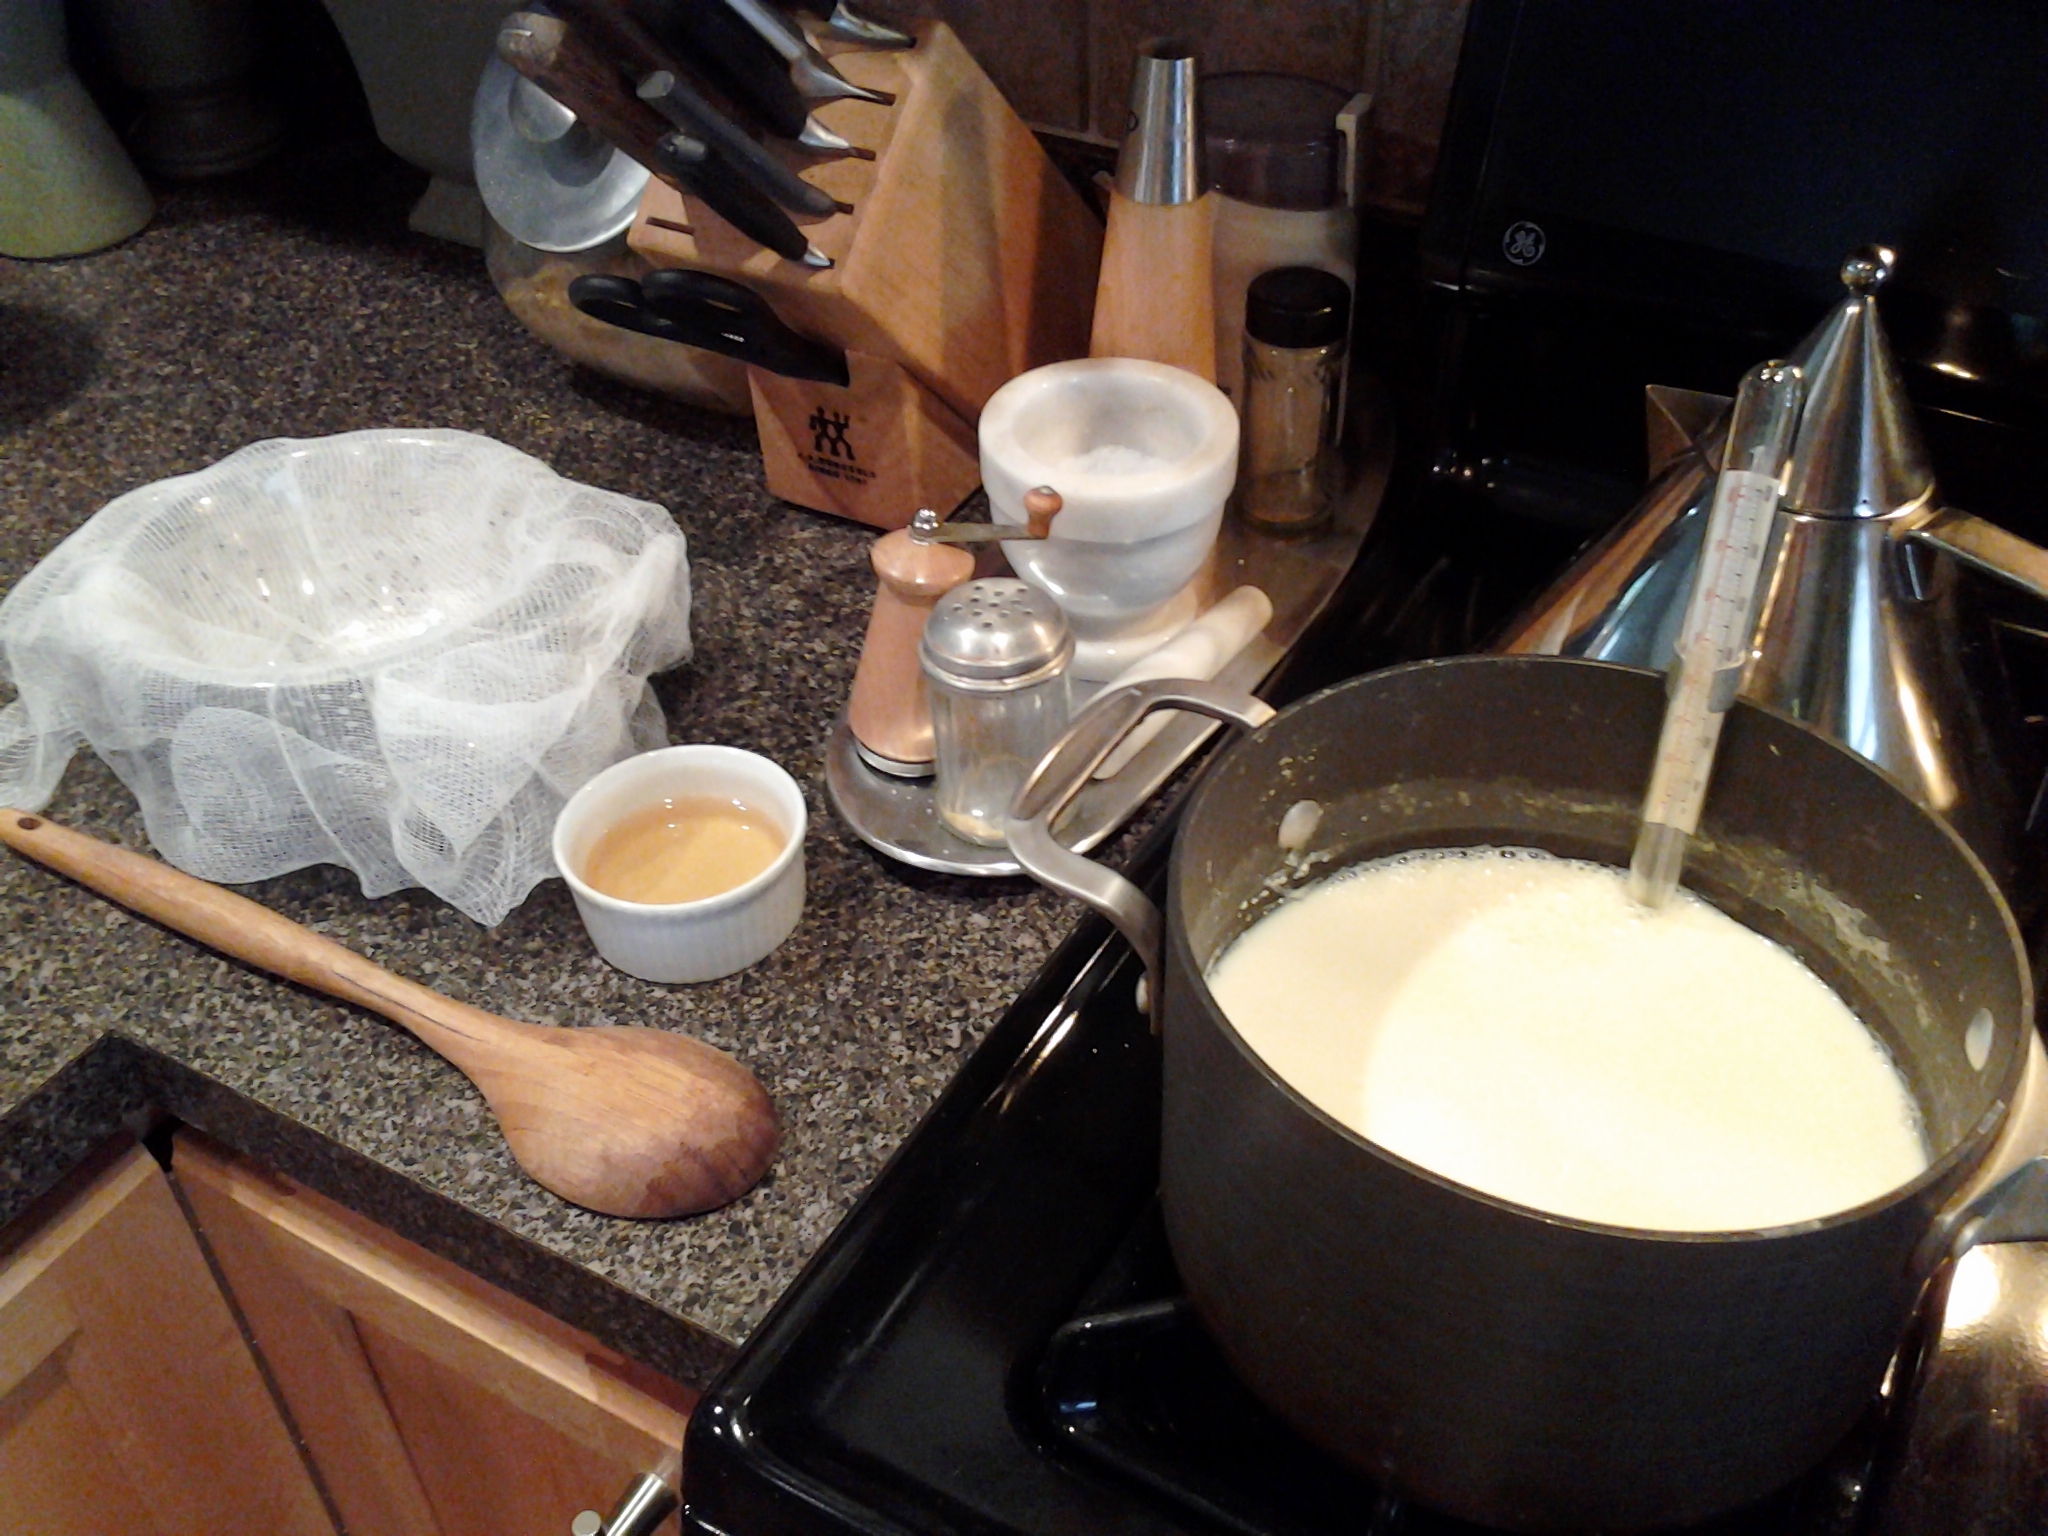
Simple Steps to Perfect Ricotta–A Visual
Warming milk for ricotta with equipment/ingredients at the readyCurds form as vinegar is addedCurds draining in cheesecloth-lined colander
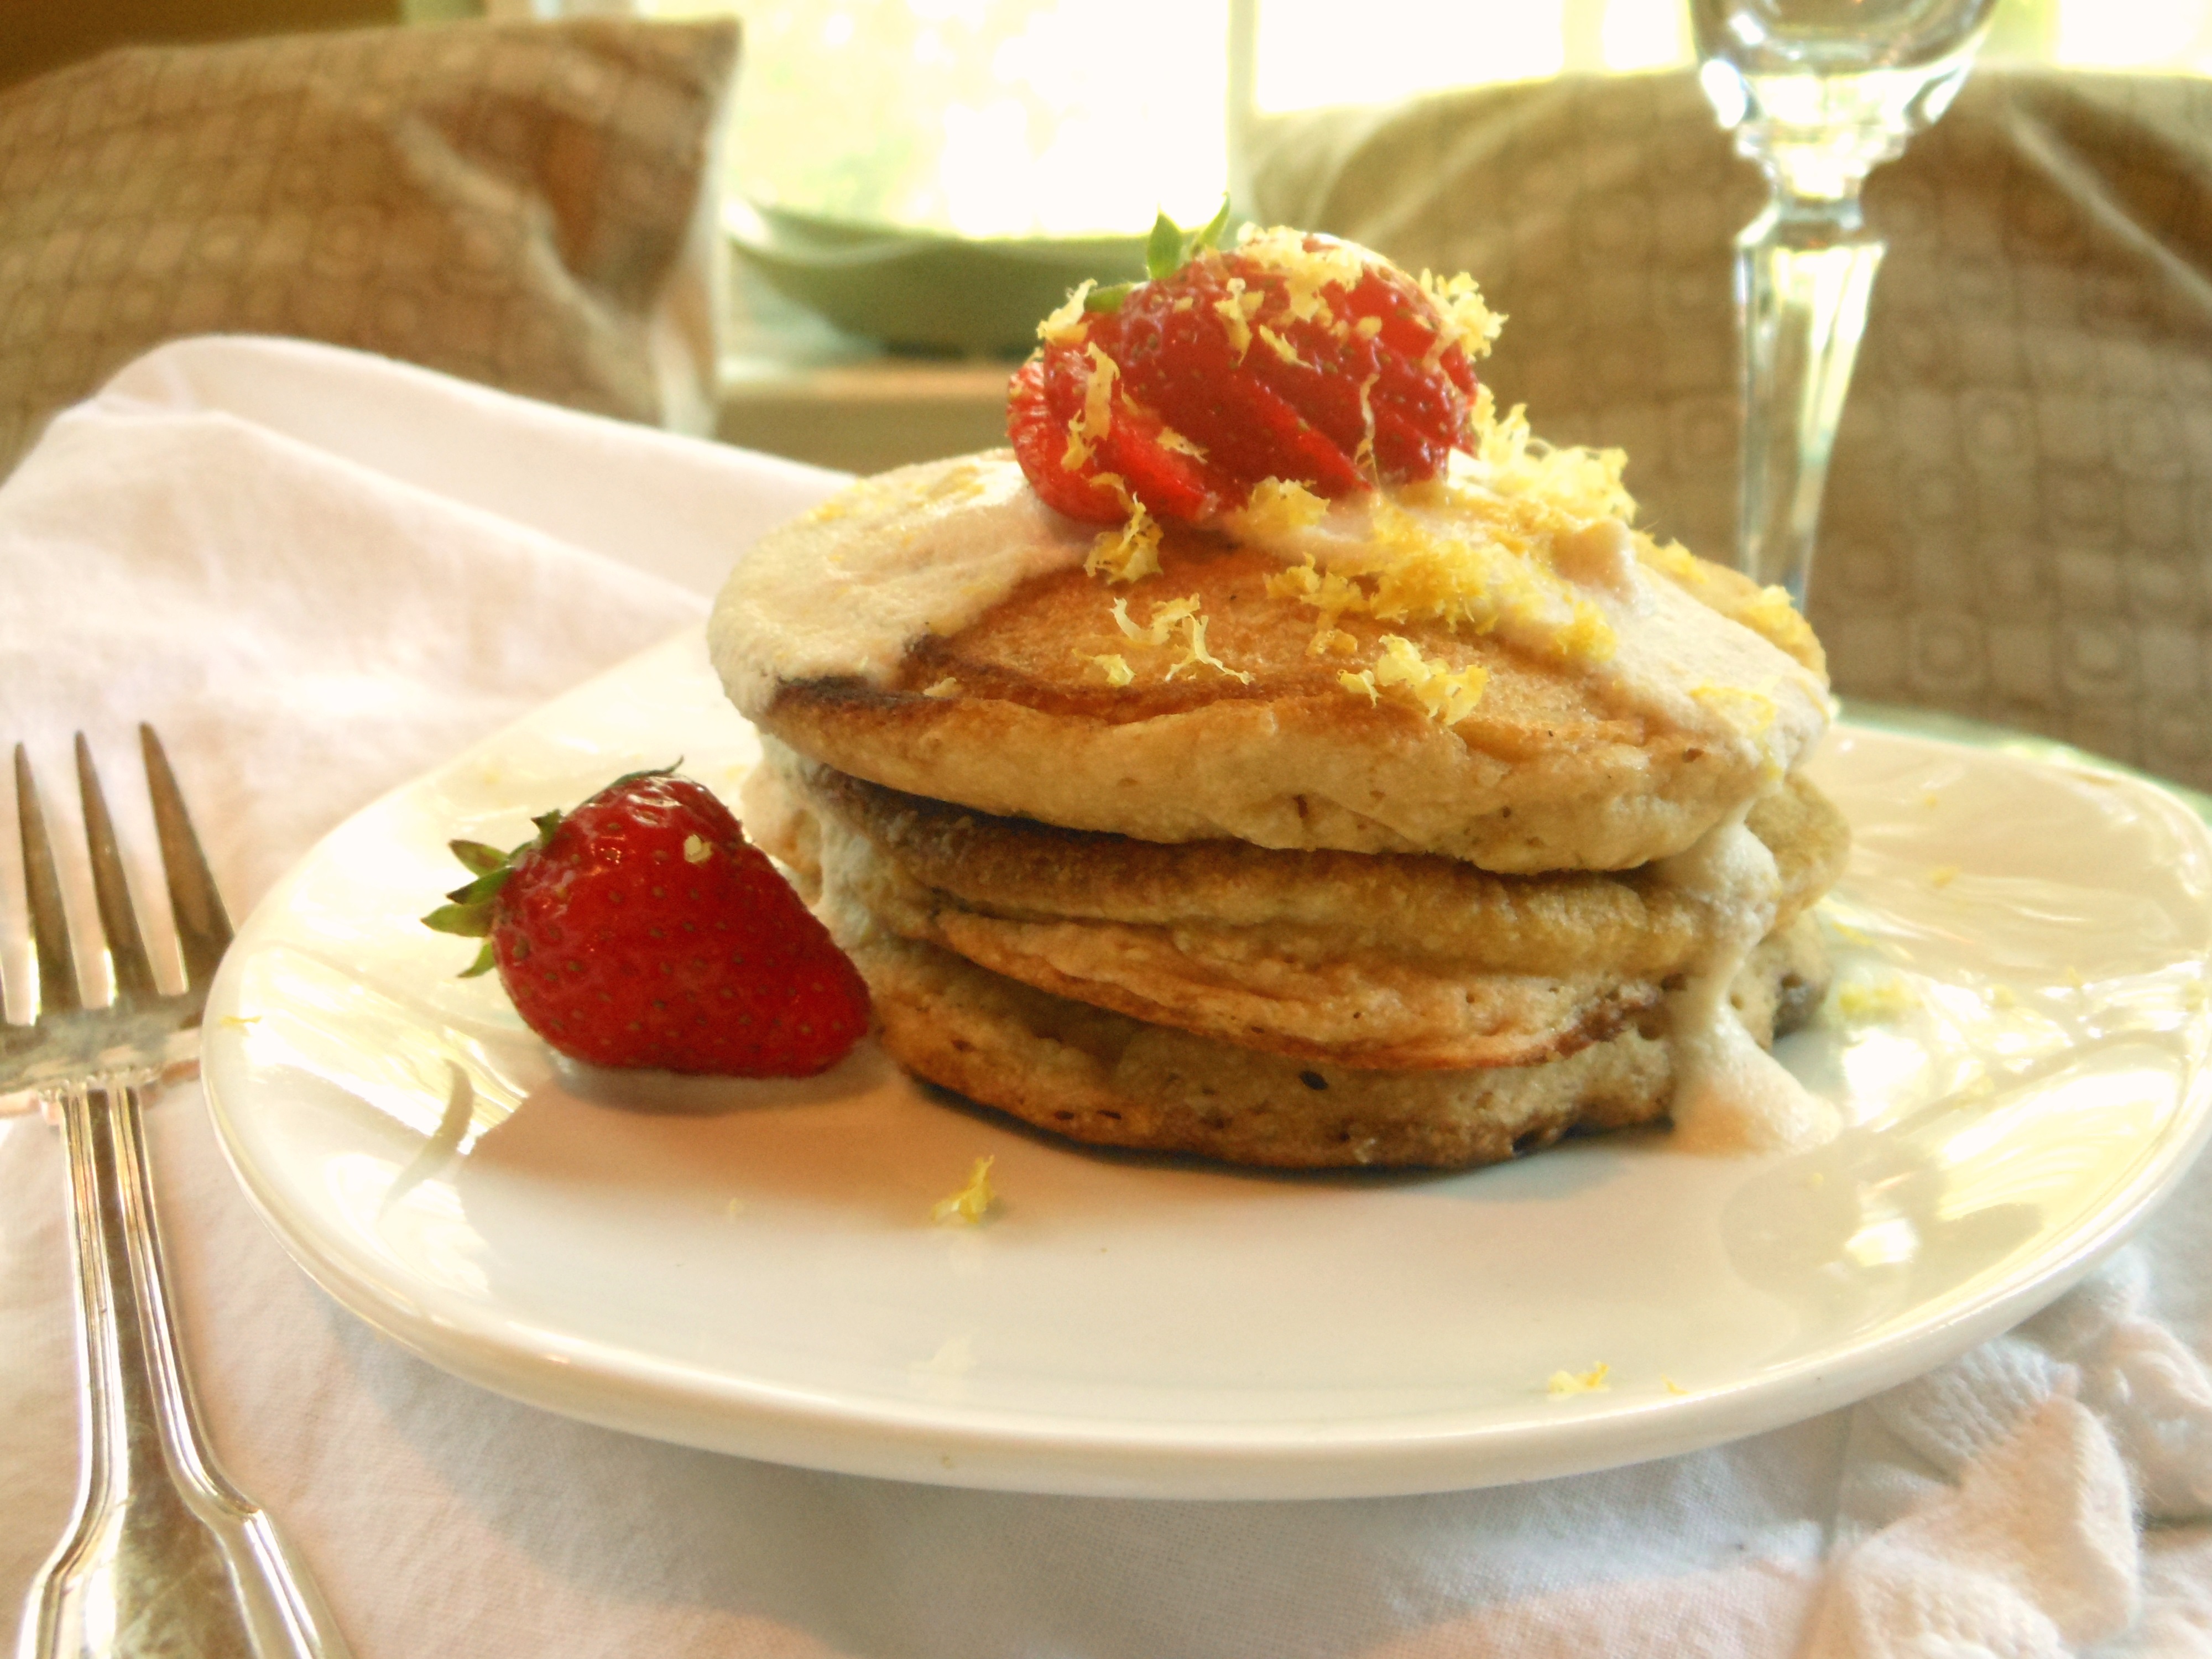
This is the perfect light and lovely breakfast or brunch treat for Mom on her special day. Tofutti Better than Ricotta Cheese is not available everywhere, but hopefully you can find it or another vegan brand where you live, as there really is not an equivalent product to substitute.
Happy Mother’s Day to all…regardless of who your children are! (Mine happen to be 140 teenage art students that I am privileged to teach and “the twinz”: a pair of beloved lookalike canines.)
1 1/2 cup all purpose flour (I use white whole wheat)
1/4 cup + 2 tablespoons natural sugar
1 1/2 teaspoon baking powder
3/4 teaspoon baking soda
1 1/2 cup soymilk (or your favorite non-dairy milk)
3/4 cup Tofutti Better than Ricotta Cheese
3/4 teaspoon almond extract
Zest of 1/2 large lemon
Lemony Maple-Ricotta Cream (recipe follows)
Garnish: fresh strawberries or blueberries plus additional lemon zest and/or confectioner’s sugar for dusting
In a large bowl, stir together dry ingredients. Make a well in the center, pour in soymilk, and whisk just until combined. Add ricotta in several spoonfuls, and whisk into batter, along with almond extract and lemons zest. Avoid over-mixing. Spray cast iron skillet with non-stick spray. (For more flavor, but also more fat and calories, you may use a little oil and or vegan butter, melted.) Heat skillet over medium-high. Make pancakes using a 1/4 cup measure, 3 at a time. Cook for a couple of minutes on first side, or until small bubbles just begin to appear, pancakes puff slightly, and are golden brown on underside. Flip and cook on remaining side for a couple more minutes or until pancakes appear set and are golden brown on underside. Drizzle a tablespoon of Lemony Maple-Ricotta Cream over each pancake as you make the stacks. Garnish top of stack as desired with fresh berries, lemon zest, and or a sprinkle of confectioner’s sugar.
Lemony Maple-Ricotta Cream:
1/2 cup Tofutti Better than Ricotta
1 tablespoon soymilk (or your favorite non-dairy milk)
1 tablespoons confectioner’s sugar
1 tablespoon maple syrup
1/4 teaspoon almond extract
Process in food processor until smooth. The mixture will be creamy for drizzling; not fluffy.
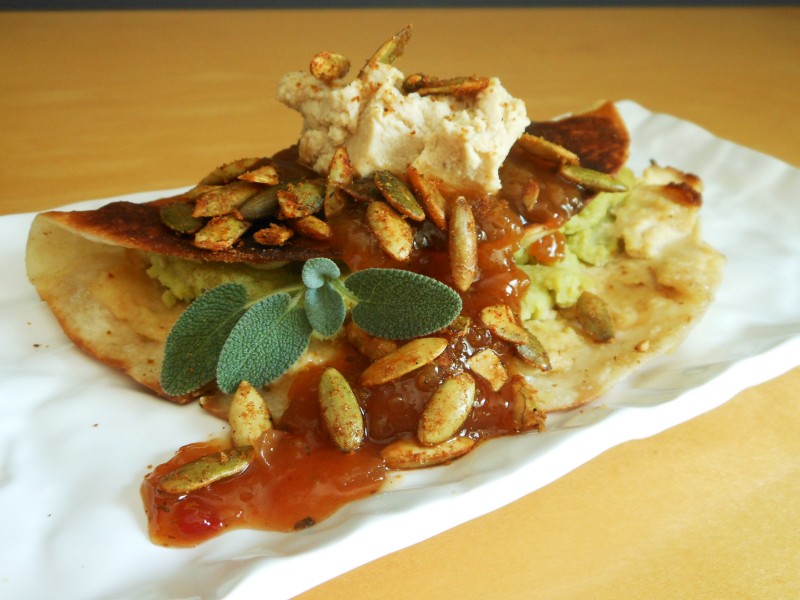
With fresh Smashed ‘Buttah Beans in the fridge following a trip to the farmer’s market, some of my new homemade goat cheese on hand for another purpose, some freshly made Smoky Nooch-Roasted Pepitas, AND some south’ren salsa that came as a gift, the creation of this super easy quesadilla was all but inevitable.
Yield: 1 serving (easily multiplies)
1/2 teaspoon vegan butter (I use Earth Balance)
1-6 to 8-inch whole wheat or flour tortilla
1/4 cup smashed butter beans (I whip cooked butter beans with vegan butter, fresh minced sage, and sea salt and pepper to taste)
1/4 cup + 2 teaspoons Vegan Goat “Cheese” (recipe follows)
1 tablespoon salsa, prepared or homemade (for this recipe I like a southern-inspired variety like Georgia Peach and Vidalia Onion)
To make each quesadilla, melt 1/2 tablespoon vegan butter in a cast iron skillet over medium high. Spread half of tortilla first with 1/4 cup goat cheese then with butter beans. Fold in half and saute 2 minutes on each side or until golden brown. Top with remaining 2 teaspoons of goat cheese, salsa, and pepitas. Garnish with a sprig of fresh sage and serve immediately. (Note: you may top with 2 teaspoons of vegan sour cream if you prefer.)
Vegan Goat Cheese
14 ounces extra firm tofu
2 tablespoons light miso
2 tablespoons beer
2 tablespoons nutritional yeast
Optional: 1/8 teaspoon garlic powder
Sea salt to taste
Process all ingredients in the bowl of a food processor until completely combined and creamy-stiff. Chill, covered, in refrigerator until read to use/serve. (When serving as an appetizer, may be formed into balls or logs and rolled in finely chopped cashews or parsley.)
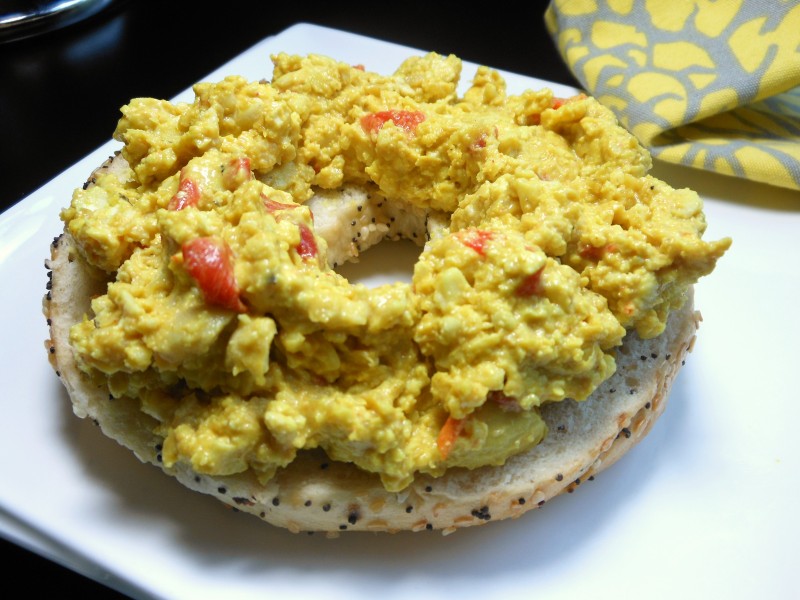
The theme of school lunches continues with my nifty Vegan Pimento Cheese Spread that packs up beautifully as a sandwich or celery stick filling. I love it on a toasted everything bagel, including for a weekend brunch–half is plenty!–but it is so tasty, that I’ve been known to enjoy it right off the spoon!
1 cup cooked chickpeas, rinsed and drained
1 cup raw cashews
3 to 4 ounces extra firm tofu (I used 1/4 of a 14 ounce box)
2 tablespoons nutritional yeast
1 tablespoon light miso
1 tablespoon beer
1 teaspoon soy sauce
1/8 teaspoon smoked paprika
1/8 teaspoon onion powder
optional: 1/8 teaspoon garlic powder
1/4 to 1/2 cup vegan mayonnaise (I like a neutral tasting one like Vegenaise)
4 ounce jar diced pimentos, well-drained
Sea salt to taste
Freshly ground pepper to taste
In the bowl of a food processor, pulse chickpeas and cashews until coarsely chopped. Add tofu, nutritional yeast, miso, beer, soy sauce, smoked paprika, onion powder, and optional garlic powder, and continue pulsing until a coarse-creamy mixture results. Transfer to a medium bowl, and fold in mayonnaise and pimentos until evenly distributed. Season to taste with salt and pepper. I like to chill it before serving, while also allowing flavors to marry. Serve in a sandwich or spread on a bagel, crackers, or celery sticks.
And that’s probably why One Green Planet dropped the reference to Benjamin Rabbit in my title when they graciously published this recipe for spring.
I was merely thinking of Benjamin and the carrots in Mr. McGregor’s garden from the beloved Peter Rabbit stories because, while this Pimento Cheese Spread is guaranteed rabbit-free, it is chock full of shredded carrots. And they are the perfect lighter, healthier, and vegan alternative to orange shreds of cheddar.
So, while shredded carrots aren’t a cheese clone, the end result is nonetheless packed with cheesy flavor reminiscent of one of my favorite pre-vegan spreads. Click here for the recipe of “secret” ingredients just in time for a spring picnic.
Yes, I know, it’s not Monday. So sorry. Eric Brent and the good folks at Happy Cow published my recipe for Vegan Southern Style Cashew Cheese Grits with Kicked-Up Kale this past Monday, but we are dealing with dog drama, so I hope you’ll forgive my tardiness.
Our 14 year old Auzzie Shepherd broke her toe and, though it’s a long story, suffice it to say that our lives have been disrupted in the extreme. We live in a sea of baby gates, a huge crate, new runners on our tile and hardwood floors so that she can stay upright, and an inflatable bed in front of our fireplace (the one up-side) so that I can sleep downstairs with her. My poor back couldn’t take sleeping on the floor another night AND carrying her almost 60 pounds self up and down, 5 stairs to do her business (our house is on pilings and there is no way in or out without negotiating stairs).
But I digress. I hope you’ll follow this link to access the recipe and that you’ll enjoy my cheese grits-and-greens any day of the week!
While you’re at the Happy Cow, I encourage you to spend some time; it’s a terrific site.
I did it again: missed a day yesterday in my “Crash the Superbowl Snack Recipe.” Darn it. It was a really busy day, but that’s no excuse. So, I owe you two today.
Let’s start with one of the recipes I intended to post a while back when I mentioned having been invited to present a program, complete with samples, on The Blooming Platter Cookbook for Alpha Rho, the educational sorority to which I belong.
I love this combination of rich cashew cheese (featuring my secret “cheesy” ingredient!) and tangy sweet-and-savory chutney. The pairing is perfect perched on a cracker but, after the meeting and some errands, I was starved, so I came home and made a grilled cheese-and-chutney sandwich on super-thin Danish rye bread. Oh, my…
My recommendation is to make the Vegan Cheddar Cheese Spread first so that it can be chilling while you make the chutney.
Next, make the chutney.
Fresh Pear and Dried Cranberry Chutney
Yield: 4-5 cups
1 tablespoon olive oil
1/2 of a red onion, cut into 1/4-inch dice
2-3 large cloves of garlic, minced
3 Asian pears, stemmed, cored, and coarsely chopped in a food processor (I’ve only every seen Asian pears in one size and that’s large! About the size of a small grapefruit.)
1/3 cup apple cider vinegar
1/3 cup natural sugar
1/4 cup catsup
2 teaspoons paprika
1 teaspoon ground allspice
1 teaspoon coriander
1 teaspoon cumin
1 teaspoon turmeric
1/2 teaspoon chipotle chili powder
1 1/3 cups dried cranberries
Sea salt and freshly ground black pepper to taste
2 tablespoons minced fresh rosemary or to taste
In a large cast iron skillet over medium-high, heat olive oil. Add onion and saute, stirring occasionally, for about 3 minutes or until softened. Add garlic and continue to saute and stir for about 30 seconds. Add pears and saute, stirring frequently, for another 5 minutes or so, or until pears release juices and begin to cook down. Add all remaining ingredients and cook, stirring occasionally, for about 20 minutes or until the mixture has reached the desired consistency. Stir in rosemary and cook and stir for another minute. Remove the skillet from the heat and allow the mixture to cool to room temperature. Store in an airtight container in the refrigerator. Serve chilled or at room temperature with crackers or crostini.
Note: To make a Grilled Cheese-and-Chutney Sandwich, melt about 1 tablespoon of vegan butter in a skillet over medium-high heat. While butter melts, spread one piece of bread first with the cheese and then with a layer of chutney. Cover with a second piece of bread and grill for a minute or two on each side or until golden brown.

 I haven’t used Go Veggie products in years, ever since I discovered that the Go Veggie products sold at the Kroger where I shop are not vegan.


 With fresh Smashed ‘Buttah Beans in the fridge following a trip to the farmer’s market, some of my new homemade goat cheese on hand for another purpose, some freshly made
 The theme of school lunches continues with my nifty Vegan Pimento Cheese Spread that packs up beautifully as a sandwich or celery stick filling. I love it on a toasted everything bagel, including for a weekend brunch–half is plenty!–but it is so tasty, that I’ve been known to enjoy it right off the spoon!


