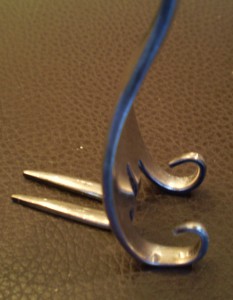
Fork It Over–Clever Place Card Holders for Your Thanksgiving Table and A Simple Advent Calendar to Boot!


As some of you know, though my “day job” is as a high school art teacher, followed closely by cookbook author and blogger, I “moonlight” as a freelance writer.  One of my fun monthly gigs is the “DIY Decor” column for the Virginian-Pilot newspaper.  It keeps the creative juices flowing, but I accepted the job on one condition:  that I not have to do anything so “cutesy” or “crafty”–and definitely not “duck and bunny,” that I wouldn’t have it in my own home or, at the very least, give it to a friend with good, but different, taste than my own!   Fortunately, my wonderful editor allows me near complete freedom.

If anyone ever sees me with a Bedazzler in my hand, please tell me to set it down gently and ease away slowly!

I hope you enjoy this month’s column which features cool place card holders made from antique forks, just in time for Thanksgiving.  And, so you have plenty of time before the beginning of Advent season, it also features my idea for a quick and clever Advent calendar (though, as my article says, this concept is adaptable to any celebration or holiday in which days are counted and little gifts are given on each of those days).

Happy Everything!
Detail: Paper Envelope Advent Calendar

Trader Joe’s Candy Cane Joe-Joe’s are Vegan!
but not the gluten-free version

(Please note that the new 2017 gluten-free version of these cookies, in a different color box, contains egg white powder.)

Yesterday afternoon, I had just left the farmer’s market with a bag full of super-healthy produce, and needed to stop by Trader Joe’s for a few remaining items on my list.  But, though, my grocery bag was looking very virtuous, I was thinking impure sugar-laden thoughts.

I prefer homemade cookies any day of the week, but I was jonesin’ pretty badly for something sweet on the fly.  We had just come from a Friday night stay at the rustic-elegant Sanderling Inn in Duck, North Carolina, which serves tea and homemade cookies in the afternoon.  How I would have loved some cookies with my tea after our 4-mile walk on Friday, but alas, they were off-limits.  So, I came home with cookies on my mind.

Therefore, at TJ’s, I detoured down the cookie aisle in search of something sweet and vegan.  I must have picked up every box on that aisle to read the list of ingredients only to be met with whey, milk powder, eggs, butter, and all the rest of it.  Finally, I picked up the least likely looking box and–Eureka!–all vegan.  It turns out that Trader Joe’s brand of Candy Cane Joe-Joe’s in their cheery holiday-striped box are vegan approved!

Think Oreo’s, but with a peppermint filling.  So, while you probably won’t want to serve these at your next party, you might want to tuck a couple into you or your child’s lunchbox, or serve up a little quasi-guilty pleasure at a party-for-one when nobody’s looking.

My Recipe for Vegan Miso-Roasted Pumpkin and Grilled Tofu Over Udon Noodles Is Published on OneGreenPlanet.org!

I was thrilled to come home today from a quick overnighter (yesterday was a school holiday) to North Carolina’s captivating Outer Banks to learn that the wonderful folks at One Green Planet had published my recipe for Vegan Miso-Roasted Pumpkin and Grilled Tofu over Udon Noodles.  Just click the recipe title to be taken directly to the recipe on their site.  Enjoy!

And, of course, you can find 150 more seasonal delights in:

The Blooming Platter Cookbook: A Harvest of Seasonal Vegan Recipes.

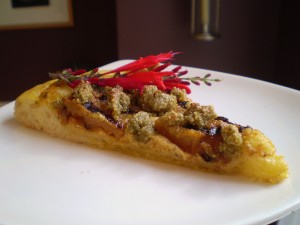
Vegan Grilled Pumpkin Pizza with Pumpkin and Pepita-Sage Pesto Spread, Pepita and Sage Pesto and Rosemary-Garlic Oil Recipe

Yield: 2 pizzas/8 servings (2 slices per serving)

The irresistibly adorable pumpkins at my favorite farm market inspired this pizza.  I’ve enjoyed it three or four times this week with my Vegan Caramelized Onion and Apple Pizza and am so sad there is no more.

As I’ve said before, homemade pizza dough is so quick and easy to make that there is scarcely any reason to purchase it, especially since it can be frozen.  Hands on prep time is just minutes, but it does take a couple of hours to rise.  So, if you are super pressed for time and favor a brand like Trader Joe’s frozen dough, then go for it.  If you choose the purchased route, I would definitely recommend a prepared dough as opposed to a prepared crust.

My dough of choice comes from my Blooming Platter Cookbook: A Harvest of Seasonal Vegan Recipes.  My recipe calls for a combination of self-rising and whole wheat flours.  However, for the pizza pictured, I didn’t have either, so I used all white whole wheat flour with some baking powder.  The only difference I found is that it makes a softer dough and, hence, requires additional flour.  The crust made this way also benefits especially from a couple of minutes in the oven before topping it and returning it to the oven to insure that the crust doesn’t become soggy.

Make the dough at least 3 hours before you plan to serve the pizza.


Blooming Platter Pizza Dough:

Yield: 2 approximate 8-inch crusts

3/4 cup plus 2 tablespoons self-rising flour (or 3/4 cup  plus 2 tablespoons white whole wheat or all purpose flour combined with 1 1/4 teaspoons baking powder and a scant 1/4 teaspoon of sea salt)

3/4 cup plus 2 tablespoons whole wheat flour

Note:  you may substitute all white whole wheat or all-purpose flour for both of the above.  However, you will need considerably more flour, added 1/4 cup at a time, until dough is smooth and elastic, but slightly sticky.

1 teaspoon “quick rise” yeast

1 teaspoon natural sugar

1 teaspoon sea salt

3/4 cup plus 1 1/2 tablespoons tepid water

2 teaspoons extra virgin olive oil plus 1 teaspoon to oil the bowl

Place all of the dry ingredients in a large bowl, stir to combine, and make a well in the center.  Add the water and 2 teaspoons olive oil to the well and stir the wet and dry ingredients together with a fork until fully incorporated.

Knead for 5 minutes with oiled hands or until the dough is smooth and elastic, but slightly sticky.  I knead it right in the bowl.  Do not over-knead.  Lift out the dough and pour the remaining teaspoon of olive oil into the bottom of the bowl and spread to coat the interior with your fingers.

Return the dough to the bowl, rolling it around on both sides to coat with the oil.  Cover the bowl loosely with a damp kitchen towel and allow the dough to rise until doubled in bulk, about 2 hours.  While the dough rises, prepare the other ingredients.


Next prepare Rosemary-Garlic Olive Oil:

1/4 cup olive oil (makes sure it is super flavorful)

1 5-inch stalk of fresh rosemary

1 clove garlic, thinly sliced

Combine all ingredients in a small cup and set aside.

Before preparing topping, preheat oven to 450 degrees.  Place two pizza stones (or two inverted baking sheets) into the oven and heat for 30 minutes.


Topping:

Approximately 1/4 cup Pumpkin and Pepita-Sage Pesto Spread (recipe follows)

Grilled Pumpkin (recipe follows)

1/2 cup Vegan Pepita and Sage Pesto

Optional garnish: fresh sage leaves or pineapple sage blossoms


Vegan Pumpkin Pepita-Sage Pesto Spread:

6 ounces Silken Firm tofu (you may you “extra firm” for a firmer end result)

1/2 cup pumpkin puree

1/2 cup Vegan Pepita and Sage Pesto

1 large garlic clove

Pinch sea salt

Place all ingredients in the bowl of a food processor and process until smooth, scraping down the sides of the bowl as necessary.  You will have more than you need for this pizza.  Store any leftovers in an airtight container in the refrigerator.  Enjoy as a dip with fresh veggies, spread on bagels or sandwiches, tossed with pasta, or as a pizza sauce.


Grilled Pumpkin:

Approximately 3 pounds fresh pumpkin (this weight is seeded and with pulp removed, but with the skin on)

Remove the skin from pumpkin with a paring knife.  Cut pizza into bite size 1/3-inch thick slices.  Spray a grill pan with non-stick spray and preheat over medium-high.  Grill pumpkin, in two batches if necessary, for 2 to 3 minutes per side or unil tender with nice grill marks.  Remove to a plate and set aside.


To Assemble:

Lay two 10-inch sheets of aluminum foil, shiny side down, on a work surface.    Spray each sheet lightly with non-stick pray.  With hands lightly dusted with flour, divide the dough in half, shape each half into a ball, and place one in the center of each piece of foil.

Beginning in the center of the ball and working your way to the edges, use your fingertips and palms to gently press the dough into a circle about 8 1/2 inches in diameter, leaving a slightly raised 1/4-inch wide rim.  Brush the entire surface of each very lightly with the Rosemary-Garlic Olive Oil; you will likely have some left over.  Lift each piece of foil one at a time, crust and all, holding it taught, and place on one of the baking stones.  Bake for 2 minutes.  Remove the stones from the oven and spread a very thin layer (about 2 to 3 tablespoons) of Pumpkin and Pepita-Sage Pesto Spread on each crust.  Divide the pumpkin evenly between the two crusts, arranging pieces in concentric rings.  Return the stones to the oven and cook for about 7 minutes, switching the position of the stones halfway through if pizzas seem to be cooking unevenly.  Remove the stones from the oven again and dot each with about half of the Pepita and Sage Pesto (1/4 cup each).  Return the stones to the oven and cook for 2 to 3 more minutes  or until the crusts are golden and the topping is hot.  Remove the stones form the oven, slide the pizzas, one at a time, onto a cutting board, and cut each into 8 wedges.  Serve immediately garnished with sage leaves or, if you’re lucky enough to grow this herb: ravishing pineapple sage blossoms.

Note: this pizza reheats beautifully on a pizza stone in a 350 degree preheated oven for 10 minutes.

Vegan Caramelized Onion and Apple Pizza with Smokey Cheddar Cheese and Rosemary-Garlic Oil Recipe

Yield: 2 pizzas/8 servings (2 slices per serving)

All things autumn was the inspiration for this absolutely addicting pizza.  I’ve enjoyed it three or four times this week and I have not yet had my fill!

Homemade pizza dough is so quick and easy to make that there is scarcely any reason to purchase it, especially since it can be frozen.  Hands on prep time is just minutes, but it does take a couple of hours to rise.  So, if you are super pressed for time and favor a brand like Trader Joe’s frozen dough, then go for it.  If you choose the purchased route, I would definitely recommend a prepared dough as opposed to a prepared crust.

My dough of choice comes from my Blooming Platter Cookbook: A Harvest of Seasonal Vegan Recipes.  My recipe calls for a combination of self-rising and whole wheat flours.  However, for the pizza pictured, I didn’t have either, so I used all white whole wheat flour with some baking powder.  The only difference I found is that it makes a softer dough and, hence, requires additional flour.  The crust made this way also benefits from a couple of minutes in the oven before topping it and returning it to the oven to insure that the crust doesn’t become soggy.

Make the dough at least 3 hours before you plan to serve the pizza.

Blooming Platter Pizza Dough

Yield: 2 approximate 8-inch crusts

3/4 cup plus 2 tablespoons self-rising flour (or 3/4 cup  plus 2 tablespoons white whole wheat or all purpose flour combined with 1 1/4 teaspoons baking powder and a scant 1/4 teaspoon of sea salt)

3/4 cup plus 2 tablespoons whole wheat flour

Note:  you may substitute all white whole wheat or all-purpose flour for both of the above.  However, you will need considerably more flour, added 1/4 cup at a time, until dough is smooth and elastic, but slightly sticky.

1 teaspoon “quick rise” yeast

1 teaspoon natural sugar

1 teaspoon sea salt

3/4 cup plus 1 1/2 tablespoons tepid water

2 teaspoons extra virgin olive oil plus 1 teaspoon to oil the bowl

Place all of the dry ingredients in a large bowl, stir to combine, and make a well in the center.  Add the water and 2 teaspoons olive oil to the well and stir the wet and dry ingredients together with a fork until fully incorporated.

Knead for 5 minutes with oiled hands or until the dough is smooth and elastic, but slightly sticky.  I knead it right in the bowl.  Do not over-knead.  Lift out the dough and pour the remaining teaspoon of olive oil into the bottom of the bowl and spread to coat the interior with your fingers.

Return the dough to the bowl, rolling it around on both sides to coat with the oil.  Cover the bowl loosely with a damp kitchen towel and allow the dough to rise until doubled in bulk, about 2 hours.  While the dough rises, prepare the other ingredients.

Next prepare Rosemary-Garlic Olive Oil:

1/4 cup olive oil (makes sure it is super flavorful)

1 5-inch stalk of fresh rosemary

1 clove garlic, thinly sliced

Combine all ingredients in a small cup and set aside.


Prepare the Apple Cider Vinegar Reduction:

1/2 cup apple cider vinegar

2 tablespoon balsamic vinegar

2 tablespoon maple syrup

Pinch sea salt

Combine ingredients in a 1-quart saucepan and simmer over medium-high until reduced to 1/4 cup.  Reduce heat if necessary, so that mixture doesn’t scorch.  Pour into a small ramekin or cup and set aside.

Before preparing topping, preheat oven to 450 degrees.  Place two pizza stones (or two inverted baking sheets) into the oven and heat for 30 minutes.

Caramelized Onion and Apple Topping:

2 tablespoon olive oil

2 medium-large yellow onion, thinly sliced

4 small-medium apples, stemmed, cored, cut into 1/4-inch wedges; cut wedges crosswise into 3 to 4 pieces

Sea salt to taste

1/2 cup Blooming Platter Smokey Cheddar Vegan Cheese Spread

Optional garnish: fresh rosemary sprigs

Heat olive oil in a large cast iron skillet over medium-high heat.  Add onion and saute, stirring frequently, for approximately 15 minutes or until onions are beginning to develop a golden color.  Reduce heat if necessary to prevent onions from scorching.  Add apple, 2 tablespoons of the Apple Cider Vinegar Reduction, and a pinch of salt, and continue sauteing and stirring about 10 minutes, or until onion is deeply colored and apple is tender and has developed some color.   Add water, a teaspoon at a time as needed if mixture appears to be drying out.  Check for salt and adjust if necessary.  Remove the skillet from the heat.

To Assemble:

Remove the rosemary from the olive oil, strip the leaves off the stalk, mince, and set aside.

Lay two 10-inch sheets of aluminum foil, shiny side down, on a work surface.    Spray each sheet lightly with non-stick pray.  With hands lightly dusted with flour, divide the dough in half, shape each half into a ball, and place one in the center of each piece of foil.

Beginning in the center of the ball and working your way to the edges, use your fingertips and palms to gently press the dough into a circle about 8 1/2 inches in diameter, leaving a slightly raised 1/4-inch wide rim.  Brush the entire surface of each very lightly with the Rosemary-Garlic Olive Oil; you will likely have some left over.  Lift each piece of foil one at a time, crust and all, holding it taught, and place on one of the baking stones.  Bake for 2 minutes.  Remove the stones from the oven and divide the onion-apple topping between the two crusts, spreading evenly to the rims.  Divide the Cheese Spread between the pizzas, dotting the top of each with teaspoon-size dollops.  Sprinkle each with half of the minced rosemary.  Return the stones to the oven and cook the pizzas for 9-11 minutes or until the crust is golden and the topping is bubbly, switching the position of the stones halfway through if pizzas seem to be cooking unevenly.  Remove the stones from the oven and slide the pizzas, one at a time, onto a cutting board.  Drizzle each pizza with 1 tablespoon of the remaining Apple Cider Vinegar and cut each into 8 wedges.  Serve immediately garnished with fresh rosemary sprigs.

Note:  this pizza reheats beautifully on a pizza stone in a preheated 3350 degree oven for 10 minutes.

Vegan Cookbook Author “Comes Clean” about Pre-Colonoscopy Diet

Sorry about the indelicate topic folks, but it’s important on many levels.  And since we’re all foodies here, and the pre-colonoscopy diet causes many folks high anxiety–me among them–I wanted to share 3 Tips and some other incidental information.

If you are 50 and have no history of colon cancer in your family,  it’s time.  If you’re not yet 50 and have a family history of the disease–or any other reason to be concerned–then it’s past time.

So, alas, with my “big” birthday last May, and a “staff day” today at school, I scheduled the appointment for 8 a.m. this morning because I hate to leave my students with substitute teachers, however good they may be.  Though doctors probably have different protocols, especially in countries outside the U.S., mine requires a clear liquid diet fast for 24 hours in advance.

Ever try finding more than 1 gram of vegan protein per serving on a clear liquid diet?  Well, I don’t think you can.  Veggie broths are right about 1 gram.  Too late, it did occur to me that miso, at 2 grams of soy protein per serving, might have been acceptable.  But I would ask your doctor.

As a vegan with low blood sugar–controlled by the optimum ratio of protein, carb and fat, I was really concerned about making it through the day at school without all of the hypoglycemic symptoms.  When I called my doctor, the nurse recommended Iso Pure , a protein drink in a rainbow of clear colors.  Turns out that it’s great for vegetarians but its whey-based protein makes it off-limits for vegans.

So, Tip #1: on the day before the procedure, rise early enough to eat or drink a high protein breakfast before the clocks strikes the 24-hour prior mark.  I recommend drinking that meal for reasons that will become obvious to you later.  My beverage of choice was a venti Green Tea Soy Frappuccino–hold the classic syrup and whip, of course–yesterday morning.

For both lunch and dinner, if you can call it that, I drank warm veggie broth with plain hot tea in the afternoon.  At school, I dissolved faux chicken bouillon cubes in hot water for lunch.  Mmm…  But dinner was more satisfying, so here is Tip #2:  the day before, I boiled 4 ounces of Udon noodles in 2 quarts of water plus 8 of those bouillon cubes.  When I drained the noodles, I reserved the broth, cooling it, and then storing it in an airtight container in the fridge.  The added starch and fat in the broth made that a much more satisfying “meal.”

Now for the truly fun and indelicate part.  First, whatever you do, don’t get online and start reading about other people’s experience of “the cleanse.”  That will do nothing but contribute to your rising anxiety or, in my case, rising panic.  My doctor’s protocol began at 5 p.m. the day before.  At the appointed hour, I had to take 4, count them, 4, Dulcolax tablets with 2 to 3 glasses of liquid.  I decided to take them with my liquid dinner, as I knew I was about to have to drink more than was entirely comfortable.

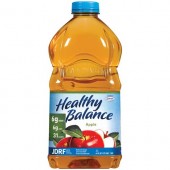
Immediately after that, I had to drink 4 cup (32 ounces) of a clear liquid–Gatorade was recommended–with a half of a bottle of Miralax dissolved in it!   But, guess what?  My cocktail was actually quite delicious and here’s why.  Tip #3:  the nurse had advised really chilling the mixture.  I can’t stand Gatorade on a good day, so I chose Healthy Balance apple juice which I chilled the day before.  After I mixed in the powdered solution, which is about the same texture as superfine sugar, I poured it over ice.  I think I’ll serve it at my next party!  Not.  But, truly, it wasn’t only “not bad”–and I had been warned by lots of friends that it is “nasty”–but it was actually tasty and satisfying.  Maybe it helped that I hadn’t eaten all day.

Then I went ahead and mixed up the other 32 ounces of apple juice and half bottle of “the stuff” as I would be rising at 3 a.m.–5 hours before the procedure–to drink it.  I didn’t try it hot which might have been more satisfying on a chilly fall morning.  But, as it was, I sat in bed with my dogs piled around me and read the December issue of VegNews.  It was quite pleasant.

Now, what follows both of those large doses isn’t the most fun, but only because it prevents a good night’s sleep.  Yet, I definitely wouldn’t want to have scheduled my appointment for later in the day and be trying to conduct normal activities.  And besides, I don’t know about any of the rest of you about my age, but sleeping through the night is not something I do anyway.  I’d say it’s been 8 years since I did that, though part of that was probably starting my new career as a teacher, not to mention adopting the first of our Great Danes who has slept with us from Day 1.

Well, it’s about time for my husband to drive me to the doctor’s office–note that you are required to have a driver take you home after the procedure because of the sedation (something else I’m not thrilled about, as I’m a bit needle phobic).  But everyone says that the prep is the worst part…and it wasn’t half bad!  I hope my 3 Tips will ensure smooth sailing on your end–sorry, I couldn’t resist–when the time comes.

Oh, and for the record, I’ve now been home since about 10:30 or so this morning, the procedure is a piece of (vegan) cake.  Seriously.  “Conscious sedation” for me meant “lights out.”  I don’t remember anything until I woke up in the recovery area, and I certainly didn’t feel a thing except next-to-nothing when the nurse inserted the IV, twice as it turns out, as I was dehydrated and she couldn’t get what she needed.  Honestly that was the part I dreaded the most and it was a non-event.  I do remember one embarrassing thing I said and they hadn’t even started drugs through the IV yet because they wanted me to meet the doctor.  When he came in to chat and shook my hand,  I instantly liked him and he was so handsome.  So before I knew it, I was saying to him, “Oh gosh, I wish you weren’t so cute.”  He laughed, blushed a little, and looked at his nurse saying, “I think that’s a compliment.”

So if your time has come or will soon come, relax.  But don’t plan a big lunch afterwards.  Everyone said I would be starving.  I wasn’t; instead I was ever-so-slightly nauseated, but just for a minute or so when I got home and was moving around a little too much.  I took one anti-nausea pill provided by the doctor which did the trick, and then I fell asleep for a nice long while.

Related Posts Plugin for WordPress, Blogger...