I’m thrilled to share a sneak preview of the first of several recipes from my brand new cookbook, The Blooming Platter Cookbook: A Harvest of Seasonal Vegan Recipes which hit the stands just this week.
I chose this grilled radish salad for several reasons, including that it is spring personified. But also, I love to utterly transform an ingredient through an unexpected cooking method; in this case, grilling these humble, but ravishing red root veggies. Not a radish fan? Not so fast! You have never had radishes like these!
The drizzle of Maple Curry Vinaigrette complements the earthy sweetness of these slightly caramelized beauties just perfectly. And the peanut garnish? Well, you be the judge!
Yield: 4 servings
Salad:
8 large red radishes, ends trimmed, and halved lengthwise
1 tablespoon olive oil
1/2 teaspoon curry powder
Pinch sea salt
Maple-Curry Vinaigrette:
1 tablespoon balsamic vinegar
3 tablespoons olive oil
1 tablespoon maple syrup
3/4 teaspoon curry powder
Pinch garlic powder
Pinch sea salt
To serve:
2 cups spring salad greens
1 tablespoon chopped roasted peanuts
1. Salad: Heat an oiled grill pan over medium-high heat. While the pan heats, prepare the radishes.
2. In a small bowl, whisk together the olive oil, curry powder, and salt. Taste and adjust seasoning if necessary. Add the radishes and toss to coat.
3. Arrange the radishes on the hot grill pan, cut-side down, placing them close together. Grill for 2 1/2 minutes, then turn 90 degrees and grill for 2 1/2 minutes more or until slightly caramelized with nice grill marks. Baste with the remaining curry-oil mixture.
4. Turn the radishes over and cook for another 2 1/2 minutes or until they develop grill marks, basting again. The radishes should be tender, but not soft. Transfer to a plate and allow to cool slightly.
5. Maple-Curry Vinaigrette: In a small bowl, whisk together the vinegar, olive oil, and maple syrup. Add the curry powder, garlic powder, and salt to taste, whisking well to combine.
6. To serve: Arrange the greens on 4 plates. Top each with 4 radish halves, drizzle each with one quarter of the dressing, and sprinkle evenly with the peanuts.
Cookbook Ordering Information:
For 150 or so more recipes for eating deliciously and compassionately this spring, summer, and all year ’round, I’ll hope you’ll consider purchasing a copy of the cookbook for your very own.
To purchase on-line, visit Amazon or Barnes & Noble. You can also contact me for a Trade Sheet to take to the bookseller of your choice with your personal request to stock the book.
Locals have a couple of additional options: if you can attend the official Launch Party, Book Signing and “Incredible Edibles” Exhibition on May 21, 2001, from 7-9 at Mayer Fine Art Gallery in Norfolk, we hope you will buy a book there. But, if you can’t make the party, you can now purchase the book at Prince Books in downtown Norfolk. Visit the store website or email owner, Sarah Pishko, at sarah@prince-books.com.

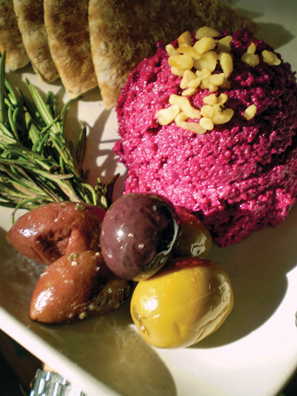
 On the Saturday night before Easter, my husband and I enjoyed a Middle Eastern dinner at the new Azar’s at Hilltop in VA Beach. I savored my lamb-less Lenten, I mean, Lentil Soup, redolent of cardamom, with a wine I had never sampled before, but certainly will again: Ksara Vineyard’s Blanc-de-Blancs from Lebanon. A blend of Sauvignon Blanc, Semillon, and Chardonnay, this wine is its own breed: fruity, nutty and…hmm…is “spicy” the right world? It tastes delectably “different.” Try it!