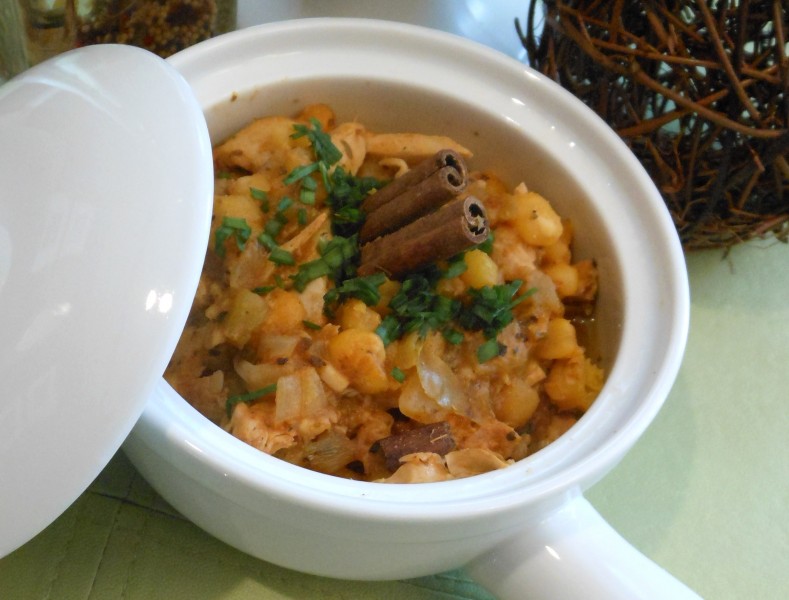
Vegan “Chicken,” Green Chili, and Hominy Posole

Yield: 4 servings

This simple, flavorful and robust “Chicken,” Green Chili and Hominy Posole is sure to become a cold weather favorite.  However, unlike most of my recipes, it doesn’t rely on seasonal ingredients, so you can actually enjoy it any time the mood strikes.

I have never made, much less eaten, Posole, but a non-vegan recipe in a recent culinary magazine made my mouth water.  So, recently, with Posole on my mind, I created my own version without even referring to that recipe.  I did, however, check online to make sure I knew what spices to include.

My version departs a bit because, well, that’s what I do, though I still stayed true to the dish.  So, I used the traditional dried oregano, but I substituted ground coriander for fresh cilantro because I didn’t have any, and I used smoked paprika instead of cayenne because those smoky undertones are irresistible to me and seemed perfect for the dish.  Also, I find the more subtle and complex heat of paprika a bit more appealing than that of cayenne.  Plus, the color was also lovely. For some reason, a note of cinnamon sounded good to me, so I added a couple of cinnamon sticks for a background note of warmth.  It was perfect!

The other main difference is that instead of serving warm corn tortillas alongside the soup, I decided to dice up a few and saute them with the onion for additional corn flavor, as well as for texture.  But don’t worry; this is not yet another version of tortilla soup!  It is Posole through and through.

I loved it and wouldn’t change a thing.  And I hope you agree.  But should you not, have some fun making it your own!  Find the recipe HERE where the good folks at One Green Planet were happy to publish it.

Print Friendly, PDF & Email

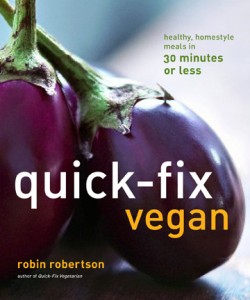
Quick-Fix Vegan Is Long on Flavor, Short on Prep Time

Quick-Fix Vegan is an all-new companion volume to the award-winning Quick-Fix Vegetarian.

With 25 years of professional culinary experience and food writing under her apron strings—and almost as many cookbooks!–best-selling author, Robin Robertson, here serves up 150 recipes, each with its own introduction.  Short and sweet–not to mention savory–these recipes are fast (all can be prepared in 30 minutes or less), full of flavor, and largely made with fresh ingredients quickly combined with pantry and fridge staples.

I hadn’t made it past the “Starters and Snacks” before I knew what I will make first:  Moroccan Pumpkin Hummus.  I am wild about the flavors of Morocco and, in fact, chose that flavorful cuisine for my “big” birthday dinner last May.  Plus I am an utter fool for pumpkin anything.  And, hummus?  Well, it is just about the perfect food.  And, in Robin’s inspired hands, it becomes even more so.

I’ve always loved fusion cuisine in which one dish is presented in the guise of another, and Robin shares one after another enticing example in this cookbook which draws its inspiration from, quite literally, a world of flavors.  I hadn’t even made it out of the “Starters” before I had found the second recipe I want to try: Jerk-Spiced Kale Chips.

Never odd, but often surprising, Robin’s flavor combinations are both interesting and appealing, like these chips or, say, her avocado sauce for pasta.  Recipe after recipe will have you asking, “Why didn’t I think of that?”

So, if, like me, you love fresh takes on old faves, then you will find much to love in this book well beyond the Starters.  Eight more chapters of recipes, each with its own index and introduction, make the most time consuming and difficult task narrowing down the options.  Fun food—take “Snowballs in Hell,” for example–and bold flavors–like “Burmese Ginger Salad”–are hallmarks of this very readable cookbook.  But, if you’re more into basics, you won’t be disappointed.  Recipes like Zucchini Frittata, Skillet Lasagna, Cream of Mushroom Soup, and Mac and Cheezeburger Bake fit that bill.

In addition to the expected chapters of starters, soups, sandwiches, salads, sauces/condiments, and desserts, main dishes are conveniently divided into ones you make stove top, ones you bake, and pasta because we all know the latter is a food group unto itself.  At the beginning of the book, the “Getting Started” chapter is practicality personified with time-saving strategies, a description of the Quick-Fix Pantry, complete with lists, Ingredient Shortcuts, tips for planning ahead and using leftovers, and oh-so-much more.

Though the only full-color photographs in this book are on the front and back covers, Robin’s vivid, but succinct writing paints a vibrant picture of each dish, of the vegan kitchen, and, indeed, of the vegan lifestyle itself.

Print Friendly, PDF & Email

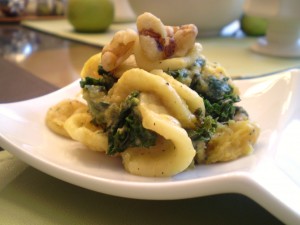
Vegan Orecchiette with Kale and Roasted Acorn Squash in a Creamy Sauce

This is omnivorous husband-approved comfort food, no question about it!  But it won’t weigh you down and it is  infused with lots of vitamins, not to mention flavor.

You can use any kind of pasta you choose, but I love the shallow “bowl-shape” of the orecchiette because it holds more of the creamy sauce.

Roast the squash in advance so that it’s ready to roll when you’re ready to roll out dinner.

Yield: 4 servings

8 ounces orecchiette (or other favorite pasta)

1 tablespoon olive oil

4 cups firmly packed 2-inch pieces of kale, thick stems removed

2 medium cloves garlic

1 cup plain soy creamer

1/4 to 1/2 cup nutritional yeast (depending on how cheesy and thick you want the sauce)

Sea salt and freshly ground black pepper to taste

About 4 teaspoons rough chopped walnuts or toasted walnuts

2 acorn squash, cut into approximately 1 x 2-inch chunks and roasted (I cut the squash in half, remove seeds and pulp, cut it into chunks, drizzle with olive oil, sprinkle with sea salt, and roast for 20 minutes at 450 degrees, stirring after 10 minutes.  I find it easiest to peel the squash after it has cooled enough to handle, but you can peel it before roasting if you prefer.)

Bring a large pot of generously salted water to boil.  Add pasta and cook just until al dente.  Meanwhile, make sauce.  In a large cast iron skillet over medium-high, heat olive oil to shimmering.  Add kale and cook, stirring almost constantly, for approximately 3 minutes or until almost tender, but still bright green.  Add garlic and saute for another minute, stirring constantly.  Reduce heat if necessary to prevent garlic from scorching.  Add soy creamer, nutritional yeast, sea salt, and freshly ground pepper, and stir to combine.  Fold in roasted acorn squash and heat through, stirring frequently.  When pasta is cooked, drain, and fold it into the sauce.  Adjust seasoning if necessary and serve immediately garnished with a few chopped walnuts.

Print Friendly, PDF & Email

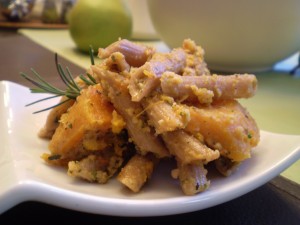
Vegan Whole Wheat Penne Pasta with Roasted Butternut Squash and Kale, Walnut, and Rosemary Pesto Cream Sauce

I love my Kale, Walnut, and Rosemary Pesto, but I’ve enjoyed so much of it recently, that I wanted to transform it just enough to be a fresh take without taking away from its beautiful balanced flavors.  So I decided to combine it with some soy creamer and use it as a sauce to coat golden butternut squash and chewy-tender tubes of whole wheat penne pasta.

Roast the butternut squash in advance so it’s ready to go when you are ready to eat!

Yield 4 servings

8 ounces whole wheat penne pasta

1 cup Vegan Kale, Walnut, and Rosemary Pesto

1/2 cup plain soy creamer

2 cups 1-inch pieces of roasted butternut squash (Halve squash lengthwise, remove seeds and pulp, cut into pieces, toss with a tiny bit of olive oil, and roast approximately 20 minutes in a 450 degree oven, stirring after 10 minutes.  I find it easier to peel it when it is cool enough to handle, but you can peel it before roasting.)

Sea salt and freshly ground black pepper to taste

Optional garnish: sprigs of fresh rosemary

In a large pot of boiling, generously salted water, cook pasta just until al dente, about 8 minutes.   Meanwhile, in a medium bowl, whisk together pesto and soy creamer.  If you want the sauce to be a little looser, whisk in olive oil, a tablespoon at t time, until desired consistency is reached.  When pasta is cooked, drain, return to pot, and place over medium heat.  Immediately add sauce and toss together quickly.  Then add butternut squash and toss gently again.  Check for seasoning and adjust as necessary with sea salt and freshly ground black pepper.  Remove the pot from the heat and serve the pasta immediately topped with sprigs of rosemary if desired.

Print Friendly, PDF & Email

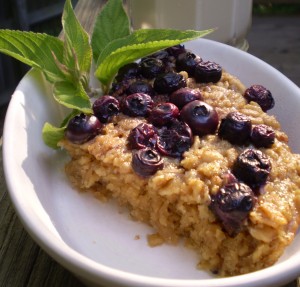
VEgan Baked Pumpkin Spice Oatmeal (it’s like bread pudding for breakfast or brunch!)

This recipe is a crowd-pleaser regardless of the season!  And I’m posting it now so you can make sure to have all ingredients on hand by the time the weekend arrives.

The first iteration of it, which I created for The Blooming Platter Cookbook, appears in the spring section of the Brunch chapter, for it was made to be topped with fresh berries.  When I tested the recipe in the summer of 2010, I served it topped with blueberries to my good friend Maggie Test (yes, that’s really her last name).  She proclaimed its texture to be perfect, like a bread pudding for breakfast (though there is no bread in the recipe, only healthy oatmeal).

So, for the weekend house party my husband hosted for my birthday last May, I made it as our Sunday “morning-after” brunch dish.  It was a huge hit with everyone and lent itself perfectly to people rising at different times, as servings can be popped into the microwave for reheating.

At the end of last week, the weather finally turned cool here in coastal Virginia and the leaves are beginning to turn right along with it.  So, I found myself craving a warm comfort-food type weekend breakfast, but nothing too heavy.  Baked oatmeal came immediately to mind.  But, with berries long out of season, I thought of pumpkin of which I can’t get enough this time of year.  I crave it in everything.

I used the recipe I created for my cookbook, simply reducing the cup of soy milk to 1/2 cup, and adding 1/2 cup pumpkin puree plus 2 teaspoons of pumpkin pie spice.  Then, instead of studding the top with berries, I used nuts.  Oh, and I topped the serving you see in the photo with some Vegan Pepita Caramel Sauce, but that’s just guilding the lily and, I have to admit, turns the dish into more of a dessert.

The only difficult aspects of this dish are 1) waiting 8 hours to bake it, and 2) not eating the entire recipe in one sitting!

Yield: 8 servings

6 ounces firm silken tofu
1/2 cup soy milk

1/2 cup pumpkin puree
1/2 cup canola oil
3/4 cup natural sugar
1 tablespoon baking powder

2 teaspoons pumpkin pie spice

1/2 teaspoon sea salt
3 cups old-fashioned oatmeal
2 tablespoons natural sugar
1/2 teaspoon ground cinnamon
1/2 cup coarse-chopped pecans or walnuts

1. Lightly grease a 9-inch glass or ceramic pie pan and set aside. Combine the tofu, soy milk, canola oil, sugar, baking powder, pumpkin pie spice, and salt in a food processor. Process until smooth, scraping down the sides of the bowl as necessary. Transfer the mixture to a medium mixing bowl and stir in the oatmeal. Spoon this mixture into the prepared pan, gently  smoothing the top. Sprinkle the surface with the remaining sugar and cinnamon, cover with foil, and refrigerate 8 hours or overnight.
2. When ready to bake, remove the dish from the refrigerator and preheat the oven to 350ºF. Sprinkle the top surface of the oatmeal with nuts, and bake for 25 minutes or until just firm. Serve hot.  Cover the pan with foil if the nuts start browning too quickly.

Note: The oatmeal may be reheated by covering the baking dish with foil and placing it in a cold oven. Turn the oven temperature to 300ºF. and heat for about 20 minutes, or until warm.  The oatmeal may alternatively be reheated in the microwave.  Start with 30 seconds and add additional time as necessary.

Print Friendly, PDF & Email

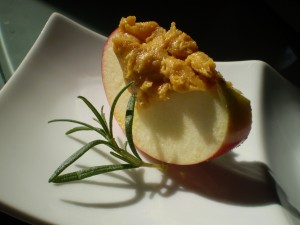
Vegan Smoky Cheddar Cheese Spread (perfect with fall apple slices)

All is right with the (culinary) world when I have a crock vegan cheese spread in our refrigerator!

I never found just the ceramic crock I was looking for–you know, those old-fashioned glossy dark brown ones like you’d find on restaurant tables back in the day?–so I gave up and purchased glass ones at a kitchen shop.  As it turns out, I’ve decided they are more practical because I can see which type of cheese spread is inside, and that could be any one of a number, as I have many favorites.  You can find them ere on this blog (just search cheese spread, “cheez” etc.) and in my Blooming Platter Cookbook.  But, while the crocks may not have been exactly what I had hoped  for, the cheese spreads are!

When I was developing recipes for the cookbook last year, I was wracking my brain for an ingredient that would make my cheeses cheesier with more of an “aged” or “fermented” taste.  And suddenly it hit me:  beer!  I grabbed one out of our garage fridge where my husband keeps his protein drinks (ick!) and beer, and whipped up a batch.  Now, I never make cheese spreads without it.

This version takes its rich golden-orange color and subtle smoky flavor from turmeric and smoked paprika .  It is is perfect spread on a crisp and juicy apple slice or on a cracker and topped with a thin slice of fresh apple.  I love our local Winesap apples for this, but use your favorite.

Though I think my spreads are best after they ripen in the refrigerator for a few hours, I like to remove them a half hour or so before serving, as I think the flavor opens up when the spread isn’t too cold.

Yield:  approximately 2 cups

2 cups roasted and lightly salted cashew halves and pieces

1/2 cup vegan beer or non-alcoholic beer (you may add more to reach the consistency you desire)

2 tablespoons nutritional yeast

1 tablespoon light miso

1 small clove garlic, peeled

1 teaspoon Bragg’s Liquid Aminos or to taste

1/8 teaspoon garlic powder or to taste

1/8 teaspoon onion powder or to taste

1/2 teaspoon smoked paprika or to taste (add enough to taste but not overwhelm)

1/4 teaspoon turmeric

Pinch of freshly ground black pepper

Accompaniments: Sturdy crisp crackers like Melba toast and apple slices lightly sprinkled with lemon juice to prevent oxidation

Place all ingredients in the bowl of a food processor fitted with a metal blade and process until smooth, scraping down the sides of the bowl as necessary.  This will take several minutes.  Scrape into an airtight container and ripen in the refrigerator for several hours if time allows.  If not, you may serve it immediately and store any leftovers in the refrigerator.  If the spread has been refrigerated, allow it to sit at room temperature for a half hour or so before serving.

Print Friendly, PDF & Email

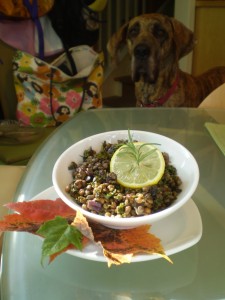
Vegan Kale and Lentil Salad

My fresh take on beans-and-greens presents lentils and kale as a hardy, yet light, salad that is equally good served warm or at room temperature, and makes the perfect bed for a piece of grilled tofu drizzled with a delectable sauce.  This dish is a powerhouse of vitamins and protein, simple enough for any day, but lovely enough for special occasions.

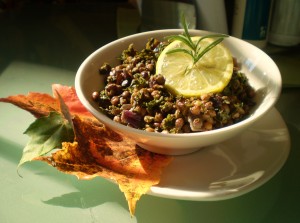
Here I serve it on its own with a shimmering slice of lemon and a sprig of fresh rosemary from our garden.

4 cups rough chopped and firmly packed kale, thick stems removed

1 tablespoon olive oil

1/2 of a medium red onion, cut into 1/4-inch dice

Sea salt

2 medium cloves garlic, minced

1 pound steamed lentils (I buy the Trader Joe’s brand which is actually 17.6 ounces)

2 tablespoons maple syrup

1 tablespoon balsamic vinegar

Freshly ground black pepper to taste

Optional: juice of 1/2 of a medium lemon

Finely chop kale in a food processor and set aside.  Heat olive oil in a large skillet over medium-high until shimmering.  Add onion and a pinch of salt, and saute lightly, stirring frequently, just for a couple of minutes.  Add garlic and saute, stirring, for only about 30 seconds.  Add kale and cook, stirring frequently, about 4 minutes or until kale is tender but still bright green.  Add remaining ingredients and heat through.  Adjust seasoning if necessary with salt and pepper and, if you want added brightness, stir in the lemon juice.  Serve warm or at room temperature.

Still Life with Vegan Kale and Lentil Salad and Minnie
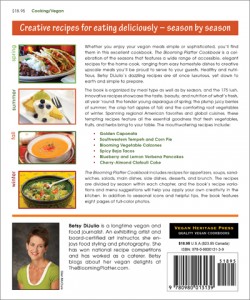
For 150 more fresh, seasonal recipes that will make your (and your dog’s!) mouth water, I hope you will check out The Blooming Platter Cookbook: A Harvest of Seasonal Vegan Recipes.


Print Friendly, PDF & Email

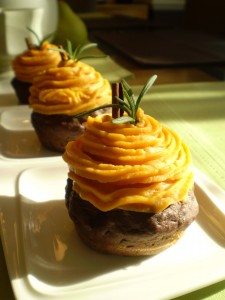
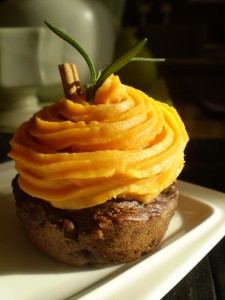
“Go Dairy Free” Features Brand New Blooming Platter Recipe: Vegan Savory Black Bean and Salsa “Cupcakes” with Whipped Sweet Potato “Frosting”

What does one do when Alisa Fleming, founder of GoDairyFree, asks if you have a recipe for Halloween to share with readers of her website?  You get busy!

I have created quite a few recipes for pumpkin dishes, which are here on my blog and in my new cookbook.  But I really didn’t have anything fun, different and delicious in traditional Halloween colors.

However, since I love a challenge, I created a recipe especially for her readers and it’s exciting to be able to share it with you: Vegan Savory Black Bean and Salsa “Cupcakes” with Whipped Sweet Potato “Frosting”!

My first attempt was a bust.  Those dry and flavorless bad boys–and I do mean bad–ended up out in the woods on our property!  But after some brainstorming, it occurred to me that I could use super flavorful salsa for both flavor and moisture and that did the trick–yum!

Sound odd?  Well, this recipe is a little out of the ordinary, but Alisa and I think the cupcakes are so good it’s “scary” (sorry, I couldn’t resist the corny Halloween reference.)  She writes:

“I’m very excited for the recipe feature we have today from the talented cookbook author, Betsy DiJulio. Betsy’s creativity is second only to her ability to create appealing, healthy, comfort food recipes. She never fails to surprise with unique ideas, but they are always very doable and delicious. Today’s recipe is certainly no exception. It pairs simple everyday dinner ingredients with an unexpected format, cupcakes! Since they are savory, and made without any sugar, Betsy uses salsa to add extra moisture and flavor …”

Just follow this link for the simple recipe.  And Happy Halloween!


Print Friendly, PDF & Email

French Lentil (and Apple) Salad with Champagne-Dijon Vinaigrette AND Quick Vegan Tempeh Bacon

Yesterday, I promised a dish from The Blooming Platter Cookbook that would be delicious served with my Vegan Caraway-Havarti Cheese  Spread on Melba toast that I posted yesterday.

So here it is!  It is my pleasure to share this simple but special recipe  inspired by a salad I enjoyed at a tiny bistro in Paris on my husband’s and my twentieth wedding anniversary trip two summers ago.   That salad contained no Tempeh Bacon, nor does the recipe in the cookbook.  But I love the addition, which I just created, so I’m thrilled to share it with you here.

Note that the recipe calls for starting with dried lentils, but I often just buy a 17.6 ounce package of Trader Joe’s steamed lentils, sold in their produce section, and use the whole package.
Yield: 4 to 6 servings

2 1/4 cups water
2 bay leaves
1 1/2 cups green lentils, picked over, rinsed, and drained
3 tablespoons olive oil (or 2 tablespoons olive oil + 1 tablespoon walnut oil)
1 tablespoon champagne vinegar or apple cider vinegar
1 1/2 teaspoons Dijon mustard
Sea salt and freshly ground black pepper
1 large apple (any variety)
1/3 cup chopped red onion
1 tablespoon snipped chives
3 tablespoons lemon juice

Optional: Quick Vegan Tempeh Bacon (recipe follows)
1. In a 2-quart covered saucepan over medium-high heat, bring water and bay leaves to a boil, reduce heat to a simmer. Stir in lentils and gently simmer, partially covered, for 30 minutes. Check at 10 minute intervals, as lentils are easy to overcook; they should be firm enough to hold their shape when tossed with the other ingredients. Add more hot water if necessary to prevent sticking or scorching. (Skip these steps if using pre-steamed lentils.)
2. While the lentils cook, make the vinaigrette. In a large serving bowl, combine the oil, vinegar, mustard, and salt and pepper to taste. Whisk until well blended and slightly emulsified. Set aside.
3. Halve the apple lengthwise, scoop out the core with a melon baller or spoon, arrange each half cut side down on a work surface, and cut into 1/8-inch thick slices. Then stack several slices together on their sides and cut them into 1/8-inch matchsticks. Add to the bowl with the dressing as you cut them, and stir gently to coat in order to prevent discoloration. Stir in the onion and chives.

4. When the lentils are cooked, drain, rinse with cool water to stop the cooking, and drain well. Remove the bay leaf. (Obviously, skip this rinsing and draining step if using the pre-steamed lentils.)  Stir the lentils into the dressing mixture. Season with salt and pepper, and add the lemon juice, 1 tablespoon at a time, to taste. Toss gently to combine. Taste and adjust the seasonings if needed. Cover and chill the salad several hours before serving to allow flavors to marry.

If including the Temp Bacon, add just before serving.

Quick Vegan Tempeh Bacon:

2 tablespoons olive oil

1-8 ounce package tempeh (I use Trader Joe’s brand), sliced cross-wise into about 20 slices 1/4-inch thick

1/4 cup soy sauce (I use a light variety)

2 tablespoons Liquid Smoke

2 tablespoons natural sugar

Sea salt

Heat olive oil in a large skillet over medium-high heat.  Add tempeh slices to the pan and sprinkle with 2 tablespoons soy sauce, 1 tablespoon of Liquid Smoke, 1 tablespoon of natural sugar, and a pinch of salt.  Saute, without disturbing for 2-3 minutes or until caramelized, but not burned.  Flip slices and repeat with remaining ingredients.  Turn off heat.  Flip slices one more time and allow them to sit for a minute or two just to absorb a little more of the flavors.  Remove them from heat and serve immediately.  (The pan drippings are really yummy.  If I’m using, say, chopped onion in a recipe with compatible flavors, I like to add the onion to the skillet and stir them around to absorb some of the drippings which are too good to go to waste!)

Serving suggestion:  If you would like to serve the salad over grilled apple slices as in the photograph, cut 1/4-inch thick apple slices and grill them in an oiled grill pan over medium-high heat for 2 to 3 minutes on each side or until tender, but not mushy, and nice grill marks appear.

Related Posts Plugin for WordPress, Blogger...
Print Friendly, PDF & Email