Vegan Buche de Noel–with Chocolate Mousse Filling and Mocha Buttercream Frosting

Finished CakeYield: 12 servings (at least)

Vegans need not forego a rolled cake–for this beautiful buche or any other iteration–if you take advantage of my many experimentations with both ingredients and technique…

I regret that I didn’t have time to experiment with this recipe until after Christmas, but it is so exquisitely beautiful and delicious that I can’t wait a whole year to share.  Plus, a winter log cake should be appropriate at least through February, no?

Important note:  it is far easier and quicker than it may look from these instructions.  And well worth any effort…

After conducting considerable research online, I chose a recipe for Vegan Swiss Roll on the Allergy Mums website (thank you!), filling it with my favorite chocolate mousse and frosting it with my longtime favorite mocha buttercream.  The creator of the “sponge” claims that it doesn’t crack and, indeed, her photo is picture perfect.  However, I found that not to be the case.

Still, my accomplice and good friend, Janie Jacobson, a healthy foods cooking instructor and cookbook author, and I were unperturbed because the luscious frosting hid any cracks completely.

I have now made two of these cakes–one for an impromptu post-New Year’s tea party and the other for a postponed 12th Night Party on Saturday night.  It was a rave both times.  But then I made two more rolled cakes according to another recipe and with considerable experimentation on my part in order to perfect the “sponge” to avoid dreaded cracks.

In terms of decorating, yes, I know about aquafaba and have made gorgeous meringues, but I was afraid it might not work for the meringue mushrooms typically used to decorate these yule logs. So I devised my own decoration of sliced almonds to suggest shelf-like mushrooms that grow on tree trunks.  Some sprigs of rosemary and cinnamon sticks lend a woodsy note–with rosemary being a surprisingly enticing aroma with chocolate–and a light dusting of powdered sugar suggests a hint of snow.

Someone told me it was the prettiest Buche de Noel she’d ever seen and another that it was my best dessert creation yet. That makes this recipe good enough to share with you.

Vegan Buche de Noel

1 cup soy or other non-dairy milk

2 teaspoons apple cider vinegar

2 tablespoons flaxseed meal

1 1/4 cups all purpose flour (I use white whole wheat)

3/4 cup natural granulated sugar (I use demerera)

2 tablespooons cornstarch

3/4 teaspoon baking powder

3/4 teaspoon xanthan gum

1/2 teaspoon baking soda

1/2 teaspoon salt

1/3 cup canola or other neutral vegetable oil

1 tablespoon vanilla extract

Vegan Chocolate Mousse (recipe follows)

Vegan Mocha Buttercream (recipe follows)

Garnishes: sliced almonds, rosemary sprigs, cinnamon sticks, powdered sugar

Preheat oven to 350 degrees.  Spray a rimmed 10 x 15″ pan with non-stick spray.  Line with one sheet parchment paper and spray lightly again.  Sprinkle a tea towel with a little powdered sugar in a 10 x 15″  rectangle.  Set aside.

In a small bowl, whisk together soymilk and vinegar, set it aside to curdle for a couple of minutes, and then whisk in flaxseed meal, making a thickened vegan buttermilk.  In a large bowl, whisk together flour, sugar, cornstarch, baking powder, xanthan gum, baking soda, and salt.  Make a well in the center and pour in canola oil, vanilla extract, and soymilk mixture.  Whisk together for 100 strokes until smooth. (Whisking for a portracted time like this will develop gluten and, hence, structure.)  Transfer batter into prepared pan and gently smooth into corners.  Bake for 12 to 13 minutes or just until a wooden pick inserted in the center comes out clean.

Allow to cool in pan for 3 minutes and then invert onto prepared tea towel.  Carefully peel off parchment paper.  With a very sharp knife, trim 1/8 inch of cake from all the edges which tend to be a little dry and may prevent smooth rolling.  Working from a long side, fold the excess inch or so of towel over the edge of the cake and carefully roll up like a jelly roll.  Tuck edges under and allow cake to cool completely on a wire rack.  Carefully unroll, avoiding trying to flatten the cake completely.  Gently spread with Vegan Chocolate Mousse.  Reroll and place seam side down on a serving platter, nestling it onto a flattened side from the previous rolling.  Cut off both ends at a diagonal and position cut pieces to resemble sawed off limbs.  Frost with Vegan Mocha Buttercream Frosting.  Lightly drag a fork lengthwise down the trunk and cut branches to resemble bark.  Garnish as desired with sliced almonds, rosemary sprigs, cinnamon sticks, and powdered sugar.

Tent with foil and refrigerate until about 30 minutes before serving time.  Slice with a sharp or serrated knife.

Cake Before Rolling

Vegan Chocolate Mousse

I recommend that you make the mousse 2 hours in advance in case it needs to set up, as tofu varies considerably from brand to brand.

6 ounces extra-firm silken tofu, gently pressed and blotted (if you cannot find extra firm silken tofu, use whatever silken tofu you can find, but be prepared to add two additional ounces or refrigerate for 2 hours to allow it to set up before filling buche)

1/4 cup natural sugar (I like demerara)

6 ounces vegan semi-sweet or bittersweet chocolate, melted and cooled until almost room temperature (the chocolate should be very thick but still spoonable)

1/2 teaspoon vanilla extract

1/8 teaspoon almond or peppermint extract

Pinch sea salt

Place tofu and sugar into food processor and process until very smooth, scraping down the sides of the bowl with a rubber spatula as needed. Add the melted chocolate, extracts, and a pinch salt. Process for several minutes until smooth, scraping down sides of bowl as necessary.  Texture should be very thick and creamy. If too thin to hold it’s shape, process with two more ounces of tofu and/or refrigerate, covered, before filling buche.

Vegan Mocha Buttercream Frosting

1/3 cup vegan butter, softened

1 tablespoon + 1 teaspoon instant coffee dissolved in about 2 teaspoons of water (I have also used a Starbucks espresso pod, torn open, and sprinkled in undissolved which works beautifully)

1 tablespoon cocoa powder

3 1/2 cups confectioner’s sugar

2 to 3 tablespoons non-dairy creamer (soy, coconut, etc.)

1/2 teaspoon vanilla extract

In bowl of an electric mixer, cream butter with coffee and cocoa powder.  Turn mixer off, add 1/3 of confectioner’s sugar and a tablespoon of creamer, and beat until creamy.  Repeat with remaining confectioner’s sugar and creamer, ending with last third of sugar scraping down sides of bowl as necessary.  Adjust consistency with additional confectioner’s sugar or creamer as desired.  Beat in vanilla until incorporated.   If a darker color is desired to contrast more with almonds, add more dissolved coffee, cocoa powder, or both.

Print Friendly, PDF & Email

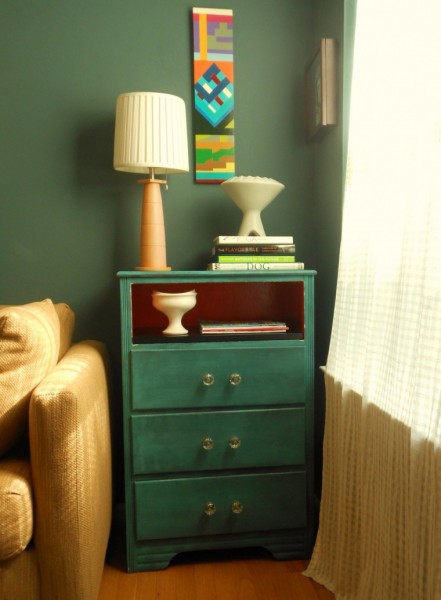
All “Dressered Up”–DIY Mid-Century Dresser Redux

Dresser Update--September DIY DécorAs some of you know, I write a “DIY Decor” column for the “Home” section of the Virginian-Pilot newspaper.  Not all of my pieces are picked up by pilotonline.com, so they are difficult to share.   But this fun redux of my childhood mid-century dresser that was published on Saturday appeared online today, and I am delighted to share the end result with you.   Find the article HERE.
Print Friendly, PDF & Email

Go Faux! Mid-Century Modern Makeover

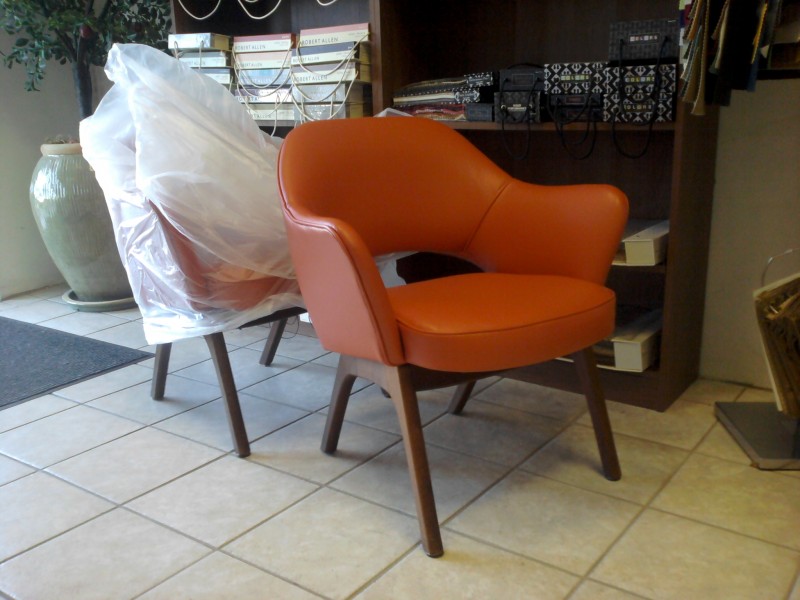
Saarinen Arm Chairs Reupholstered--Mid-Century Modern MakeoverIt’s true…I’ve done the unthinkable and reupholstered our original Saarinen Arm Chairs!  Sacrilege, I know.  (Eero Saarinen is the architect-designer of Dulles airport in D.C.)

But, Mid-Century Modern Minnie had done a number on the original orange fabric.  She looked so cute curled up in the chairs, but I should have protected them with a pad of some kind.

Anyway, a week ago, I decided I couldn’t take it any more, so I took them to the fabulous Joe’s Upholstery in VA Beach where I found an exact match for the original fabric–a rich persimmon color–in a VEGAN maritime faux leather

If this fabric can stand up to sun, sand, and saltwater in a boat, then surely Minnie will be no match for it.  On the other hand…have you met Minnie?


Print Friendly, PDF & Email

The Blooming Platter Gets Crafty–Cool and Contemporary Ceiling Medallion Wreath

I may have mentioned before that I am an accidental DIY columnist for the Virginian-Pilot.  (Do you remember the book and move, The “Accidental Tourist?)

Don’t get me wrong: I love conceiving of each month’s project and sharing it with readers.  It’s just that I am not the crafty type at all.  So my rule to myself is that I will only present ideas–and I’ve been writing this column for well over a year–that I would not be embarrassed to have in our home or to give as a gift.  So far so good.

This month’s is one of my favorites.

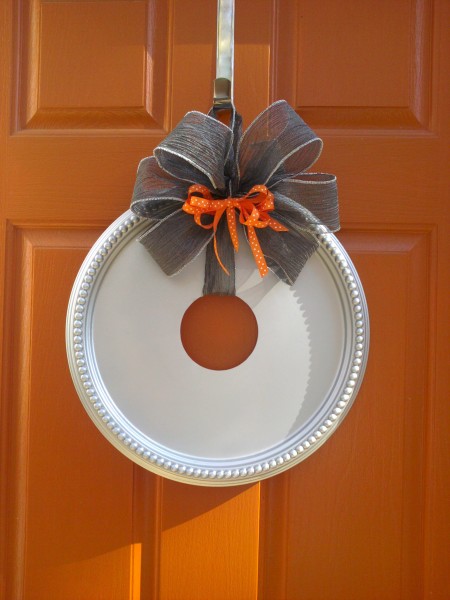
Essentially, I spray-painted a plastic ceiling medallion from Home Depot silver using an inexpensive paint that bonds to plastic.

Then, using a white paint pen, I painted white dots on each of the beads that create the relief border in order to complement the white polka dots in the narrow orange ribbon.

And finally, I made and tied together two bows.  The charcoal gray one was made out of wired ribbon.  I tied the bow so that there was one short and one long tail and I knotted these tails together–concealing the knot behind the bow–to make a loop from which to suspend the wreath from an over-the-door style wreath hanger.  Easy-peasy!

The whole enterprise, including hanger, cost about $47.  But, I have lots of silver paint leftover, in addition to the paint pen, some of the orange and white polka dot ribbon, and the reusable wreath hanger.

If, like me, you favor a minimalist aesthetic, then this may be the wreath for you.  If, on the other hand, you are a fan of over-the-top holiday decorations, you could start with this basic idea and then embellish to your heart’s content using ornaments and an adhesive that will withstand the elements if you plan to hang it outdoors.

My holiday mantra is: “Simplify without sacrificing.”  But yours should be whatever you want!


Print Friendly, PDF & Email

Fork It Over–Clever Place Card Holders for Your Thanksgiving Table and A Simple Advent Calendar to Boot!


As some of you know, though my “day job” is as a high school art teacher, followed closely by cookbook author and blogger, I “moonlight” as a freelance writer.  One of my fun monthly gigs is the “DIY Decor” column for the Virginian-Pilot newspaper.  It keeps the creative juices flowing, but I accepted the job on one condition:  that I not have to do anything so “cutesy” or “crafty”–and definitely not “duck and bunny,” that I wouldn’t have it in my own home or, at the very least, give it to a friend with good, but different, taste than my own!   Fortunately, my wonderful editor allows me near complete freedom.

If anyone ever sees me with a Bedazzler in my hand, please tell me to set it down gently and ease away slowly!

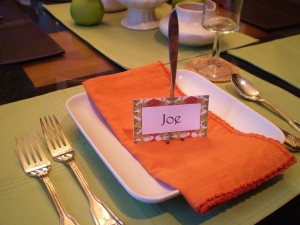
I hope you enjoy this month’s column which features cool place card holders made from antique forks, just in time for Thanksgiving.  And, so you have plenty of time before the beginning of Advent season, it also features my idea for a quick and clever Advent calendar (though, as my article says, this concept is adaptable to any celebration or holiday in which days are counted and little gifts are given on each of those days).

Happy Everything!
Detail: Paper Envelope Advent Calendar
Print Friendly, PDF & Email

Vegan Cookbook Author Scored in Her Neighborhood Thrift Store

Veganism and sustainability go hand-in-hand.  What easier way to embrace sustainability, in this case, preventing discards from entering the waste stream, than through thrift store shopping?

As a frugal recycler–and who isn’t even a little frugal in this economy?–I love good thrift stores (and consignment stores) almost more than antique stores.  Yes, I am my mother’s daughter when it comes to antique stores, but thrift stores–as long as they don’t have “that” odor (you know the one)–are ridiculous in terms of prices.

I rarely purchase clothes in thrift stores–though I hardly own a stitch of clothing or pair of shoes that didn’t come from a consignment store–but when I drop off donations, or when I’m looking for something like board games or still life objects for my students, I always make a spin through the housewares.

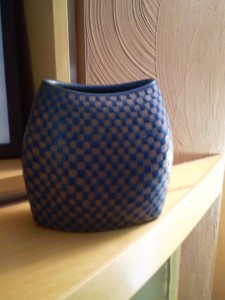
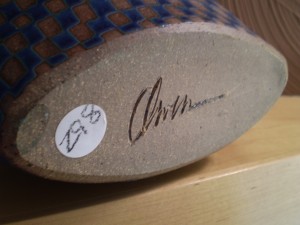
This week  I scored big with this signed ceramic vase that seems made for our home.   About 8-inches tall and a sort of flattened shape, its clay body is terracotta and its surface decoration small slightly raised and slightly irregular cobalt blue squares  that create a checkerboard pattern.  I put it in our den which is painted a terracotta color, as you see in the photo, with a few cobalt blue and orange accents.

The colors were pulled out of a “crazy quilt” that my mother made me when I graduated with my M.A. , and she had never made a quilt before.  She made it from  fabrics from which either she or I had sewn clothing as I was growing up (another take on recycling).  I was so touched.  It is one of my top 3 cherished objects, partially because she made it, but also because it’s gorgeous.  However, I have to admit, when I first saw it, I thought the color palette of mostly cobalt blue, orange, terracotta, minty green, off-white, and black was going to be challenging to work with.  Turns out it’s fresh and unique, and a lot of fun to build around.

Back to the vase…guess what I paid for it?  Only $2.98!   So, go green: go thrifting!

Print Friendly, PDF & Email

Vegan Home Decor: My New "Glen Livet" Line

A couple of days ago, I went into my husband’s man cave to retrieve some brandy for cooking (I have to do it when he’s not home because I always go for the good stuff). There I discovered a solid wood four-sided Glenlivet box on the floor to be discarded. Not! It was crying out to become a shadow box. So, in about 5 minutes, a shadow box it was.

I’m home on Spring Break this week and tending to lots of household projects. Yesterday, I had three different sets of workman in and out, so I decided to make good use of my home-bound status.

The box had a circular depression in the bottom, perfect for a bud vase. I chose to use an empty Franglica bottle with the label removed. The box also had a circular hole cut in the top through which flowers or bamboo or whatever could extend. I don’t keep faux flowers around, but I had one stem with sentimental value: they were left over from a headband I’d had to make for a recent special occasion. (I’ve hinted at this previously and more on it soon when I receive the disk of photos.)

All I did was pop a sawtooth hanger on the top back of the box, a couple of wall protectors on the bottom back corners, and a picture hook in the wall above our *new bar. Then, I set the bottle in place, inserted the flowers and hung it. That’s it. Done!

Now that’s my kind of project.

*The new bar was one of those projects with which some of you will hopefully identify: I woke up last Friday at 5 a.m., with house guests coming that night, thinking that I simply couldn’t stand it another minute if I didn’t convert our breakfast bar into a bar-bar. Don’t ask me why, that’s just how my motivation comes: with a vengeance.

Pieces of this plan had been brewing for a while, but absent specifics. So I got up, crept downstairs, emptied out the breakfast bar cabinets and cleared the counter; transferred bar ware, tools, bottles and such from one cabinet and a metal cart to the new bar; and found new homes for the cart and everything I had removed from the breakfast bar. I love the look and I loved being able to move that cart out of the kitchen and into my new (wo)man cave (more on that later)–really opened up the space at the end of the kitchen peninsula. This week, thinking that some of the items on the bar would look more cohesive collected on a tray, I found the perfect simple, modern white platter with integrated handles at Bed, Bath and Beyond (or Bed, Bath and B— S—, as my husband calls it).

So, now, my bar project, too, is done and though it took longer than 5 minutes, it was pretty quick–I had to be at school at 7 the day I did the bulk of it–and resulted in several spaces looking and functioning just how I want them…I’ll drink to that! (The funny thing about all of this is that I’m not a big drinker at all. I enjoy wine with a meal and the occasional holiday soymilk punch, but that’s about it.)

Related Posts Plugin for WordPress, Blogger...
Print Friendly, PDF & Email