Vegan Rosemary-Garlic Breadsticks

Yield: 8 breadsticks

Last Tuesday, I came down with a ferocious bug, the same one to which everyone, adults and children, has been succumbing in our area. You know the one: fever, body aches, congestion, cough, yaddi, yaddi.

For two days, all I wanted to eat was canned No-Chicken Noodle soup. I never ate dinner on Friday night because all I wanted by then, inexplicably, was buttery, garlicky breadsticks with marinara sauce, and the restaurant where my husband went for carry-out, didn’t have them.

On Saturday morning, I woke up still craving them and, having started taking some prescription meds the night before, was feeling slightly better. So, since most restaurants overdo breadsticks in that classically American “Supersize Me” style anyway, I decided to make my own. They were still generous in size, but somewhat more modestly proportioned. And boy-oh-boy were they worth waiting for!

For my special dough recipe (and about 175 more!), I encourage you to preorder my brand new cookbook, The Blooming Platter: A Harvest of Seasonal Vegan Recipes which will be available in May, though you can certainly use your favorite dough.

Here’s what I did to my recipe which calls for about 2 cups of flour:

To the dry ingredients, add:

1/2 teaspoon garlic powder

1/2 teaspoon onion powder

1 teaspoon dried basil

1/2 teaspoon dried marjoram

1/2 teaspoon dried oregano extra sea salt

Make the dough according to directions, letting it rise, etc. While the dough rises, make Rosemary-Garlic Oil so that it can be steeping:

1/3 cup olive oil

1 large clove crushed garlic several 4 to 5-inch sprigs of rosemary (I used quite brown sprigs from my frostbitten rosemary shrub, so it was more like using dried than fresh)

Pinch of sea salt plus more for sprinkling on breadsticks

Combine all ingredients and set aside. Preheat the oven to 45o degrees. Beginning with a ball of dough, pat and shape it into an 8-inch square on an oiled work surface. Cut it into 8 equal strips, twist each strip into a spiral, and place them on an oiled baking stone or sheet. Brush them liberally with Rosemary-Garlic Oil and sprinkle with sea salt. Bake for 11 minutes or until tender and golden, brush with more oil, sprinkle with more salt, and serve warm.


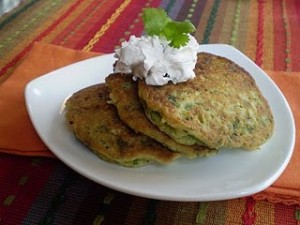
Vegan Creamed Corn and Spinach Cakes

Yield: 8 corncakes

This recipe telescopes me right back to childhood and my Mama’s Double Corn Fingers made with creamed corn. She would make a big pan–crusty on the outside and tender on the inside–and we would have nothing but them and a glass of milk, calling it dinner as a special treat when my dad was out of town.

Though “creamed” corn hardly sounds vegan, the canned version actually is, the natural starch in the corn helping impart a luscious creaminess. I love it mostly to cook and bake with. Mama baked her corn fingers, but in my iteration, I fry them up as skillet cakes.

And, though this recipe isn’t in my new cookbook, The Blooming Platter: A Harvest of Seasonal Vegan Recipes (175 other delicious recipes are!), I add a mound of fresh baby spinach to the corncake batter for a nutritious burst of seasonal freshness. and flecks of green goodness. In summer, just substitute 1/2 cup fresh corn for the chopped spinach.

These cakes are addicting served as a combined bread-side dish or as the main event for breakfast or brunch. But I also love them topped with chili or my Vegan Spinach-Three Bean Dip. Make them silver dollar sized and serve them as appetizers, topped or not. Use your imagination!

2 tablespoons vegan butter (I like Earth Balance) + additional for frying
1/2 cup self-rising flour
1/2 cup self-rising cornmeal
pinch of garlic powder
2 cups loosely packed fresh stemmed spinach, finely chopped (should yield about 1/2 cup)
1-15 ounce can creamed corn (I like the yellow variety for rich color)
1/2 cup unsweetened soymilk
Optional garnish: vegan sour cream and cilantro sprigs

Preheat the oven to warm. Melt the 2 tablespoons butter in a large cast iron skillet over medium-high heat. In a medium bowl, whisk together, flour, cornmeal, garlic powder and chopped spinach. Whisk in creamed corn and soymilk until well combined. Make cakes, two at a time, using a 1/4 cup measure. Cook for 2 to 3 minutes, flip and cook for an additional 2 to 3 minutes or until golden brown and cooked through. Remove to a paper towel-lined plate and keep warm in the oven. Repeat with remaining batter, keeping skillet greased with additional butter as needed. Garnish as desired and serve warm.

Vegan Spinach-Three Bean Dip Gets All Dressed Up

Presentation is everything, no?

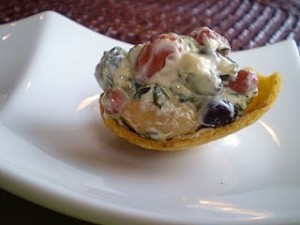
Recently, I needed to make a batch of my almost-famous Vegan Spinach-Three Bean Dip for a National Art Honor Society meeting. As my school’s sponsor, I created it a few years back knowing how popular spinach dip is, but wanting the kids to have a protein boost in their afternoon snack. It was a huge hit and my students still ask for it.

For this month’s meeting, I held a little back so that I could photograph it in a different guise than previously presented. In an earlier post, it looks as I intended: hearty and ready for the big game in front of the TV.

Here, I was going for a lighter and slightly more elegant presentation: a dollop in a Frito “Scoop.” Given the humble makings of spinach dip, some folks may think that trying to dress it up is futile, but since we eat with our eyes first, to me it’s like the difference between an ice cream scoop in a cone and one in a pretty parfait glass.

However you serve it, you’re sure to love it.

Happy Vegan Valentine’s Day–Vegan Chocolate Truffles

Vegan Chocolate Truffle

Many recipes call for making a cashew cream of equal parts cashews and water which I find WAY too thin. These recipes also often call for melted chocolate which is luscious, but fairly high-fat. So, I make mine with cocoa powder and powdered sugar. Try them–you’ll LOVE them.

And, by the way, I hope this post isn’t too late to do you any good for Valentine’s Day tomorrow. This is the earliest I could get it done, so I apologize if you’ve no time left to make a batch. They are ultra quick to prepare and shape, though the mixture does need to chill for about 2-3 hours.

On the other hand, don’t feel you can only indulge on special occasions!

2 cups cashews halves or pieces (raw or roasted and lightly salted; if the latter, the truffles will have that “roasted” flavor and you will be able to taste the salt, but I love salt and sugar together)

1/2 cup cocoa powder

3/4 cup powdered sugar

1/2 cup water plus up to 1 tablespoon more

optional: 1/2 teaspoon flavoring of choice, e.g. vanilla, rum, hazelnut, etc.

Coating: cocoa powder, colored sugar, very finely chopped nuts, etc. (I used red sugar for the one in the photograph)

24 mini-paper liners in Valentine’s colors/patterns (I purchased mine at a craft store) Line a baking sheet with waxed paper.

Place all ingredients except paper liners, of course, in the bowl of a food processor. Process for a few seconds and then scrape the sides of the bowl. Process the mixture for several minutes or until very smooth, scraping the sides as necessary. Add the additional 1 tablespoon of water, 1 teaspoon at a time, if needed to prevent stressing the motor of your food processor, as this is a very thick mixture. Scrape it into an airtight container and chill for 2 to 3 hours or until it is firm enough to handle very easily. (Believe it or not, the motor of your food processor working will have caused the mixture to warm slightly.) Scoop the mixture into 1-inch balls (I use a small scoop for this task), rolling each one between your palms quickly to shape, and placing it on the prepared baking sheet. Return the sheet to the refrigerator if necessary before coating the candies. Pour the desired coating into a small bowl, quickly roll each truffle in it to cover completely, and place it in a mini-paper liner. Store the truffles in an airtight container in the refrigerator. Package as desired.

Yield: 2 dozen 1-inch truffles

Related Posts Plugin for WordPress, Blogger...