
 Yield: 9 to 16 brownies
Red Velvet is darn near sacred to me. My aunt’s version of the cake with her unique Colonnade Frosting (off-limits now because both cake and frosting are only vegetarian) and drips of bittersweet chocolate over the top is one of the defining tastes of my childhood.
Because of that, Red Velvet was also the groom’s cake chosen for our wedding and the wedding cake I made for my dear friend and food writer Donna Reiss when she married Art Young. For my go-to vegan version of the cake or cupcakes, I use the recipe in Vegan Cupcakes Take Over the World. However, not content to stop there, I created outrageously scrumptious vegan Red Velvet Pancakes and Red Velvet Shortbread Cookies (endorsed by Better Homes & Gardens) a few years ago and, recently, Red Velvet Ice Cream and a mixed-media artwork titled, “She Wore Red Velvet.”
One of the last remaining Red Velvet challenges was brownies. I started by searching Red Velvet Brownies online. When I found versions that looked like the ideal in my mind, I consulted the recipes. The recipe I ultimately chose was not vegan, so I veganized it, making significant changes to the brownie batter–some melted vegan semisweet chocolate chips, some non-dairy milk, a bit of pureed tofu (critical to the texture and density I sought) and leavening–and even more to the cream cheese layer. My first attempt incorporated a scaled-down version of my cheesecake batter which contains tofu and vegan cream cheese and bakes up beautifully as a full-size cheesecake. But it baked up a bit rubbery as a thinner layer. So, next I tried cashew cream, which I loved, but with which I had to experiment a couple of times to get the look I was after.
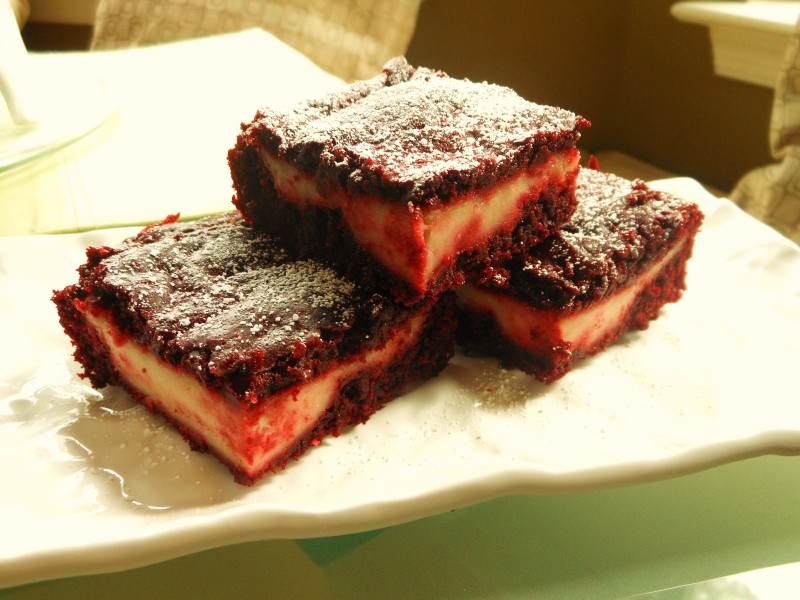
Ultimately, I hope you agree that the resulting brownies are beautiful, delicious, textural marvels.
Happy Valentine’s Day to you and yours!
“Cream Cheese” Layer (my quick sweetened cashew cream):
2 cups raw cashews
4 cups boiling water
*1/4 cup confectioner’s sugar (plus additional for sprinkling if making layered brownies)
1/2 teaspoon vanilla
1/4 teaspoon almond extract
1/8 teaspoon salt
Pour boiling water over cashews, cover, and let sit for an hour. Reserve 2 tablespoons of the cashew water, drain, and place the cashews into bowl of food processor with the reserved water and remaining ingredients. Process about 10 minutes until smooth and significantly lightened in color and texture. Remove to a small bowl and rinse bowl, lid and blade of food processor. *Though I typically bake with natural sugar, the confectioners sugar keeps the cashew cream a lighter color.
Brownie Layer:
1/2 cup vegan butter
1/4 cup vegan semisweet chocolate chips
2 ounces extra firm tofu, drained
1 cup unbleached all-purpose flour (I use white whole wheat)
1 cup natural sugar
1/4 cup unsweetened cocoa powder
1/2 teaspoon baking powder
1/4 teaspoon baking soda
1/4 teaspoon salt
1/2 cup non-dairy milk
1 ounce (2 tablespoons) red food coloring (natural recommended, e.g. India Tree True Red)
1 teaspoon vanilla extract
1 teaspoon apple cider or white distilled vinegar
Preheat oven to 350 degrees and spray an 8-inch square baking pan with non-stick spray. In a medium bowl or saucepan, combine butter and chocolate chips and melt in microwave or over medium heat on top of the stove. Pour into bowl of food processor, add tofu, and process a couple of minutes or so until very smooth. In a medium bowl, whisk together flour, sugar, cocoa powder, baking powder, baking soda and salt. Make a well in the center and pour in non-dairy milk, food coloring, vanilla, and vinegar, along with butter-chocolate-tofu mixture from food processor. Whisk until well combined and then stir 50 strokes with a wooden spoon.
To bake, choose which type of brownie your prefer…
For Layered Brownies (pictured): Spoon half of batter into prepared pan and gently smooth top to cover bottom of pan. Dollop “cream cheese” layer over brownie layer and smooth to cover. Dollop remaining brownie batter on top of “cream cheese” layer and gently smooth to cover. (An offset spatula is nice for these tasks.) Drag a knife or skewer (my preference) in long zig-zagging motions through all layers not to create swirls, as the top will remain solid red, but to insure that layers are “locked” together. Bake for 30 minutes or until top is set and a toothpick inserted in the center comes out clean, but a little moist. Cool on a wire rack. Slice, sprinkle with confectioners sugar, and serve; or cover until serving time. Alternative serving suggestion: frost with vegan cream cheese frosting and, if desired, drizzle with melted and slightly cooled dark vegan chocolate.
For Swirled Brownies: Spoon half of batter into prepared pan and gently smooth top to cover bottom of pan. Dollop “cream cheese” filling and remaining brownie batter in a tight checkerboard pattern over the bottom brownie layer. Drag a knife or skewer (my preference) in long zig-zagging motions, about an inch apart both vertically and horizontally, through all layers to create swirls. Bake for 30 minutes or until top is set and a toothpick inserted in the center comes out clean, but a little moist. Cool on a wire rack. Slice and serve; or cover until serving time.


February 17, 2014 at 4:24 pm
That looks so good, Betsy! It is really pretty, too!
February 17, 2014 at 5:15 pm
So “sweet” of you to take the time to say so, Zsu! I just had one as an “after school” snack and they really are good and festive-looking. Thank you for your kind feedback!
February 22, 2018 at 4:15 pm
Just made these as a test recipe for my upcoming birthday & we absolutely loved them ! I have been searching for a great vegan brownie recipe since making the switch from vegetarian to vegan a year ago & now I’ve got one 🙂 thank you !
February 22, 2018 at 6:47 pm
Happy birthday to you, Chloe! You made my day. Thank you so much for taking the time to leave a comment and I hope you’re next dance around the Sun is filled with delicious vegan food.