Fresh Raspberry-Champagne Vegan Buttercream Frosting

Yield: enough to generously frost 12 regular cupcakes or a single-layer cake

School started on Monday with an in-service week for teachers, so I made these beauties for a few of my teacher friends to wish them a “sweet” start to a new school year.

What a hit they were!  One teacher wanted the recipe, one said they were “three minutes of uninterrupted heaven,” another sent me a text saying, “Awesome cupcake,” and still another said he was quite sure it was the best cupcake he had ever eaten!  And, by the way, all of these teachers are omnivores.

What makes them so special?  Well, the vanilla cupcakes from Isa Chandra Moskowitz’s Vegan Cupcakes Take Over the World are darn good.  But the cupcake-frosting combination is out of this world.  Truly, it was the frosting that sent everyone over the moon: fresh raspberries that I marinated in champagne!  Actually, they were from a sangria recipe I created with Prosecco (I was testing a recipe for a major project that, fingers crossed, will come to fruition).  But, for the purpose of recreating the frosting without having to make sangria first, I figured out the correct proportion of Prosecco and sugar.  The flavor is bursting with berry freshness and a little tangy zip, but there is a subtle depth and complexity about it too.

These cupcakes are pretty enough for a wedding, but it would be a shame to save them for such rare occasions.  Bake up a batch and make any day special!

1/2 cup sparkling wine (I use Prosecco, but champagne would be lovely too)

3 tablespoons natural sugar

1 cup fresh raspberries

2 tablespoons vegan butter

2 tablespoons vegetable shortening

2 tablespoons vegan cream cheese

5 1/2 cups powdered sugar

1 teaspoon vanilla

The day before you plan to make the frosting, marinate the berries: in a small bowl, dissolve sugar in the sparkling wine, add berries, stir well, cover, and refrigerate for 24 hours.  To make frosting, cream butter, shortening, and cream cheese with an electric mixer until fluffy.  Add the powdered sugar, a cup at a time, starting the mixer on slow and gradually increasing the speed so that you don’t coat yourself in sugar.  After you’ve added about 2 cups of the sugar, drain berries and add all of them with another cup of sugar, beating well.  Don’t be alarmed if mixture looks curdled; it will smooth out as the remaining sugar is added.  Continue beating and adding remaining sugar and vanilla until the frosting is thick and creamy.  You may find that you need more or less of the sugar in the marinade, as well as in the frosting, depending on how sweet and moist the berries are, respectively.  So adjust as you see fit.  Use the frosting immediately or refrigerate until ready to use.  I like to pipe swirls of frosting on top of the cupcakes using a pastry bag before garnishing with white nonpareil pearls for a very feminine look (I purchase the pearls at our local Kroger).  However, a fresh raspberry perched on top , perhaps with a mint leaf, would also be lovely.

Note: I recently saw some Oreos (they’re vegan in the U.S.!) with a berry filling!  So pretty in pink.  I’m thinking that the frosting would be absolutely scrumptious between two chocolate wafer cookies, no?

Print Friendly, PDF & Email

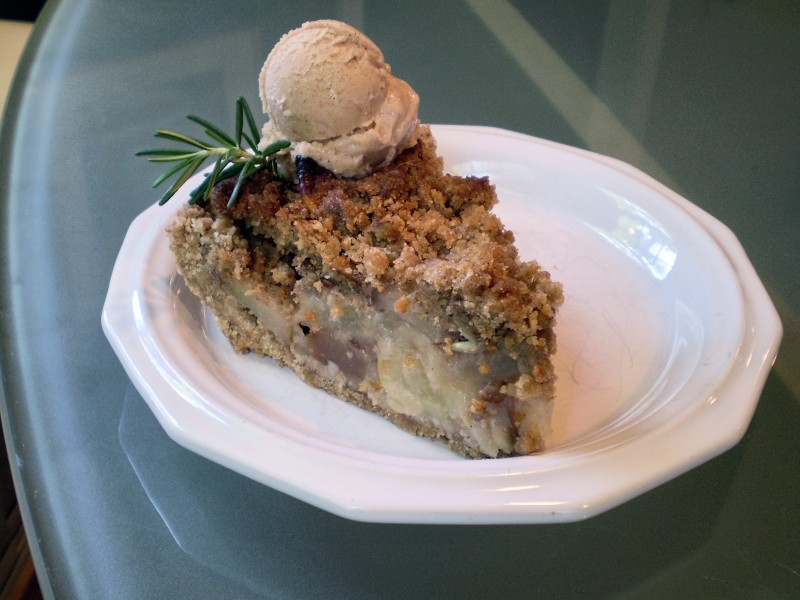
Vegan Ginger-Streusel Pear Pie from The Blooming Platter Cookbook is Now Available on One Green Planet! And there’s a bonus: My Vegan Cinnamon Stick-Vanilla Bean Ice Cream

Before the last of the winter pears are gone, I bet you might like to bake some up in this special pie from The Blooming Platter Cookbook: A Harvest of Seasonal Vegan Recipes.

It was recently published by the good folks at One Green Planet and you can access itby clicking HERE.

Its crust has a secret ingredient–now known to be healthy–that yields a perfect flaky, yet tender, crust that’s a cinch even for novice bakers to manage.  And you won’t have to wait very long to have this beautyon the table because of my stove top pre-cooking method.

Make it a la mode:  As a bonus, you can also access my Cinnamon Stick-Vanilla Bean Ice Cream recipe which was created especially for this pie, but is delicious on its own.
Thanks to Team One Green Planet!  Enjoy, everyone!

Print Friendly, PDF & Email

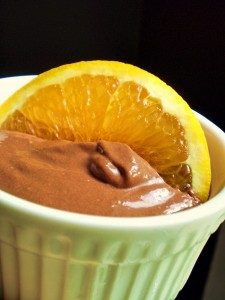
Chocolate-Orange Mousse from The Blooming Platter Cookbook

Following is another gift of the season from The Blooming Platter Cookbook.  While I can’t purchase locally-grown oranges, I did notice a sweet shipment from Florida in the grocery store last week, which made me think of this recipe.

It is a luscious marriage of rich chocolate and fresh oranges.  Especially if you spike it with a tablespoon or two of orange liqueur, it is a wonderful dessert for a cold winter evening.  The mousse sets up almost instantly, so it is ready and waiting as soon as you put your dinner fork down.

Yield: 8 servings

This is a luscious marriage of rich chocolate and fresh oranges. Spiked with orange liqueur, it is a wonderful dessert for a cold winter evening. The mousse sets up almost instantly, so it is ready and waiting as soon as you put your dinner fork down.

2 large oranges

12 ounces extra-firm silken tofu

1/2 cup natural sugar

9 ounces bittersweet vegan chocolate,melted (see note) and slightly cooled

1 teaspoon vanilla extract

1/4 teaspoon almond extract

Pinch sea salt

Optional garnishes: vegan whipped topping, orange slices, or candied violets

Arrange 8 (4-ounce) ramekins in a 9 x 13-inch pan and set aside. Zest and juice the oranges and transfer to a food processor along with the orange pulp, discarding the seeds and pith. Add the tofu and sugar to the food processor, and process until very smooth, scraping down the sides of the bowl with a rubber spatula as needed. Add the melted chocolate, vanilla and almond extracts, and a pinch of salt. Process for several minutes until smooth and fluffy, scraping down the sides of the bowl as necessary.

Divide the mixture evenly among the ramekins. Cover the top of the pan with foil. This method is faster than covering each individual ramekin and makes them easier to transport. Chill the mousse until set, about 30 minutes. Serve chilled, garnished as desired.

Note:  melt the chocolate in a heatproof bowl in the microwave for about a minute at 30 second intervals, whisking in between.  Alternately, melt on the stove in the top of a double boiler.

For 150+ additional gifts of the season, please consider The Blooming Platter Cookbook for yourself or as a gift for a health- and taste-focused friend or loved one. 

Print Friendly, PDF & Email

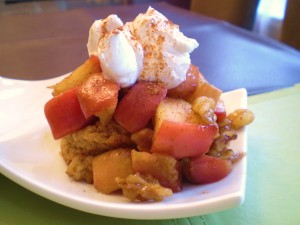
Vegan Pumpkin Shortcakes with Warm Spiced Apple Filling

I decided to end Vegan MoFo 2011 on a sweet note.

But, first, speaking of sweet…

A big thank you is in order to Isa and all the good folks who are the driving force behind Vegan MoFo.  Thank you so much for continuing to feed this fire and for making it so easy, not to mention gratifying, for all of us vegan bloggers and many, many readers to participate.  What a beautiful thing.

Though MoFo officially ends today, I will still be here offering new recipes several times a week to Blooming Platter readers and subscribers.  So I invite you to subscribe if you haven’t already.  It’s now easier than ever and you can do it via email, no rss feed necessary.  Just look over at the top of the right-hand sidebar and follow the simple prompts.

This version features a split pumpkin biscuit.

And now a sweet for the sweet, but, not so sweet that you couldn’t serve this warming dish for a fall breakfast or brunch, which is how I first enjoyed it.

I grew up loving my mother’s biscuit-style Strawberry Shortcake which, incidentally, she would sometimes allow my sister and me to enjoy for breakfast.  So, my fall version of this treat is based on a sweetened pumpkin biscuit.

And it’s topped with a quick and spicy apple and walnut saute.  Your kitchen will be perfumed with some of the best fragrances of fall.

Yield: 4 Servings

Note: the following is the Herbed Biscuit recipe from my new Blooming Platter vegan cookbook without the herbs, but with the addition of dehydrated pumpkin powder and a little natural sugar.  Just click here to order the dehydrated pumpkin from Barry Farm.  I am partial to it rather than pumpkin puree, as it adds lots of flavor and golden color, but no additional un-needed nor unwanted moisture which requires additional flour and, hence, a heavy biscuit.  However, if you have a vegan pumpkin biscuit recipe you like, feel free to substitute.  Just add about 2 tablespoons of natural sugar to a cup of flour. 

My special biscuit method requires freezing the vegan butter and shortening, so don’t forget to pop it in the freezer the night before you plan to make them.  And I highly encourage taking the tiny bit of extra time to employ my modified french puff pastry folding method.  You won’t believe how buttery and flaky the two together will make your biscuit-shortcakes.

This version features an unsplit pumpkin biscuit.

Pumpkin Shortcakes

Note: this recipe makes about 10 biscuit-shortcakes, more than you need, but they are delicious plain and reheat nicely, so I predict you’ll be glad to have them on hand.

1 tablespoon apple cider vinegar

1 cup plain or unsweetened soy milk

1 1/2 cups self-rising flour (or 1 1/2 cups all purpose or white whole wheat flour + 1 tablespoon baking powder)

1/2 cup dehydrated pumpkin powder (I use Barry Farm brand–it’s like a fragrant golden powder)

3/4 teaspoon baking powder (add only if using the self-rising flour)

1 tablespoon pumpkin pie spice (or your own mix of ground cinnamon, clove and nutmeg to taste)

1/4 cup natural sugar

4 tablespoons frozen vegetable shortening

4 tablespoons frozen vegan butter + 2 tablespoons refrigerated vegan butter (I like Earth Balance)

Warm Spiced Apple Filling (recipe below)

About 1/4 cup of your favorite vegan whipped topping, sweetened cashew cream, or even vegan sour cream and a sprinkle of ground cinnamon

1. Preheat the oven to 425 degrees F.  In a small bowl, whisk the vinegar into the soy milk and set aside.  In a large bowl, combine the flour, baking powder (3/4 teaspoon if using the self-rising flour and 1 tablespoon if using all purpose or white whole wheat), pumpkin powder, pumpkin pie spice, and natural sugar, and stir with a fork to combine.  Make a well in the center.  Spray your box grater very lightly with nonstick spray for easier clean up and then grate the frozen shortening and frozen vegan butter into the well.  Whisk the soy milk mixture and add it to the well.

2.  Incorporate the wet into the dry ingredients by stirring with a fork so that the warmth of your hands doesn’t melt the shortening and butter.  Place the remaining 2 tablespoons of butter in a 9-inch square pan and place it in the oven to melt the butter.  Remove the pan as soon as the butter has melted.

3.  On a lightly floured work surface, pat or roll the dough to about 1-inch thick (1/4-inch thicker than for my biscuits).  Fold it like a business letter: fold one side two-thirds of the way across and fold the remaining 1/3 back across.  Pat or gently roll the dough out to a 1-inch thickness again, turn it a quarter turn and repeat about 4 more times.  Do this fairly quickly so that the dough doesn’t warm up.

4.  Lightly flour the work surface as necessary.  The last time you pa the dough to a 1-inch, cut out biscuits wih a 2-inch biscuit, cookie cutter or drinking glass.  Place each biscuit in the prepared pan and flip to coat both sides with melted butter.  Bake the biscuits for about 15 minutes or until golden brown.   While biscuits bake, make filling (recipe below).

5.  When cool enough to handle, either place a biscuit on each of 4 plates; top with 1/4th of the Warm Spiced Apple Filling; garnish each serving with a tablespoon of vegan whipped topping, sweetened cashew cream, or vegan sour cream and a light dusting of ground cinnamon; and serve warm.  Or, split the biscuits and place 1/8th of the filling inside and another 1/8th of the filling on top, garnish, and serve.  Save the remaining 6 biscuits in an airtight container for another use.

Warm Spiced Apple Filling

1 tablespoon vegan butter (I like Earth Balance)

1/4 cup + 2 teaspoons chopped walnuts

2 medium apples (I like our local Winesaps), cut into 1/4-inch dice

1/4 cup natural sugar

1/4 cup ground cinnamon or to taste

1/4 cup ground ginger or to taste

1/8 teaspoon ground clove or to taste

1 tablespoon maple syrup

In a large cast iron skillet over medium-high heat, melt butter.  Add walnuts and toast, stirring frequently for about 3 minutes or until lightly toasted.  Remove nuts to a paper towel-lined saucer.  Add apple, natural sugar, and spices.  Saute for about 3 minutes or until apples soften.  Add maple syrup and cook another minute or two until apples are very tender.  Add all but 1 tablespoon of walnuts, stir, and heat through.  Remove from heat and use as directed above.

Print Friendly, PDF & Email

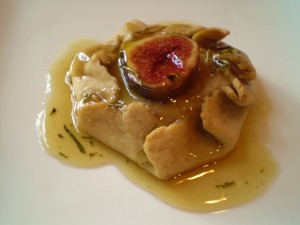
Vegan Fresh Fig (or Other Fresh Fruit) and Cashew Cream Crostada with Rosemary Caramel Sauce

Yield: 4 tarts

Until now, I’ve always used sweetened cashew cream as a topping.  But something made me wonder what would happen if I baked it as a filling in a darling little tart that I call a crostada because they seem a little Italian, especially when bathed in my glistening Rosemary Caramel Sauce, inspired by my love of my vegan cheese spreads, fresh figs, and rosemary.  So what did happen?  The emergence of one of my favorite desserts of summer!  But when figs aren’t in season, top them with any soft or lightly sauteed fruit.  And feel free to mix and match the herb you add to the sauce to best complement your choice of fruit.

1/2 cup Cashew Cream (recipe follows; must begin making the day before you plan to use, as cashews soak over night)

2 tablespoons natural sugar or confectioners’ sugar (the former will lend a hint of crunch, while the latter will yield a smoother product)

approximately 1/2 teaspoon lemon zest (optional)

Crostada Dough (recipe follows)

2 fresh figs (or other soft fruit, such as banana slices, lightly sauteed in vegan butter and a pinch of sugar)

Rosemary Caramel Sauce (recipe follows)

Cashew Cream (this recipe entitled “Chantilly Whipped Cream” is from The Blooming Platter Cookbook, page 153):

Note: this recipe will yield approximately 2 cups, more than you need for the crostada, but you’ll enjoy having it on hand.

2 cups raw, unsalted cashew pieces, divided

2 cups water, divided

6 tablespoons confectioners sugar

2 tablespoons lemon juice

1/2 teaspoon vanilla extract

Place 1 cup of the cashews in a medium bowl and cover with 1 cup of the water.  Cover the bowl and refrigerate overnight.  Drain and rinse the cashews in a colander.  Transfer the cashews to a food processor, add the remaining one cup of water and process until creamy, scraping down the sides of the bowl as necessary with a rubber spatula.  Add the remaining cup of cashews and process another few minutes , or until thick and creamy, again scraping down the sides of the bowl as necessary.  The mixture should have enough body to hold a peak.  Add the confectioners’ sugar, lemon juice, and vanilla extract and process until combined.  Taste and adjust flavoring if necessary.  Transfer the cream into an airtight container and chill for at least an hour before using.  Remove 1/2 cup of the cream to a small bowl, and return the remainder to the refrigerator.  Into the 1/2 cup of cream, stir the 2 tablespoons of natural sugar and optional lemon zest.  Set aside.

Crostada Dough (this recipe is from The Blooming Platter Cookbook, page 168):

Note: this dough is the world’s easiest and best-behaved around.  I’m just sayin’…I  thought I had added too much ice water, but I just pulsed it a couple more times, lifted out the ball, and placed it on my very lightly floured surface, turning it over once to coat both sides, and it was perfect.

3/4 cup + 2 tablespoons white whole wheat flour (or unbleached all purpose flour)

pinch of sea salt

3 tablespoons non-hydrogenated coconut oil (semi-solid at room temperature; now considered part of a healthy diet!)

Scant 1/3 cup ice water

Preheat oven to 400 degrees.  Line a baking sheet with Silpat or parchment paper, or use a seasoned baking stone, and set aside.  Combine the flour, salt, and coconut oil in a food processor, and pulse a few times until the coconut oil is evenly distributed and the dough looks like coarse sand.  Begin adding water, 1 tablespoon at a time, pulsing a few times after each, just until the dough comes together.  It should be slightly moist, but not sticky, very easy to handle, and formed into somewhat of a ball.  Lift it out of the  processor, gathering up any loose bits, and divide the dough into fourths.

On a very lightly floured surface, shape each into a small disk and then roll out, using a lightly floured rolling pin, to about 5 inches in diameter.  The dough should be quite thin, but not so much so that it will tear.  Gently lift each dough circle and place on prepared baking sheet, gently reshaping if necessary.  (I like to use the tried-and-true method of rolling the circle of dough around the pin, transferring it to the baking sheet, and then unrolling in place)

Assembly:

Place  2 tablespoons of cashew cream in the center of each circle of dough, gently shaping it into a disk with a generous border of dough.  Gently fold the edges of the dough over the outer edge of the filling, pleating the dough as you go.  Be sure to leave an opening in the center in which to place the fig half.  Bake for approximately 15 minutes, but check periodically to avoid over-browning.  Remove the baking sheet from the oven and, as soon as the crostada are easy enough to handle, use a metal spatula remove them to a wire rack.  With the back of a spoon, make a depression in the filling of each tart and nestle a fig half, cut side up, inside.  Place each tart on a serving plate and drizzle withe the Rosemary Caramel Sauce.  Serve immediately and pass extra sauce.  These crostada are best served just after baking or, stored, covered, in the refrigerator and allowed to come to room temperature.

While tarts bake make sauce:

Rosemary Caramel Sauce

4 tablespoons vegan butter

1 cup natural sugar

1/2 cup soy creamer

Pinch of sea salt

1 tablespoon minced rosemary

Dash of vanilla extract (optional)

Place butter, natural sugary, soy creamer and salt in a one quart saucepan over medium heat.  Cook and stir or whisk frequently for about 5 to 7 minutes or until mixture thickens.  Remove from heat and stir in rosemary.  Allow to cool slightly and then taste to determine if you want to add the vanilla.  I prefer it without as it dulls the lovely flavor of the rosemary.  Use right away or pour into a bowl or jar and allow to cool.  Refrigerate any leftovers tightly covered.  Reheat to use.

Print Friendly, PDF & Email

Vegan Cheesecake Stuffed Fresh Peach Halves

Yield: 8 servings

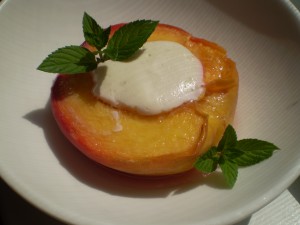
Okay, I admit it, I shamelessly “lifted” this idea straight out of a recent culinary magazine.  I don’t even know which one.  And I didn’t even read the recipe–which was non-vegan–I just saw the title and the picture, and then raced as fast as I could to our local farmer’s market for the biggest, juiciest, ripest local peaches I could find. 

The concept is so simple, yet so brilliant; I don’t know why I hadn’t thought of it by now, epecially since I live in the land of peach perfection.  Little dollops of vegan cheesecake batter–so little you don’t even need to feel guilty–are baked inside the depression left by removing the stone.   That’s it.  I simply garnished mine with sprigs of fresh mint, but you could drizzle with a sauce or liqueur, add a dollop of vegan whipped cream, or sprinkle with berries and/or nuts. 

To my way of thinking, though, all of that is just guilding the lily.  Trust me, it just doesn’t get much better than this dessert in its purest form.  Two friends who popped by yesterday, separately, for impromptu visits swooned.  Hope you do too!

Note: you will have extra batter, probably enough for 8 more peach halves which, short of a large gathering, is too many to have on hand.  However, unless you have a petite food processor, it’s a little difficult to work with half this amount of cheesecake ingredients.  So I would just get creative with the leftovers.  You can use it as a sauce or bake it up in a couple of little tart shells.

8 very large ripe, but still firm, peaches, cut in half lengthwise and pitted

1/2 of a 12-ounce block of Silken firm tofu

4 ounces of vegan cream cheese

1/4 cup natural sugar or to taste

1/2 cup soymilk (unsweetened or plain)

1 tablespoon fresh lemon juice + more for brushing on cut peaches (if you want a more pronounced lemon flavor, add the zest of half a lemon rather than more juice)

1/2 teaspoon vanilla extract

1/4 teaspoon almond extract

Pinch sea salt

Garnish: fresh sprigs of mint or lemon verbena

Preheat oven to 350 degrees.  Oil a large glass or ceramic baking dish with non-stick spray.  Using a small scoop, hollow out a tiny bit more of the center of each peach half to make a large enough depression to hold a generous tablespoon or so of cheesecake batter.  (Just nibble on what you scoop out; it won’t be enough to save.)  Brush cut/scooped surfaces of peaches with lemon juice.  Set aside.  Make filling:  place all remaining ingredients except garnishes in the bowl of a food processor.  Process until smooth, scraping down sides of bowl as necessary.  Fill each peach depression with a generous tablespoon or so of cheesecake batter and bake for 30 minutes or until set and slightly less shiny.  (Check after 20.)  Do not overbake.  Remove the pan from the oven and carefully transfer the peaches to individual serving bowls.  Allow them to cool to room temperature, cover, and chill for an hour or so in the refrigerator before serving.  Garnish with mint sprigs and serve.  (I was in a rush to try them, so I transferred them straight from the oven to uncovered bowls to the refrigerator and chilled them for about 30 minutes before serving.)

Print Friendly, PDF & Email

VegNewsletter Features a Recipe from The Blooming Platter Cookbook

Hi everyone~

I just signed up for VegNews Magazine’s free online VegNewsletter and wanted to encourage you to do the same!

While you’re at it, you might want to subscribe to the actual magazine; it’s a great deal at only $20 per year with discounts for 2 and 3 year subscriptions.

The range of content is amazing.  Vegan food and wine is just the start.  There is travel and  fashion and, well, news on a host of topics as the title suggests.

Speaking of food and wine, the current issue features a recipe from The Blooming Platter Cookbook!  It’s my Mango Coconut Sorbet, a summertime favorite.

Thanks to all the folks at VegNews for including The Blooming Platter in VegNewsletter; it’s such an honor!  I can’t wait to meet all of you on my trip to San Francisco next week!

Print Friendly, PDF & Email

Vegan Fresh Plum Tarts or Hand Pies with Basil Caramel Sauce

Yield: 4 tarts

My annual gift of fresh plums from Mike Grover via Diane O’Neal partially inspired these new treats.  Mike’s tree is prolific and, each year, he harvests more than he knows what to do with, so he generously shares.  Last year I created a favorite Vegan Thai Rice Noodle, Plum, and Shitake Salad published in my  new cookbook (see below) and Vegan Rice Cakes with Fresh Plum and Sake Maple Syrup; Mike created a beautiful-looking plum bread.

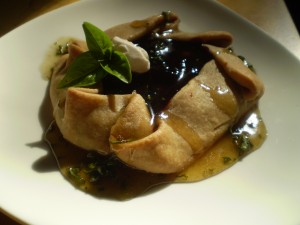
This year, with July 4 tomorrow, I created glistening red plum tarts and hand pies.  The jewel-tooned filling is encased in scrumptious dough from The Blooming Platter Cookbook.  I prepared enough dough and filling for four, so I shaped two as tarts and two as hand pies.  Though both require equal amounts of my tasty dough, I decided that I prefer the tarts because the beautiful filling shows more.  If you really want to serve hand pies, though, you could cut sluts in the top surface to reveal some of the  colorful interior.

The filling is based on a recipe in the July 2011 issue of Bon Appetit for Cherry Hand Pies.  It was the result of combining both fresh and dried cherries.  That sounded like it would deepen the flavor, yet still taste fresh.  The best of both worlds!  So, since I happened to have both fresh and dried plums, that’s what I used.

After sampling one, it seemed to need just a little something to take it over the top.  So I did what I always do: closed my eyes while taking a bite and mentally pairing the tart with other flavors until I hit on the right combination.  In this case it was caramel sauce and basil whipped cashew cream!  However, since I didn’t have any cashews and didn’t want to purchase some and then have to wait while they soaked over night, I decided to make a quick Basil Caramel Sauce.  Yowza!  Just perfect.

The sauce only takes about 5 1/2 minutes to make, and 5 minutes of that time is simmering.  Adding the basil at the end, allows it to stay fresh and green, but opens its flavor up.  It would be good with a spoon!  Note that it thickens as it cools.

Filling:

1 cup fresh chopped pitted plums (my plums were only about the size of a walnut, so I simply pitted and halved them)

1/3 cup dried chopped plums

1/2 cup natural sugar (adjust as necessary, depending on the tartness of your plums)

pinch of sea salt

1/2 teaspoon vanilla (or try a liqueur like Chambord)

2 teaspoons arrowroot powder (or cornstarch)

2 teaspoons cold water

In a quart saucepan, combine both kinds of plums, sugar and salt.  Simmer, stirring frequently, for about 5 minutes.  While mixture simmers, stir together arrowroot powder or cornstarch and water to make a slurry.  Stir vanilla into the plum mixture, followed by the slurry.  If using arrowroot powder, remove the mixture from the heat immediately after adding or it could “break.”  If using cornstarch, return the mixture to a simmer and then remove it from the heat.  Allow to cool to room temperature.  While mixture cools, make dough.

Dough (this recipe is from The Blooming Platter Cookbook, page 168):

Note: this dough is the worlds easiest and best-behaved around.  I’m just sayin’…I  thought I had added too much ice water, but I just pulsed it a couple more times, lifted out the ball, and placed it on my very lightly floured surface, turning it over once to coat both sides, and it was perfect.

3/4 cup + 2 tablespoons white whole wheat flour (or unbleached all purpose flour)

pinch of sea salt

3 tablespoons non-hydrogenated coconut oil (semi-solid at room temperature; now considered part of a healthy diet!)

Scant 1/3 cup ice water

Preheat oven to 400 degrees.  Line a baking sheet with Silpat or parchment paper, or use a seasoned baking stone, and set aside.  Combine the flour, salt, and coconut oil in a food processor, and pulse a few times until the coconut oil is evenly distributed and the dough looks like coarse sand.  Begin adding water, 1 tablespoon at a time, pulsing a few times after each, just until the dough comes together.  It should be slightly moist, but not sticky, very easy to handle, and formed into somewhat of a ball.  Lift it out of the  processor, gathering up any loose bits, and divide the dough into fourths.

On a very lightly floured surface, shape each into a small disk and then roll out, using a lightly floured rolling pin, to about 5 inches in diameter.  The dough should be quite thin, but not so much so that it will tear.  Gently lift each dough circle and place on prepared baking sheet, gently reshaping if necessary.  (I like to use the tried-and-true method of rolling the circle of dough around the pin, transferring it to the baking sheet, and then unrolling in place)

Place one-fourth of the cooled filling in the center of each circle of dough.  If making tarts, fold up about an inch border of dough around the edges, gently pleating it to form a circle, but leaving a nice circle of filling showing in the center.  If making hand pies, fold one half of the dough over the filling, matching the edges of the dough circle to create a half-circle, crimping with a fork to seal.  (You may use a tiny bit of water rubbed on the edges with your finger to help seal, but I didn’t find it necessary.)  Make a couple or three slits in the top surface if desired to allow a little of the pretty filling to show through.

Bake for approximately 15 minutes, but check periodically to avoid over-browning.  Remove the baking sheet from the oven and, as soon as the tarts/ hand pies are easy enough to handle, use a metal spatula remove them to a wire rack to cool slightly.

While they bake, make Basil Caramel Sauce.

Basil Caramel Sauce:

1/2 cup natural sugar

1/4 cup cold water

2 tablespoons vegan soy creamer

1 tablespoon fresh minced basil

Garnish: for each tart/hand pie, a dab of vegan sour cream or whipped cream and a sprig of fresh basil

In a one-quart saucepan or small cast-iron skillet, combine sugar and water.  Heat over medium-high until simmering.  It will froth up liberally. Stir frequently for about 2-2 1/2 minutes.  Add creamer and continue stirring and simmering for another 2- 2 1/2 minutes.  Remove from heat and stir in basil.  Cool a minute or so to thicken every-so-slightly and serve immediately over tarts/hand pies and garnish them as desired.  Store any leftover tarts/hand pies or sauce in an airtight container in the refrigerator.  Reheat before using.

Print Friendly, PDF & Email

Vegan Bourbon-Broiled Peaches with Peaches-n-Cream Ice Cream

With summer in full swing, and Independence Day in the USA  just days away, the time seemed right to post a tasty teaser from The Blooming Platter Cookbook: A Harvest of Seasonal Vegan Recipes.

Driving past a farm market yesterday, I noticed that our long-awaited local peaches are in!  Hopefully, the same is true where your live because this cooling treat  might come in handy for your July 4 celebration.  Or, if you don’t observe this holiday, this dessert is sure to provide a welcome respite on any meltingly hot day.

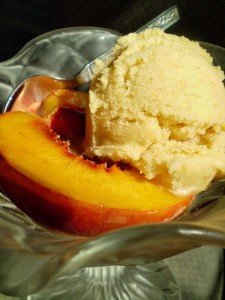
Where we live in coastal Virginia, peaches are one of the glories of summer. It is hard to beat fresh peaches when eaten at the height of summer, fuzz and all, juice dripping down one’s chin. This preparation pays homage to the essence of the peach with the distinctive flavor of bourbon. It’s irresistible with the Peaches-n-Cream Ice Cream, or to save time, a store-bought vegan vanilla ice cream may be substituted.

If this recipe makes your mouth water, I hope you’ll consider purchasing a book so more than 150 others will be right at your finger tips!

Bourbon-Broiled Peaches
Yield: 4 servings

2 peaches, rinsed, halved and pitted
2 tablespoons bourbon
4 teaspoons natural sugar
Pinch sea salt
4 scoops Peaches-n-Cream Ice Cream (recipe follows), or your favorite vegan vanilla (optional but encouraged)

1. Position the oven rack on the top shelf of your oven and preheat the broiler. Place the peach halves, cut side up, in a small, shallow heat-proof dish. Brush them with the bourbon. Sprinkle each half with a teaspoon of sugar and a tiny pinch of salt. Broil for about 5 minutes to heat them through and melt the sugar. Watch them carefully to prevent scorching.
2. To serve, arrange broiled peach halves in shallow dessert bowls and top each with one scoop of the ice cream, if using.

Peaches-n-Cream Ice Cream
Yield: 1 quart

Make this delicious ice cream the day before you plan to serve it.

1 very large ripe peach, halved, pitted, skin left on
Juice of one small lemon
1/2 cup unsweetened soy milk, divided
1 cup plain soy creamer
3/4 cup natural sugar
1 large vanilla bean pod, split lengthwise, and seeds scraped out with the tip of a paring knife
2 tablespoons arrowroot powder
3 tablespoons pure peach preserves, optional
1/2 teaspoon vanilla extract (or more to taste)
1 1/2 cups vegan sour cream

1. Cut the peach into chunks and add to a food processor with the lemon juice. Process until it is a smooth puree. Set aside.
2. In a 1-quart saucepan, combine 1/4 cup soy milk, soy creamer, sugar, and vanilla seeds over medium heat and bring just to a boil.
3. In a small bowl, whisk the remaining 1/4 cup soy milk with the arrowroot powder until smooth. When the soy creamer mixture just reaches a boil, remove the pan quickly from the heat and whisk in the soy milk-arrowroot mixture until very smooth and thickened. Stir in the vanilla extract followed by the reserved peach mixture, peach preserves, if using, and vanilla extract. Allow the mixture to cool to room temperature. Whisk if lumps remain and/or press the mixture through a sieve. Cover the mixture and refrigerate it at least three hours or overnight; then whisk in the sour cream.
4. Freeze the ice cream according to your ice cream maker’s manufacturer’s directions. Scrape the finished ice cream into an airtight container and store in the freezer. Allow the ice cream to “ripen” and further set up before serving, if desired.

Related Posts Plugin for WordPress, Blogger...
Print Friendly, PDF & Email